  "If it came from a plant, eat it. If it was produced in a plant, don't. - Michael Pollan, Author
Have you watched The Game Changers movie yet? Produced by, among others, James Cameron and Arnold Schwarzenegger, it’s by far the best vegan and plant based documentary that has been released in 2019. I would put it up there with Cowspiracy and Forks Over Knives as must-see documentaries if a vegan or plant based diet interests you or if factory farming alarms you. The Game Changers: Plant Based is Going Viral Since The Game Changers movie came out, people have been searching in Google for words like ‘vegan’ and ‘plant based’ more than ever. In the graph below you can see that the search words plant based peaked near the end of October 2019. The graph shows a percentage so, compared to the peak, there were only 25% searches for plant based before The Game Changers came out. That means that since the movie came out, people have been Googling the words plant based 4x more than before! Comparing to several years before, searches are actually up about 10x. The plant based movement is now experiencing its peak hype, but will it last? I think so. There are two reasons why I believe this sudden surge in trend is a sustainable one. 1 The Word is Out: Protein from Plant Based Sources is Superior Until now, the general perception of vegans has been: People who are skinny, look underfed and are protein deficient. Even though research has shown that sufficient and high-quality protein can be obtained from a balanced whole food plant based diet and can actually promote health, people are still asking the protein-deficient question. The Game Changers skillfully goes into this query and comes out with a very clear answer. Not only does plant based food contain enough protein and the right proportions of protein, it also contains a higher quality protein than animal-based products. The world’s strongest man, the world’s fastest man (be it in a car), the world’s best football player, the world’s best tennis player, the world’s more durable athlete.... they all have one thing in common: they eat plant based! Their ability to recover, which is incredibly important when competing at the very best level, is greatly increased on a diet in which protein comes from plant based sources. I think that insight has sent shock waves through the world. 2 It's Actually Tasty?!! Once people accept that a plant based diet has enough nutrients (like protein), and that it can actually enhance athletic performance, there is another big obstacle to make the leap. Many people seem to think that vegans only eat salads. Quite the contrary is true. I’ve also found that people around me who have given it a shot, have actually enjoyed the great variety of flavors that a plant based meal provides. In The Game Changers movie there is also a scene in which big, tough American Football players are digging into a colorful, nutritious and tasty plant based barbecue meal. A big eye opener! Nowadays there are so many options available if you want to eat plant based. You can go the route that is considered more healthy, the so-called whole food plant based route. But you can also go for plant foods like the Beyond Burger or Impossible Foods, which have been gaining a lot of popularity worldwide in 2019, as they are quite similar in flavor compared to meat. Whichever option you choose, rest assured that you will have a lot of variety and a guaranteed flavorful experience! This article was written by Darren Van Es, founder of GingerKale, a website which helps educate and inspire people about the benefits of a whole food plant based diet. You can also follow Darren on Instagram.
0 Comments
"Cauliflower is nothing more than cabbage with a college education." -Mark Twain We've had a couple weeks of rather unseasonably warm weather recently, broken up by a day or two of winter re-visited. The warmer, spring-like weather piqued my taste buds for something fresh and light. Fresh and light brings to mind salads for me. I have long been wanting to create a grain-free tabbouleh, the middle eastern dish of bulgur, tomatoes, cucumbers and parsley among other ingredients. I adore the flavors in it yet avoiding gluten, so the traditional version is not a match for me right now. Enter the versatile cauliflower that is popularly being used in everything from pizza crusts to rice substitute to potato substitute to now bulgur substitute. In many stores it comes already pre-chopped in a bag for convenience. My local Costco has organic chopped cauliflower which made me so happy ( if you can't find it pre-chopped, just pulse it in batches in your food processor or chop it by hand.).It turned out to be a great substitute in my opinion. The dish was so fresh and crunchy and cool, it really hit the spot. Instead of the more typical lemony -olive oil dressing though, I dressed it in a version of my Hummus recipe. I thought the result was beyond delicious. I ate the entire recipe myself in two sittings. Oh, yes, did I mention it stays fresh for 2-3 days in the refrigerator? Make ahead salad for the win! It's a great start to a Meatless Monday, if you want to try it out. Grain-Free Tabbouleh -Serves 4-6 as a side dish 4 cups finely chopped cauliflower 4 roma tomatoes, seeded and diced 1 cup diced red onion 1 cup chopped Italian parsley, stemmed 1 1/2 cups diced cucumber (I use organic English or hot house cucumbers, skin on) salt and pepper to taste Hummus Dressing: 1 can chick peas, rinsed and drained 3 Tablespoons Tahini (sesame paste) 1 small clove garlic 1/3 cup fresh squeezed lemon juice 3/4 teaspoon Himalayan pink salt or sea salt 1/4 cup water or more to get desired consistency 1 pinch ground cumin, optional 1. Place all of the salad ingredients in a bowl. 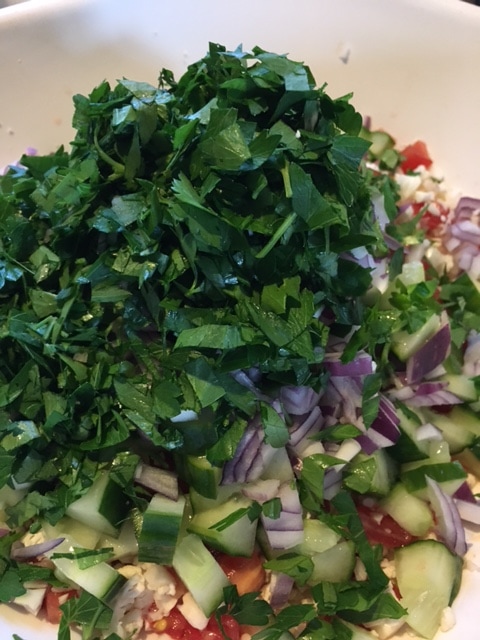 2. For Dressing: Place all of hummus ingredients in bowl of food processor with metal blade in place. 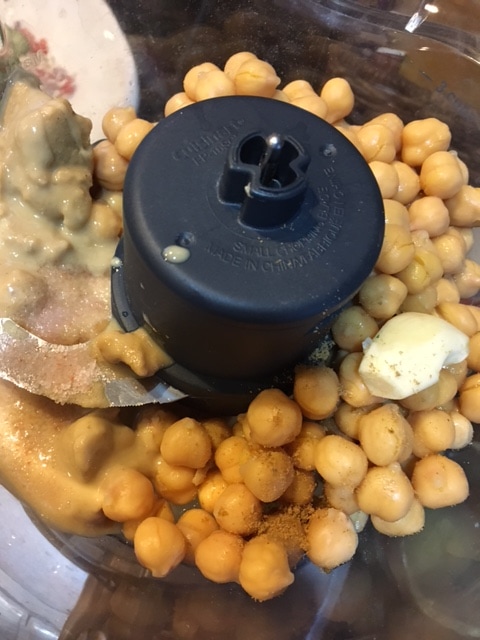 3. Process hummus until smooth and creamy. Add in more water to thin to desired consistency. 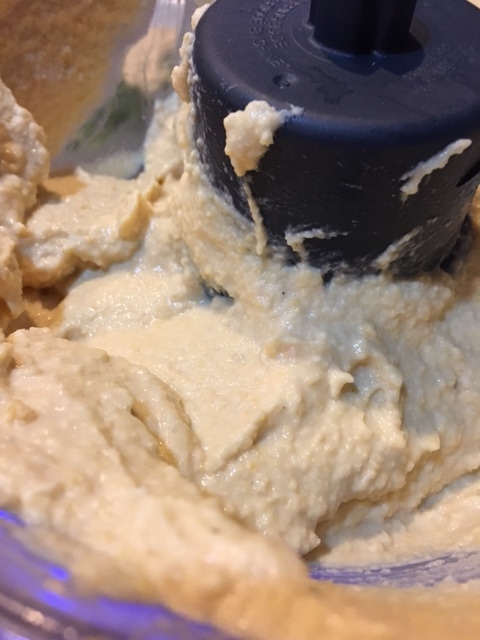 4. Spoon 2/3 cup, or to taste, of hummus onto salad ingredients. Toss to combine. Use as much or as little hummus as you'd like (leftover hummus will keep, covered, in the refrigerator for up to 4 days- use as a dip for your favorite raw veggies or pita chips or as a spread for a veggie-full sandwich or wrap). Taste for seasoning and adjust accordingly with salt and pepper. 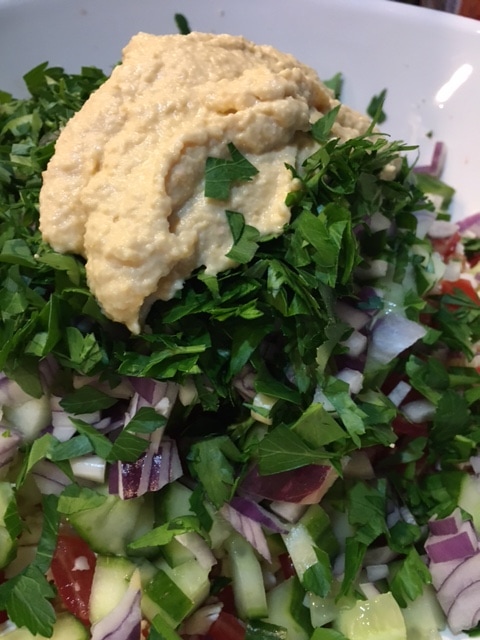 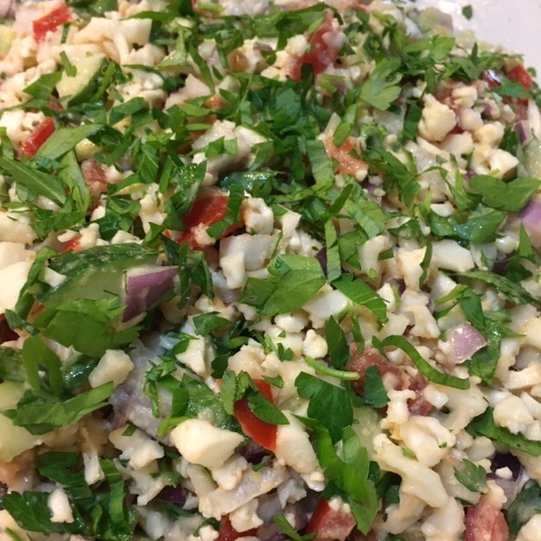 5. Serve immediately, or cover and store in refrigerator until needed. May be kept refrigerated for up to 3 days. 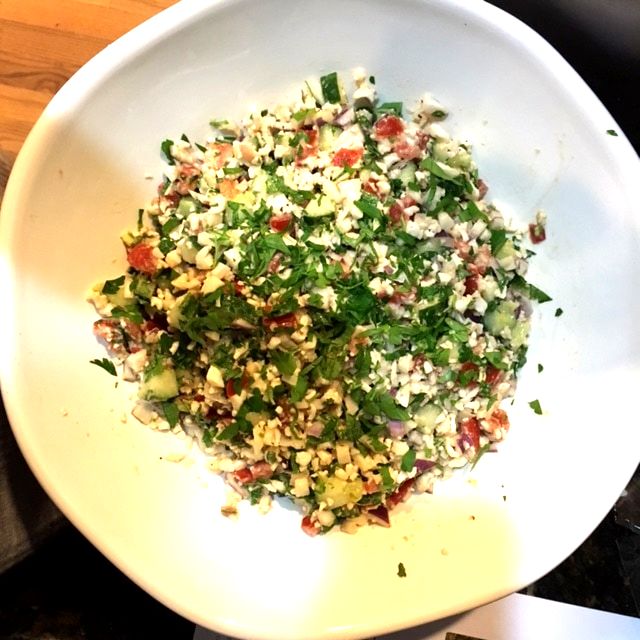  Happy eating! ♥
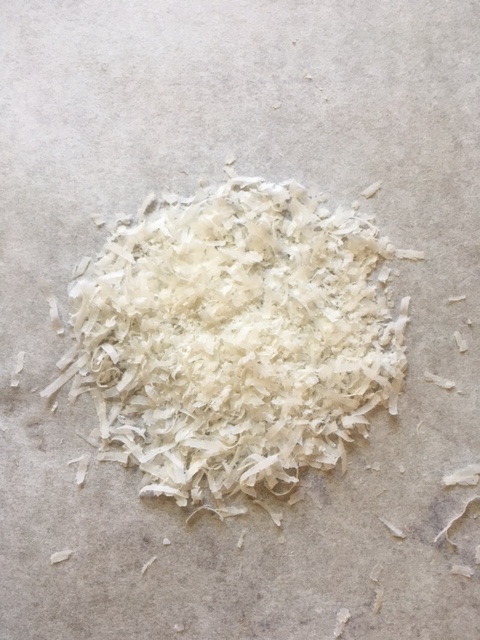
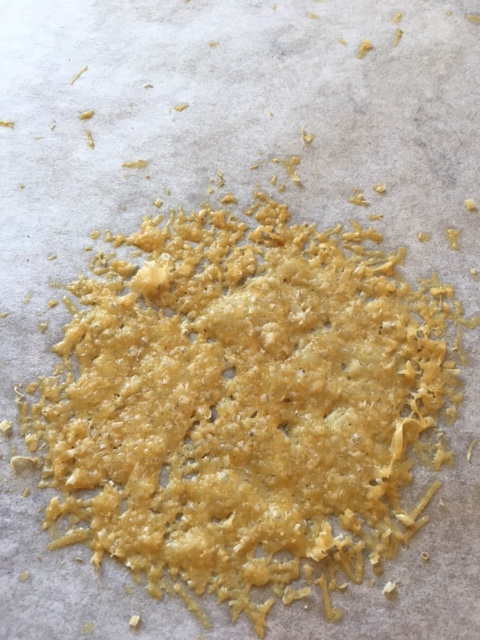
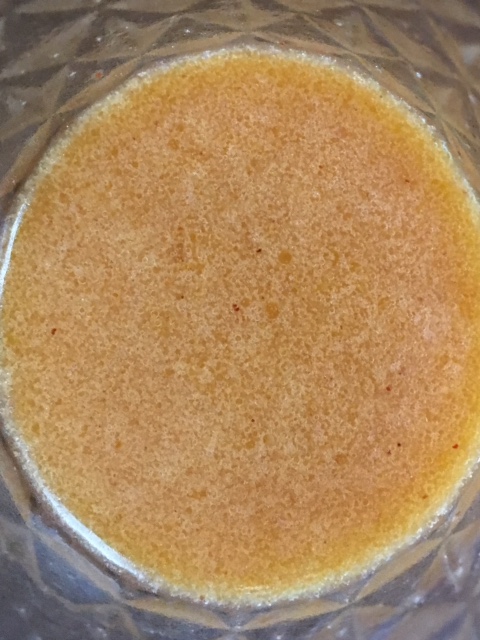
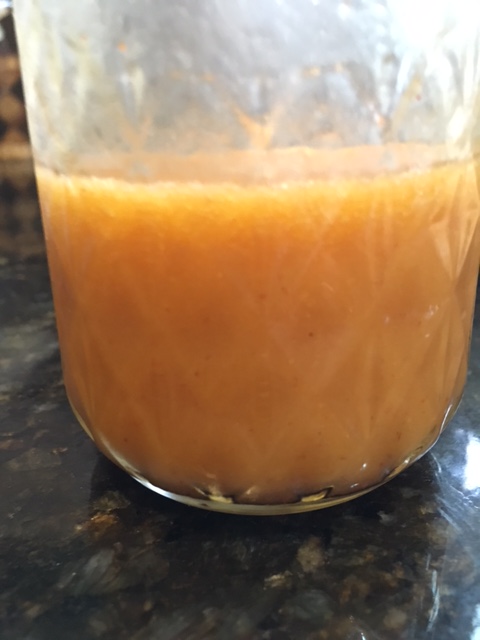
“Had a cold hummus with pita bread, Under a delicious food, yellow or red. Might just have the appetite to cook- Urgent dinner by hook or crook. So that's just a humus humor spread.” -Ana Claudia Atunes I wanted to post a cookie recipe, because October is National Cookie Month (happy dance!). However, I have been a little short on time and so I am not quite ready to post my first cookie recipe. So instead, I will appease you with something super healthy and delicious- hummus! This past Spring I went back to upstate New York where I grew up, and on one occasion my mom, aunt and I went out for a little drink and a snack at a wonderful little wine bar in Delmar, NY called the Twisted Vine. We ordered several things off their appetizer menu, but the one thing that I really loved was their hummus. It came in a cute small crock surrounded by veggies. It was chunky, rustic and lemony. I was determined to come up with something similar. This is the result. Right now my favorite way to eat it is with tiny cooked fingerling potatoes in all colors. But of course, you could just as easily eat it with your favorite crudite veggies or pita chips. It's easy and keeps well for a week in the refrigerator. Of course it's super versatile and can also be made into your favorite flavors-drizzle with extra virgin olive oil(it doesn't have any added in) and some chopped fresh parsley , swirl in a little pesto to taste and sprinkle with toasted pine nuts, fold in in some roasted garlic to taste, or roast and finely dice a red pepper then stir in... whatever suits your taste best! For me I just keep it simple and sprinkle Smoked Paprika on top. Soooo good! Oh and it's so much fresher and vibrant tasting than anything store-bought that probably has preservatives and who knows what else. It's so easy to make, there is no excuse not to. Rustic Hummus 2- 14.5 ounce cans garbanzo beans (chickpeas), rinsed and drained well 6 Tablespoons Organic Tahini juice from 2 Lemons (about 4 Tablespoons) 3 cloves garlic 1/3 cup water 1. Place all ingredients in the bowl of a food processor. 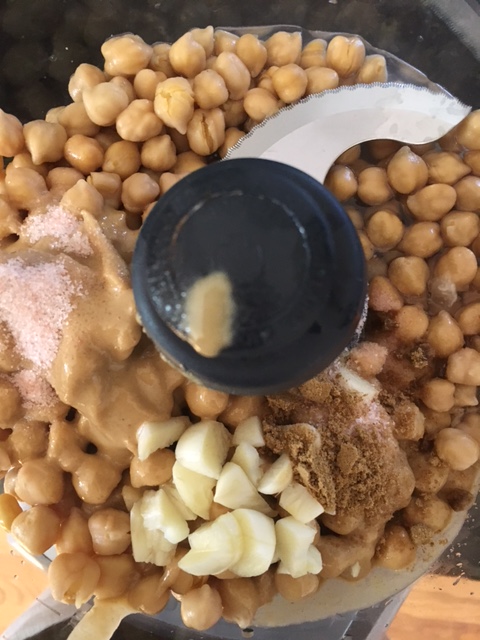 2. Pulse to combine until well mixed but rough textured. 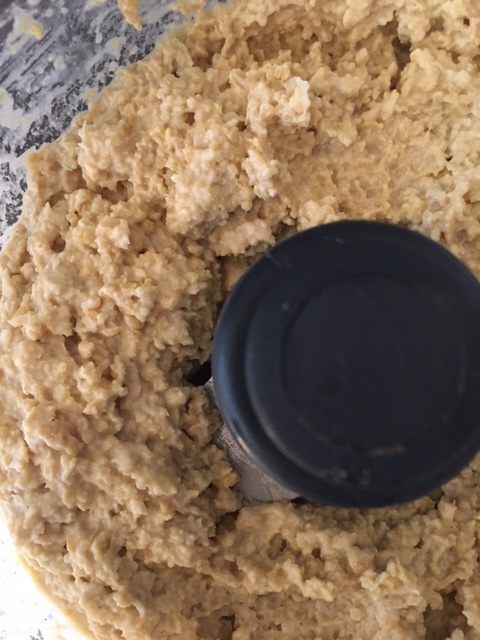 3. Scrape into a bowl, sprinkle with smoked Paprika and serve with your favorite dippers. 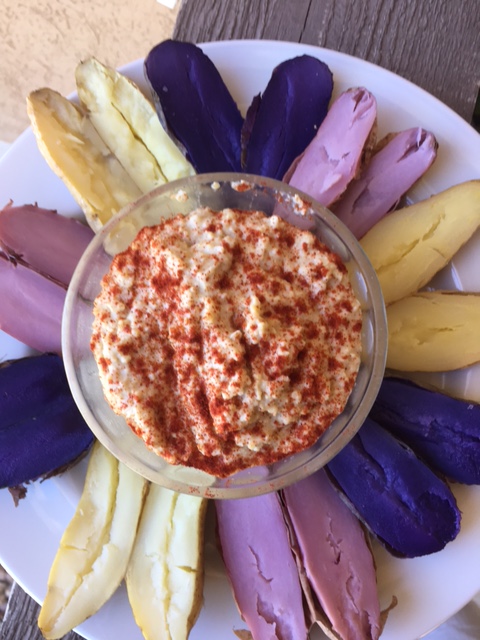 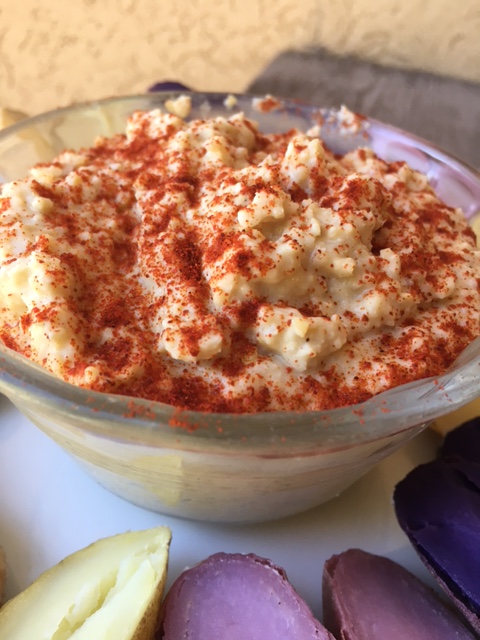 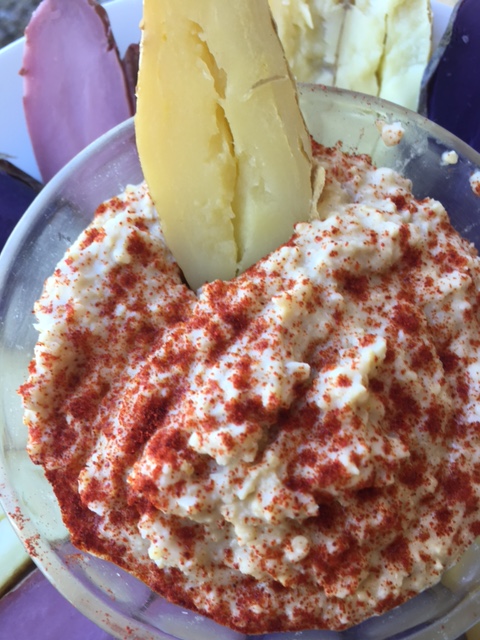 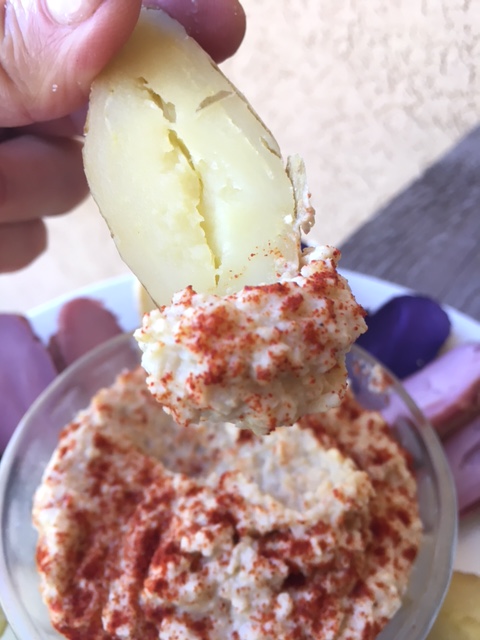 "I live on good soup, not on fine words. " -Moliere One of my first blog posts when I started this thing about a year ago, was an ode to farm fresh tomatoes. You can see those recipes here and here. Truly, a fresh tomato off the vine, picked and sold locally, if not harvested from your own garden, is a treat for the senses that no supermarket tomato can come close to approximating. There are variations in juiciness, sweetness and acidity , size and color. The anticipation of getting these fresh tomatoes mounts and mounts as the growing season progresses. Everyone thinks tomatoes are a summer vegetable (well fruit actually), but the truth is it is quite close to summer's end before the best tomatoes appear, and then poof- they are gone. Recently I was able to get some tomatoes from the local farm I volunteer at and I decided to turn them into Roasted Tomato Soup. This recipe is one I adapted from Tyler Florence. It is so delicious. His original recipe calls for much more fat than I use and also calls for basil. Personally I can't stand basil in tomato soup because it makes me feel like I am eating a bowl of marinara. I grew up on Campbell's Condensed Tomato Soup, did you? And I loved it....at the time, with the requisite grilled cheese sandwich on the side. Now the sweetness of the soup really does not appeal to me, but the memory lingers. This soup is a nice grown up version to appease the memory. It's creamy, fresh, beautiful and delicious, with or without the grilled cheese sandwich. So quick, grab some fresh grown tomatoes and make a batch. Better yet, double it (or triple even if you have a soup pot large enough) and place a container in the freezer for another time. Roasted Tomato Soup- serves 4 2 1/2 pounds of assorted ripe tomatoes (large, small, plum, heirloom...), cored, seeded and halved* 1/2 cup extra virgin olive oil 5 small cloves of garlic, peeled 4 cups thinly sliced onions, packed 1 1/2 teaspoons kosher salt 1 teaspoon coarsely ground black pepper 5-6 sprigs fresh thyme 3-4 cups chicken or vegetable stock (low sodium, if canned) 2 bay leaves 1 tablespoon unsalted butter (optional if vegan) 2 Tablespoons heavy cream (optional) Parmesan crisps (optional) 1. Preheat the oven to 450 Degrees F. Line a baking sheet with foil then lay a piece of parchment paper on top. 2. Arrange the tomatoes on top of the paper (don't you just love all that variation?). 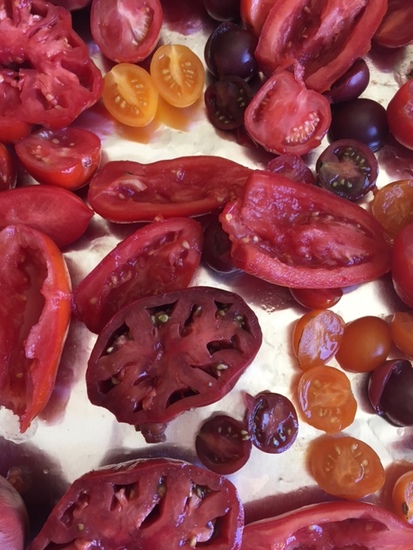 3. Place the sliced onions and garlic on top of the tomatoes. Sprinkle with salt and pepper. Drizzle with olive oil and toss to combine. Top with fresh thyme. 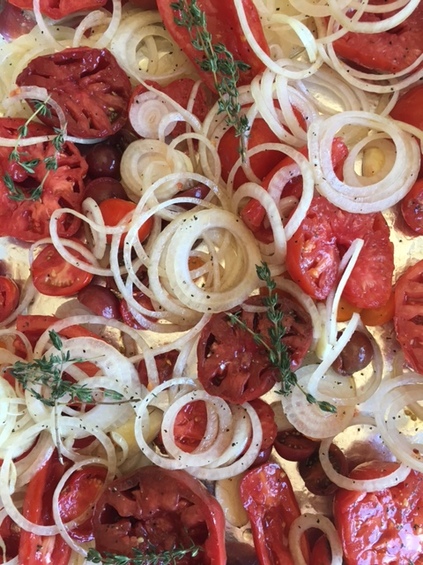 4. Place tray in hot oven and roast for 30-40 minutes until cooked down and slightly caramelized.. If making Parmesan crisps, reduce oven to 375 degrees F. 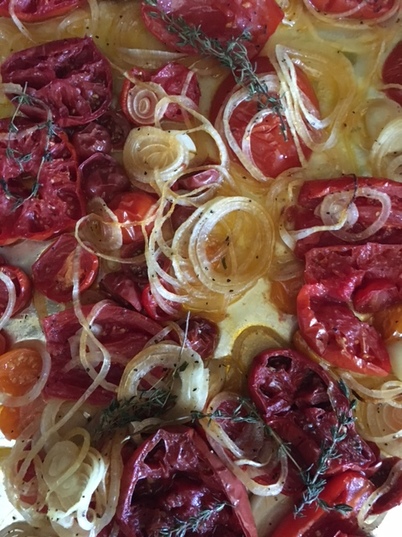 5. Remove the thyme sprigs, leaving some of the leaves only behind with the tomatoes. Transfer the roasted tomato mixture into a soup pot large enough to hold the ingredients. Add in bay leaves, stock and butter, if using. Bring mixture to a boil, then reduce heat and simmer, until liquid is reduced, about 20-30 minutes, stirring occasionally. 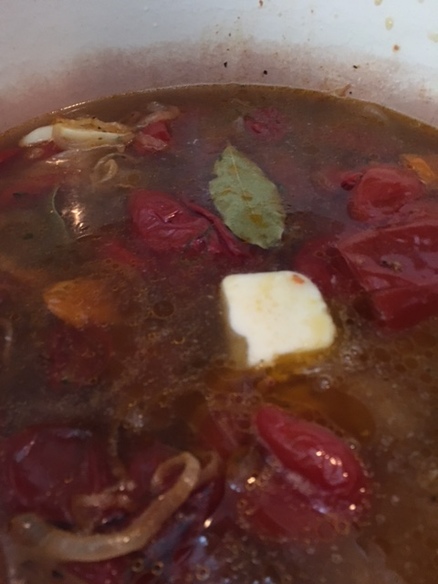 6. Remove the bay leaves and discard. 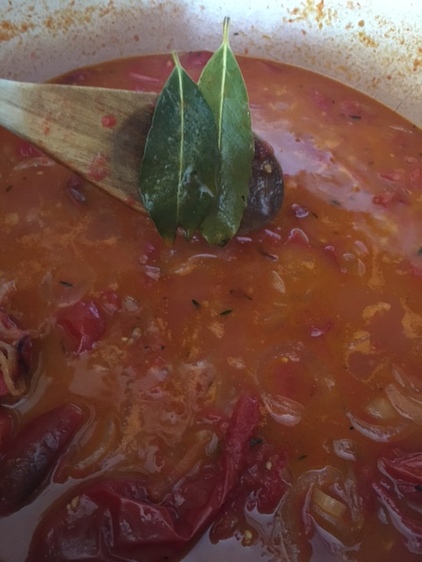 7. Using an immersion blender (one of my favorite tools), puree soup, right in the pot, until smooth. If an immersion blender is not available, carefully use a stand blender, filling jar no more than half-way full. You may have to puree in batches. Be careful, contents are HOT! 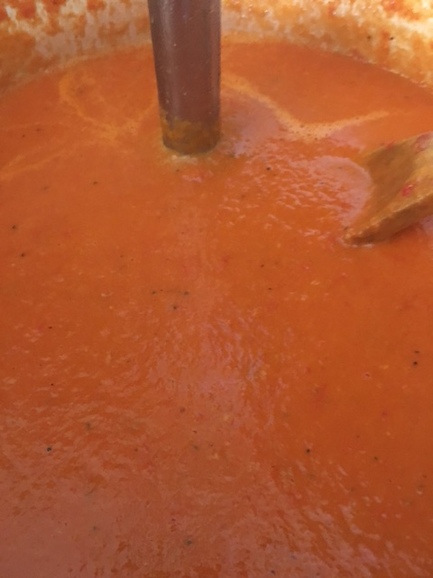 8. Taste for seasoning and adjust to taste. Add in additional stock, if desired, for thinner soup. Stir in cream if using. (I personally think it's not needed at all- sometimes more fat muddies the flavor instead of heightening it IMHO). 9. To make Parmesan crisps, line a baking sheet with parchment. For every Parmesan crisp you'd like to make , place 1 Tablespoon of grated Parmesan cheese onto the baking sheet and pat down into a circle, leaving 2-3 inches between mounds. Bake for 3-5 minutes until golden. Remove from oven and cool completely before removing from tray (they can be a bit fragile).
10. Ladle soup into bowl and float a Parmesan crisp on top. Serve hot!  And it was good to the last drop! ; ) ♥ 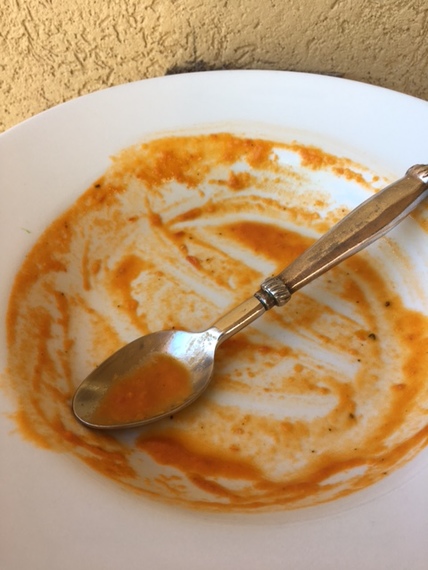 * Note: To seed the tomatoes, core them first (only needed with the larger tomatoes). Cut the tomatoes in half cross-wise. hold the tomatoes cut side down over a bowl or the sink. Give a gentle squeeze and a little shake and the seeds will fall out, not all of them, but most. Good enough.
PS: If you'd like another great fall soup recipe, please visit this link here. "If you've ever grown zucchini, you know they all ripen the same day. You wait all of June and July for zucchini. August rolls around, and one day—bam! You have more zucchini than you know what to do with."- Gale Martin In other words, zucchini, as we all know, is prolific! So what to do with all of that abundance? One can only eat so much zucchini bread, am I right? Well I have a versatile, delicious and much healthier alternative to zucchini bread to share with you. This recipe comes courteous of one of the best cooks I know, my friend Suzi. She was my right hand woman in my previous business venture in meal prep. She has an extraordinary palate and great intuition for cooking. Our joke was "... and it's always the same," but it wasn't because she measures nothing and goes by taste and what she has on hand. It was, however, always delicious. The first time she gave me a guideline for making it, it didn't turn out like her's. Come to find out she neglected to share her secret ingredient with me. It's canned EL Pato Jalapeno Salsa. I buy it in my local market, but I live in an area with a pretty big Hispanic population. Once she fessed up, then I was able to duplicate pretty much what she did. I have attempted to standardize the recipes so you can get consistent results, but truth be told, it is still more of a blueprint to play around with. You may like more or less heat with the chiles, more or less tomato, no corn, more corn, etc. It is a very flexible and forgiving recipe. I make bunches of it and keep it in the freezer to eat all winter. The texture suffers a bit, but it is still very flavorful, and I enjoy it very much. You can eat it as a delicious side dish to grilled meats, as a vegetarian pasta topping or as a topping on a roasted spaghetti squash. Sometimes I use it as a soup base for a turkey taco soup I like to make. You can even stir in rinsed and drained black beans at the end to make it a vegetarian main course (think meatless Monday).. Any which way you serve it, it will be a wonderful way to take advantage of summer's bounty. Just do yourself a favor and avoid using those tough baseball bat sized summer squashes. Try to choose the smaller ones that are more tender with small seeds. It makes a difference. Recipe doubles beautifully. Suzi's Stewed Zucchini- serves 6-ish 1 1/4 c. diced onions 3 cloves garlic, peeled and minced 1 1/2 pounds zucchini and /or summer squash (I like a mix), sliced lengthwise and then cut into 1/2" half-moons 1/2 cup diced roasted chiles, seeded (I use poblano, but you can use whatever you prefer, fresh roasted or canned) 28-ounce can diced tomatoes in juice 1 c. low-sodium chicken broth or vegetable broth 4 Tablespoons El Pato Jalapeno Salsa, or to taste* kosher salt and coarse ground black pepper 2/3 cup fresh or frozen, thawed, corn kernals freshly grated Parmigiano Reggiano cheese, optional Freshly chopped Italian Parsley, optional 3 Tablespoons Olive oil 1. Heat olive oil in large skillet over medium heat until hot, but not smoking. Stir in onion and garlic, season with a pinch of salt and pepper. Cook stirring often, until wilted and translucent.  2. Stir in squash, season again with a tiny pinch of slat and pepper and saute, stirring often for about 3-5 minutes. 3. Stir in tomatoes, chiles, broth and salsa*. Bring to a boil, reduce to a simmer. Partially cover and simmer about 30 minutes, stirring occasionally. 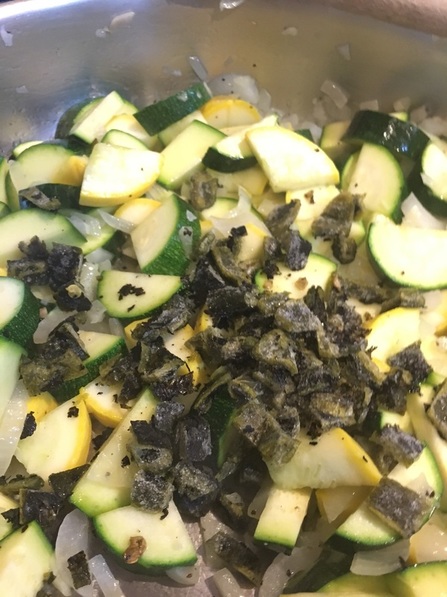 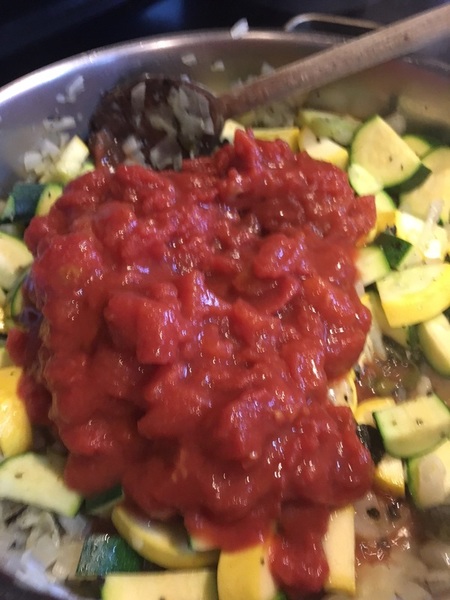 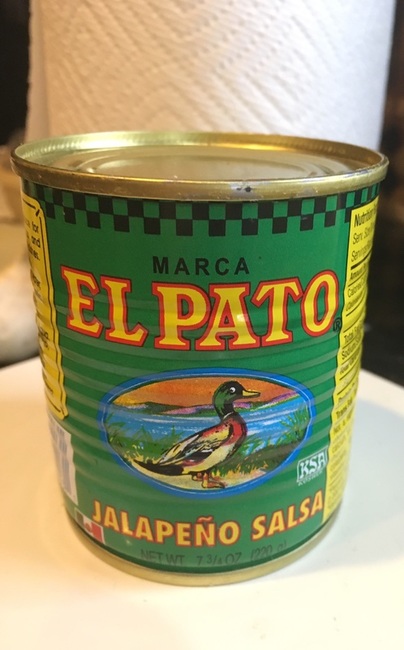 4. When squash are still tender, but not deteriorated, after about 30 minutes, stir in corn. Cook for 1-2 minutes longer, until heated through. Taste for seasoning and adjust according to your taste. 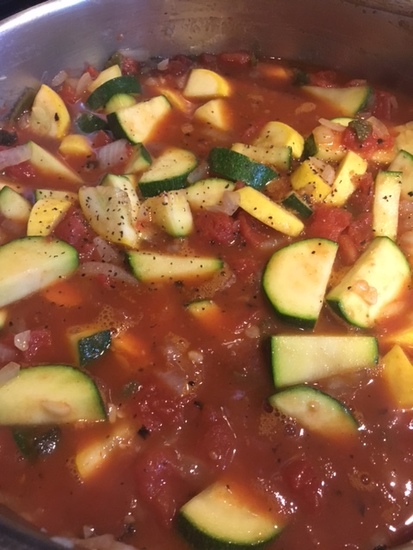 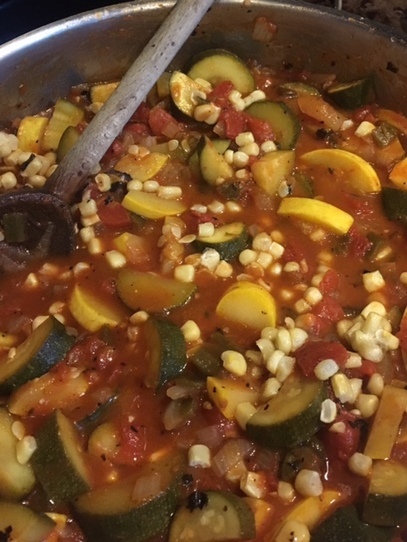 5. Serve immediately, topped with grated cheese and sprinkled with fresh parsley. 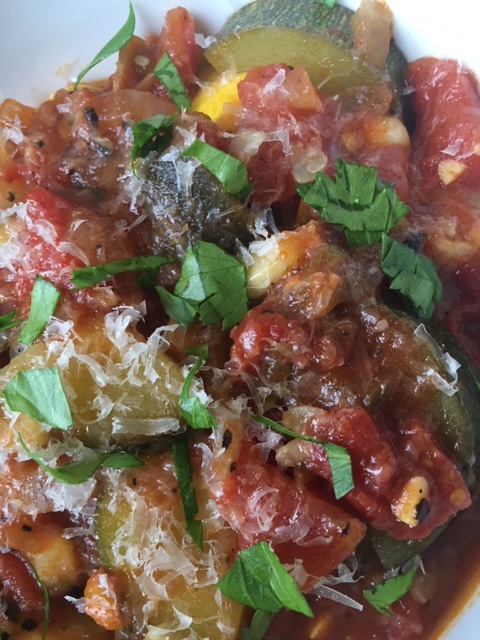 * If you can't find El Pato Jalapeno Salsa in your area, no worries, you can increase the chiles a bit or add a few dashes of your favorite hot sauce (go easy until you are certain of the intensity) and lastly, right after adding the corn, stir in 1 1/2 teaspoons of red wine vinegar to help elevate all the flavors.
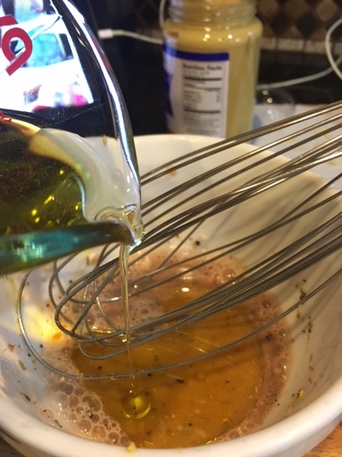
“But, you must remember, whatever you eat, make sure you have at least one bowl of salad with it.” -S.A. Tawks, The Spirit of the Imagination I don't know if I have mentioned it before, but I am an accidental vegan. It has been less than a year that I undertook a (mostly) vegan lifestyle. I had been living with a chronic, rare and so called auto-immune and incurable skin condition called granuloma annulare for nearly three years. Western medicine was unable to help me. Functional medicine approaches yielded no help, including the Paleo diet which is supposed to be really helpful for so called auto-immune disease). The condition only worsened and became more disfiguring by the month, appearing on most areas of my body including my face. Then this past November a book was released by Hay House called Medical Medium by Anthony William. It changed my life. Embarking immediately on a diet change incorporating as many organic raw fruits and vegetables as possible, the condition stopped spreading. Then in January I did the very strict 28-day cleanse out-lined in the book and I my skin cleared up 100% and has never come back. I have felt so good eating that way (both physically and emotionally, not to mention my hot flashes disappeared) I primarily stick with the diet of only raw fruits and vegetables (I am not 100% perfect 100% of the time, and that is good enough for me). Now my family is not following a vegan eating plan, and that's ok with me, too, so I cook for everyone in my family (exhausting sometimes, I'll admit!) Luckily, there are some recipes the whole family can enjoy, and this is one of them! I have been making this for years and it seems to turn up on our dinner table mostly in the summer. It makes a lot, but it lasts several days stored air-tight in the refrigerator, so great to have on hand. It's a perfect accompaniment to typical summer BBQ fare of grilled chicken and ribs, so it would be perfect for summer entertaining as well. It's crunchy, cool and refreshing, And it's so pretty on the plate! Give it a try, won't you? Cool and Crunchy Jicama Slaw- serves 8-10 special equipment needed - Mandoline with slicer and julienne blades Slaw: 1 large Jicama (about 1 1/2 pounds), peeled and julienned 1 cup of julienned radishes 4 cups shredded red cabbage 2 cups julienned carrots (about 3 medium, peeled) 1 cup red onion, halved, and sliced lengthwise 1 yellow or red bell pepper (or half and half), cored, halved cross-wise, seeded and sliced thinly 3/4 cup chopped fresh cilantro (or Italian parsley, if you are a cilantro hater) Dressing: 1 tsp kosher or sea salt 1/4 cup freshly squeezed 1/4 cup unseasoned rice wine vinegar 2 teaspoons honey (you can sub for another sweetener if you are strictly vegan) 1/2 teaspoon chili powder 1/8 teaspoon ground cumin 1 teaspoon minced jalapeno, seeded, optional 1/2 cup avocado oil 1. Place all of prepped veggie ingredients in a large bowl. 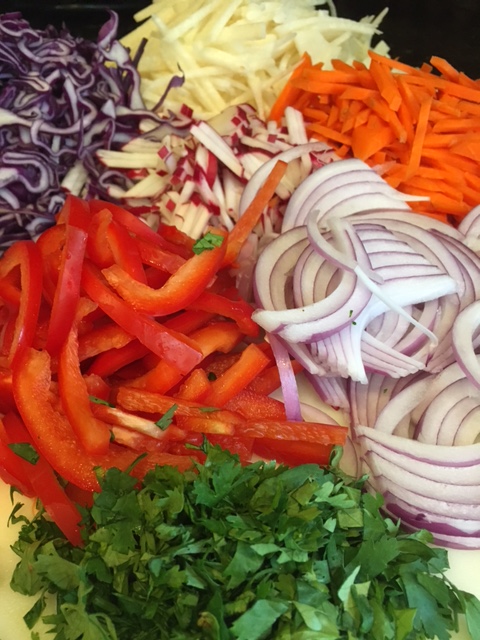 2. Prepare dressing. Combine all ingredients for dressing except the oil and whisk together. Gradually drizzle in the oil while whisking constantly.
3. Pour about half of the dressing over the ingredients in the bowl (I always like to start with less. You can always add more); toss. Taste and adjust seasoning to your taste. 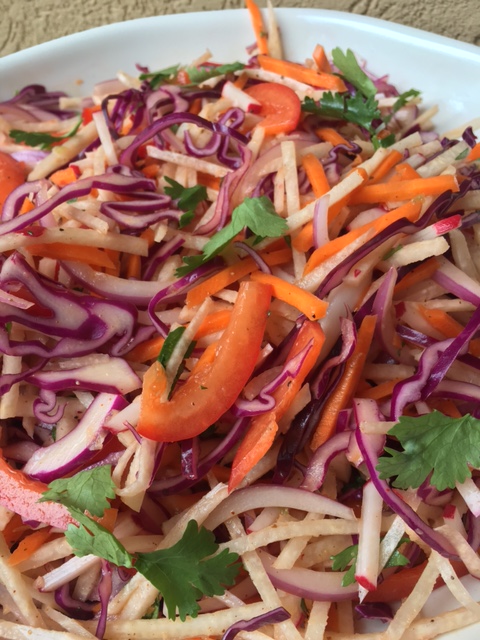 4. Serve on a bed of baby greens, garnished with a few slices of avocado for a main dish (top with some broccoli sprouts? Yes!), or as is for a great side dish. 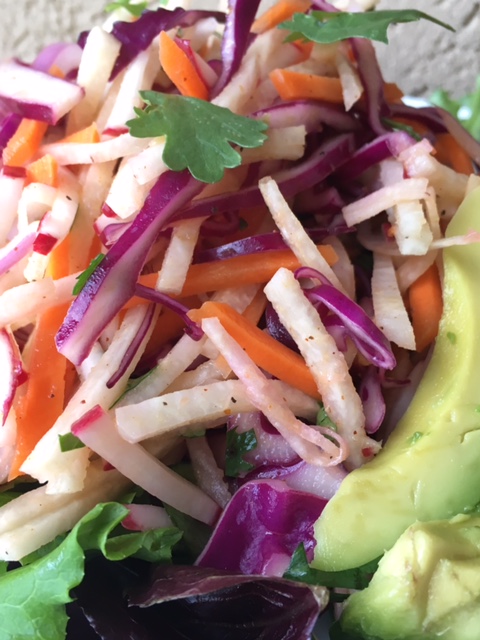 Disclaimer: I am not advocating for a vegan lifestyle, just sharing my story. However I will highly recommend the book Medical Medium if you have a chronic mystery illness (RA, fibromyalgia, Hashimoto's thyroiditis, MS, Lyme and more...) and can not get help with your condition. You CAN heal!
"But, for my own part, it was Greek to me." - William Shakespeare Greek salad , isn't something that has been too tinkered with that I can tell. It is pretty much universally the same tomato, cucumber, red onion, feta and olive mixture the world over, drowned in some kind of vinaigrette, some better than others. And I love it (minus the drowned part). It is like a summer garden in a bowl- colorful, fresh and delicious. However, when I make it at home,. I think, well, why not add.... and thus Greek Salad MY way! It's super easy to make, just dump, dress and mix, and you'll have a great summery salad to enjoy any day! Greek Salad My Way 12 ounces Grape or cherry tomatoes, halved 1 English cucumber (about 10" long) washed, halved lengthwise and cut into 1/2" half moons 1 1/2 Yellow Bell Peppers, seeded and cut into 1 " chunks 1 c. red onions, peeled and sliced 1/4 " thick into half moons* 1/2 cup canned chick peas, rinsed and drained very well (pat dry if necessary) 4 ounces fresh green beans, stemmed, briefly blanched and cut in half or thirds cross-wise 1/2 cup Castelvetrano olives, pitted and drained (so yummy!) 1/2 cup Kalamata olives, pitted and drained 2 Tablespoons fresh basil leaves cut in a chiffonade** 3/4 cups cup Cubed feta cheese (or to taste) -omit of you want a vegan version Romaine lettuce leaves, washed and dried Vinaigrette: 1 clove garlic, minced 1 Teaspoon Dijon Mustard 3 Tablespoons Red Wine Vinegar 1/4 teaspoon kosher salt 1/4 teaspoon coarse ground black pepper 1/2 teaspoon dried oregano, crushed with your fingertips juice from 1/2 lemon 3/8 cup extra Virgin Olive Oil 2 Tablespoons avocado oil 1. For Vinaigrette: In a small bowl whisk together garlic, Dijon, vinegar, salt, pepper, oregano and lemon juice. This will help dissolve the salt. 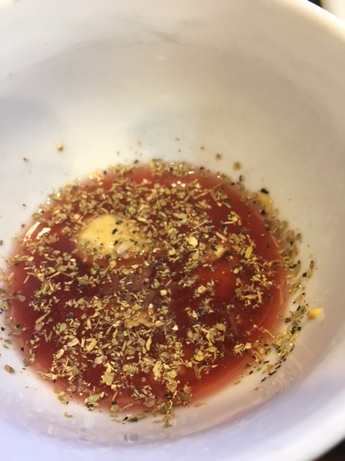 2. Combine the olive and avocado oils in a measuring cup with a pour spout. Slowly whisk the oil into the vinegar mixture. Whisk well.
3. If not using right away (or for leftovers) store in a glass jar with a lid. Use within a week. 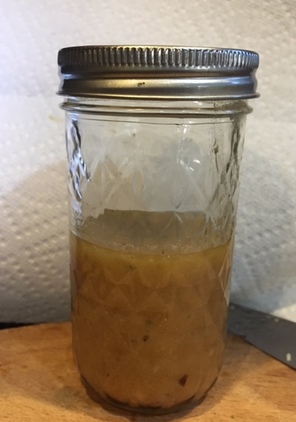 4. For Salad: Place all ingredients in a bowl, except the feta and vinaigrette. Toss gently to combine. 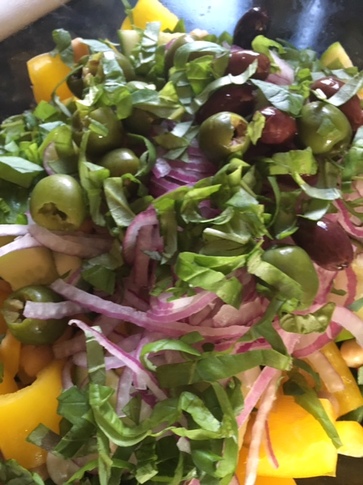 5. Top with feta, add vinaigrette (if it's been sitting mix well once again) judiciously, toss to combine. Taste and adjust seasonings and vinaigrette to your taste. 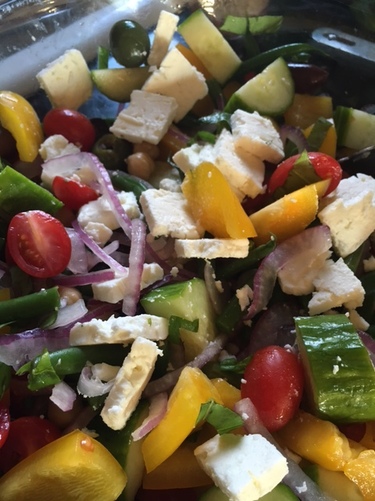 6. To serve, place a few romaine leaves on each plate and top with a generous portion of salad mixture. 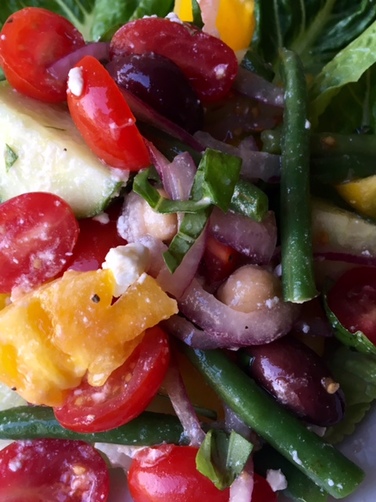 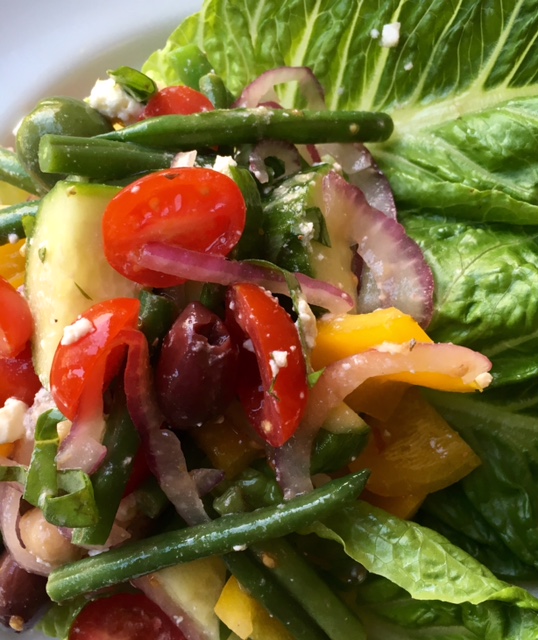 * to take the bite out of red onions, soak the sliced onions in a bowl of ice water for 30 minutes, drain, pat dry and proceed with recipe.
** to chiffonade basil, roll whole basil leaves into a cigar shape and then cut across the roll cross-wise with a very sharp knife into thin strips. “The best meals are those prepared by loving hands.” - Ken Poirot It's mid-week, and things are busy in your house. Am I right? Or maybe you had a busy day at work or school and you don't really feel much like cooking, but still want to put a nourishing meal on the table with minimal effort. With a few pantry items and some leftover chicken, you can do just that! A week ago or so, we had leftover rotisserie chicken and in the back of my mind I thought that Chicken Burrito Bowls would be an easy and delicious way to use that up. It ended up being a big hit with my husband and daughter, and it was super easy.The beauty of it is you can totally customize it to your taste (be sure to check out some variations at the bottom of the post). Here is how I went about it. Chicken Burrito Bowls- serves 4 4 cups cooked and seasoned seasoned brown rice* 4 cups diced left-over roast chicken, reheated gently in the microwave 1/2 cup frozen corn kernels, thawed 3/4 cups black beans, rinsed and drained Your favorite prepared tomato-based salsa Low-Sodium Chicken broth 1 teaspoon taco seasoning** 1 cup shredded cheese (Cheddar, Colby-Jack, Jalapeno-Jack, ) diced avocado -optional chopped fresh cilantro-optional diced fresh tomato-optional sliced olives-optional sour cream-optional guacamole-optional sliced geen onions-optional hot sauce-optional 1. Cook rice according to package directions, substituting salsa for one fourth of the liquid called for and using chicken broth in place of remaining amount of water called for. 2. When rice is done, stir in corn, black beans and 1 tablespoon chopped cilantro (optional). Remove pot from burner and keep covered until ready to use.. 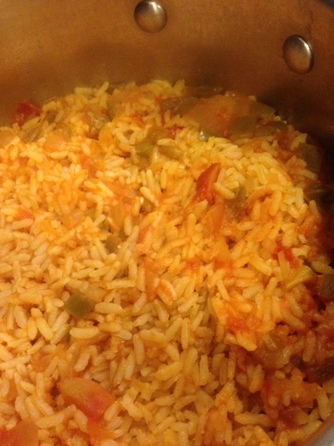 3. Sprinkle diced chicken with taco seasoning; stir to evenly distribute. 4. Into each of the 4 bowls, place 1 cup of the rice. Make a well in the middle of the rice. Into the well place the chicken. 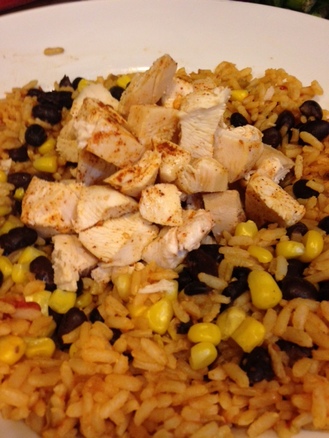 5. Drizzle about 1/4 cup of your prepared salsa on top of chicken then sprinkle each bowl with cheese
6. If desired microwave bowls to melt cheese (or if bowls are oven-proof, feel free to place them under broiler to melt). Top with your favorite garnishes as listed above. Serve with a nice green salad and some fresh fruit.  Variations: Shrimp burrito bowl- Saute 1 pound thawed, peeled and de-veined shrimp tossed with 2-3 teaspoons of taco seasoning in a skillet with 2 tablespoons of olive or coconut oil just until opaque. Squeeze the juice of 1/2 lime over the top. Toss to coat. Substitute for chicken.
Beef Burrito Bowl: cook 1 pound of ground beef in skillet until browned. Stir in 3 tablespoons taco seasoning (or to taste) and 1 cup of water (if using store bought seasoning, follow package directions). Simmer, stirring until water is evaporated and meat is thoroughly seasoned, about 10-15 minutes, adding more water as needed. Taste and adjust seasoning accordingly. Substitute for chicken. Re-fried Beans: Add 1/2 cup of re-fried beans that have been heated to the bottom of the bowl before adding in chicken.Season if desired with taco seasoning. Or for vegetarian option, use re-fried beans in place of meat; substitute vegetable broth for chicken broth in rice. * Different brands may call for different liquid to rice ratios, so be sure to follow the instructions for cooking rice on the package you are using. You want it to yield 4 cups cooked, approximately. ** Taco seasoning: I make my own, but you can use store bought, if you prefer. 1 Tablespoon chili powder 2 teaspoons onion powder 1 1/4 teaspoons ground cumin 1 teaspoon garlic powder 1 teaspoon paprika 1 teaspoon dried oregano 1/2 teaspoon sea salt Place all ingredients in a bowl. Whisk or stir together well to evenly combine. Recipe can be easily doubled or tripled. Store any leftovers in an airtight container for future use. Stir before using. "I'm so glad I live in a world where there are Octobers," -Anne of Green Gables Do you love fall as much as I do? I look forward to fall all year long. There is something about the way the character of the natural light changes, the cooler weather, the beautiful colors of fall foliage, the earthy smell that just makes me happier than any other time of the year. Although I am not crazy about the dark mornings fall brings, the dark evenings make me happy to have candle-light once again which adds a certain coziness to out home. It just says welcome. And it's apple season! To a girl raised in Upstate New York where there are orchards galore, this is indeed cause for celebration. I can't wait for the local apples to appear at the farmer's market because as good as some apples are year round, ones fresh-picked have a certain quality to them that trumps all others- extra crunchy and juicy and many more varieties to choose from than I typically can find at a local supermarket. Best of all? No icky waxy finish! Fall makes me want to nest more, too. I am eager to cook stews and mostly, soups galore. I make really big batches of Bolognese and marinara sauces along with turkey chili to have on hand in the freezer for cozy cold weather meals. Now really is the most bountiful time of the year at farmer's markets, too.. There are still plenty of tomatoes and warm weather produce and the winter squash are now in. The smell of roasted chiles is always inviting at our markets, and I stock up for my freezer and then use them all year long. Recently I was smitten with some butternut squash, yellow cherry tomatoes and beautiful yellow bell peppers at my local farm stand and came up with a gorgeous soup we will happily eat all season long. Here's the recipe if you care to try it . It can be made with red tomatoes and bell peppers too, and even mushrooms, but let's just say the color won't be as appetizing! Golden Harvest Soup 1 medium butternut squash, halved and seeded (Carefully!) 1 large yellow bell pepper, halved, seeded and cut into chunks 1 medium onion, skinned and sliced into wedges 1 cup yellow cherry tomatoes (or 1/2 pint approx) 1 1/2 cups baby carrots, or carrot chunks 4- 4 0unce links, sweet italian sausages with fennel 3 cloves garlic, peeled and minced fresh thyme sprigs 1/4 teaspoon poultry seasoning 1/2 cup dry white wine 6 cups chicken stock, plus additional for thinning soup, if desired olive oil kosher salt and coarse ground black pepper Preheat oven to 425 degrees F. Brush baking sheet with olive oil. Place butternut squash, cut side down on baking sheet. Place prepared yellow bell pepper, onion, tomatoes and carrots on same baking sheet. Drizzle everything generously with olive oil, sprinkle with salt and pepper and toss gently to coat. Scatter fresh thyme sprigs on top. 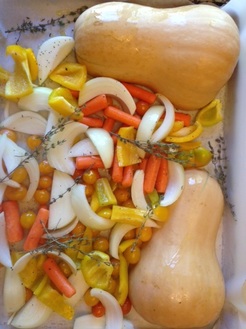 Place tray in oven on middle rack and roast for 30-40 minutes until tender and slightly caramelized. Remove from oven and let cool until squash is cool enough to handle.  Meanwhile, heat 2 tablespoons olive oil in a heavy bottomed soup or stock pot over medium heat. Once oil is hot but not smoking squeeze little balls of sausage out of the casing into the oil. Saute all the sausage in the oil until evenly browned. With slotted spoon remove sausage to paper towels to drain. 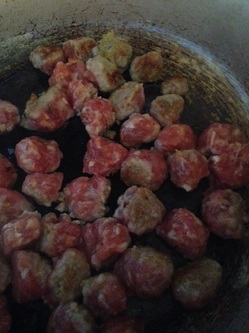 In remaining oil in pot, saute garlic gently until soft and translucent, being careful not to burn. Add in all the vegetables from tray, scooping out all the soft squash flesh with a spoon, being careful not to get any skin. Crumble thyme leaves into pot, discarding stems. Stir vegetables continuously while adding in wine. Cook, stirring until wine is evaporated. Stir in a pinch of salt and pepper , poultry seasoning and chicken stock. Bring to a boil. Reduce heat and simmer, stirring occasionally , for 20 minutes. Using an immersion blender, puree soup right in the pot until as chunky or as smooth as you would like. Add in more broth, as desired. 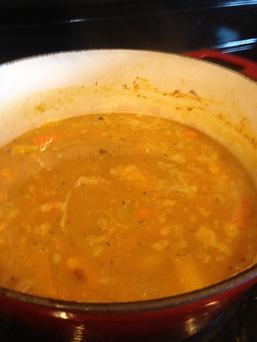 Stir in browned sausage. Simmer soup for another 20-30 minutes. Taste for seasoning and adjust to suit your taste. Serve immediately, sprinkled with a few fresh thyme leaves for garnish. Serves 4-6. Doubles easily. Freezes beautifully! 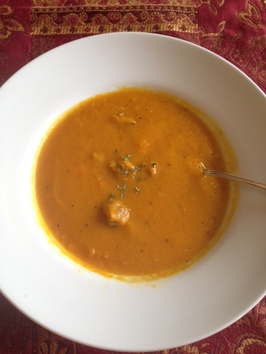 Variation: For vegetarian version, omit sausage and substitute vegetable stock for chicken stock. "Cooking well doesn't mean cooking Fancy." - Julia Child Yesterday I told you about roasting some tomatoes I bought from my local farm stand. I love to do this because they are really a versatile ingredient to have on hand. Roasting them concentrates the flavor and firms them up a bit, but not so they are leathery and chewy like a sun-dried tomato. No, these still remain supple and easy to chew. I like to snack on them out of the container, but here are a few ways to use them to jazz up other things: 1. Add them to a roasted turkey and avocado sandwich. 2. Substitute them for (or use them in addition to) fresh tomatoes in a BLT. 3. Use them as a topping on a bowl of fresh polenta sprinkled with freshly grated parmesan cheese. 4. As soon as they come out of the oven, toss with a little more Extra virgin Olive oil, some shredded fresh basil, salt and pepper and toss with freshly cooked pasta. 5. Garnish grilled chicken or firm white fish with them. 6. Make the best grilled cheese and tomato sandwich with them Ok, let's make grilled cheese! For each sandwich take two slices of good quality artisan bread. Lightly spread mayonnaise on one side and Dijon mustard on the other. Top the mayonnaise side with sliced white cheddar cheese (sharp or extra sharp) and add the Roasted tomatoes. Top with another slice of cheese and place the Dijon mustard side facing down on top of the tomatoes. Lightly butter the outsides of each side.  Preheat a frying pan or griddle to medium. Lay the sandwiches in the hot pan, and cook until golden brown. Flip sandwich and continue cooking until the second side is perfectly golden (I like to cover my pan so the cheese melts more quickly). Remove the sandwich from the heat, slice and serve. Yum!  |

Archives
December 2019
Categories
All
|


 RSS Feed
