|
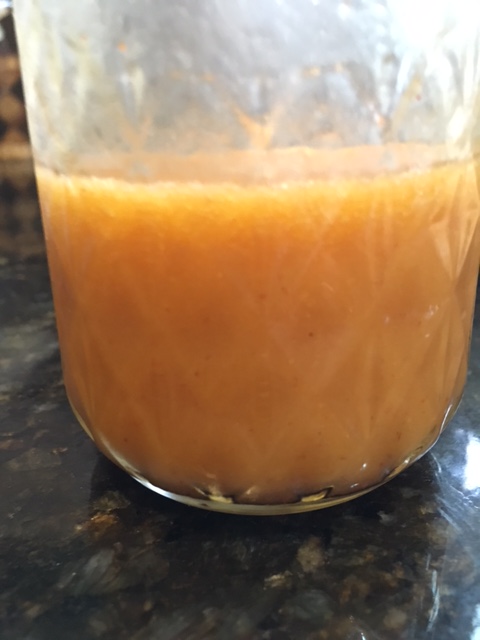
"Cauliflower is nothing more than cabbage with a college education." -Mark Twain We've had a couple weeks of rather unseasonably warm weather recently, broken up by a day or two of winter re-visited. The warmer, spring-like weather piqued my taste buds for something fresh and light. Fresh and light brings to mind salads for me. I have long been wanting to create a grain-free tabbouleh, the middle eastern dish of bulgur, tomatoes, cucumbers and parsley among other ingredients. I adore the flavors in it yet avoiding gluten, so the traditional version is not a match for me right now. Enter the versatile cauliflower that is popularly being used in everything from pizza crusts to rice substitute to potato substitute to now bulgur substitute. In many stores it comes already pre-chopped in a bag for convenience. My local Costco has organic chopped cauliflower which made me so happy ( if you can't find it pre-chopped, just pulse it in batches in your food processor or chop it by hand.).It turned out to be a great substitute in my opinion. The dish was so fresh and crunchy and cool, it really hit the spot. Instead of the more typical lemony -olive oil dressing though, I dressed it in a version of my Hummus recipe. I thought the result was beyond delicious. I ate the entire recipe myself in two sittings. Oh, yes, did I mention it stays fresh for 2-3 days in the refrigerator? Make ahead salad for the win! It's a great start to a Meatless Monday, if you want to try it out. Grain-Free Tabbouleh -Serves 4-6 as a side dish 4 cups finely chopped cauliflower 4 roma tomatoes, seeded and diced 1 cup diced red onion 1 cup chopped Italian parsley, stemmed 1 1/2 cups diced cucumber (I use organic English or hot house cucumbers, skin on) salt and pepper to taste Hummus Dressing: 1 can chick peas, rinsed and drained 3 Tablespoons Tahini (sesame paste) 1 small clove garlic 1/3 cup fresh squeezed lemon juice 3/4 teaspoon Himalayan pink salt or sea salt 1/4 cup water or more to get desired consistency 1 pinch ground cumin, optional 1. Place all of the salad ingredients in a bowl. 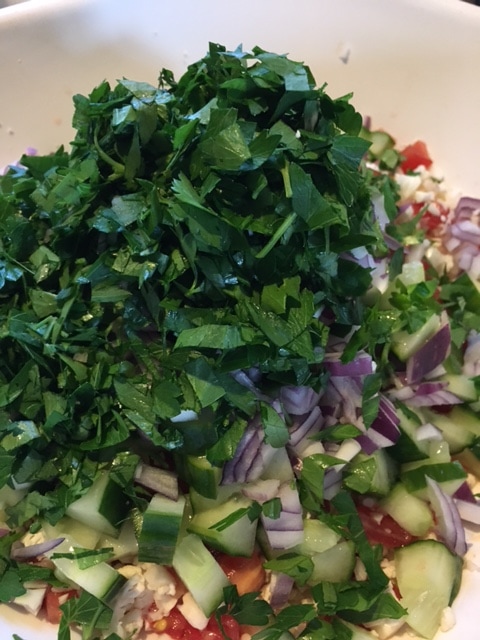 2. For Dressing: Place all of hummus ingredients in bowl of food processor with metal blade in place. 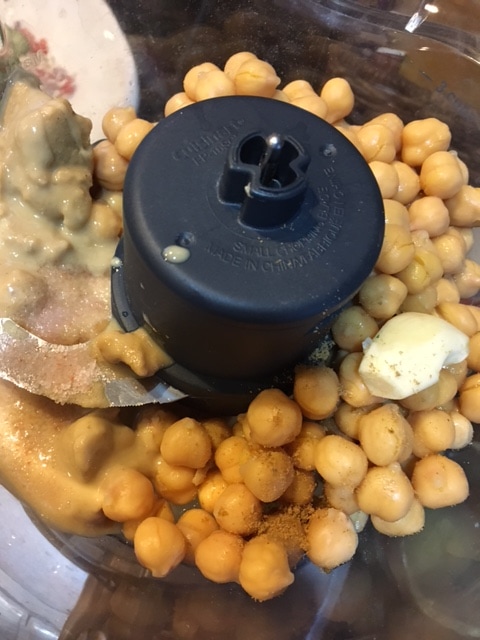 3. Process hummus until smooth and creamy. Add in more water to thin to desired consistency. 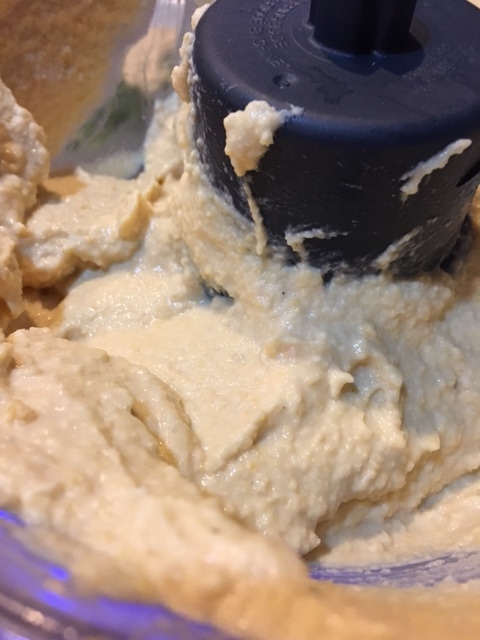 4. Spoon 2/3 cup, or to taste, of hummus onto salad ingredients. Toss to combine. Use as much or as little hummus as you'd like (leftover hummus will keep, covered, in the refrigerator for up to 4 days- use as a dip for your favorite raw veggies or pita chips or as a spread for a veggie-full sandwich or wrap). Taste for seasoning and adjust accordingly with salt and pepper. 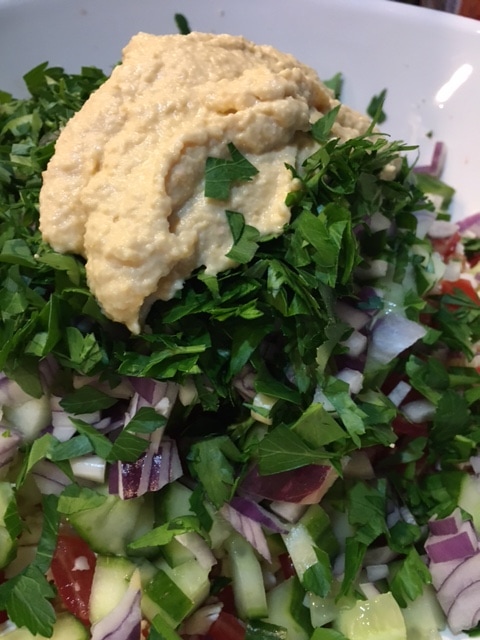 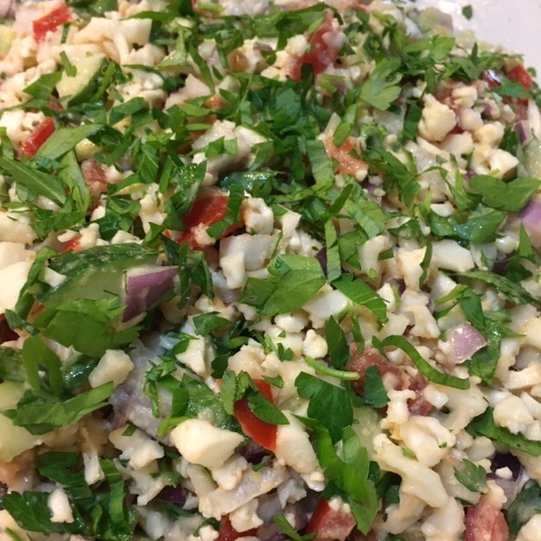 5. Serve immediately, or cover and store in refrigerator until needed. May be kept refrigerated for up to 3 days. 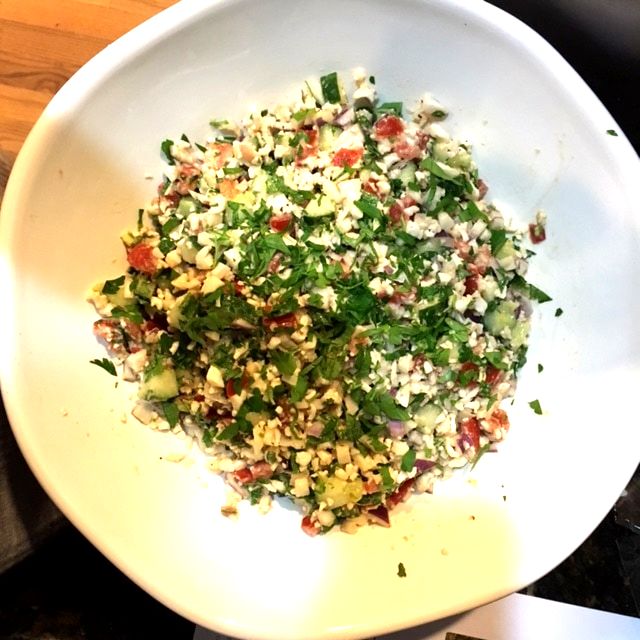  Happy eating! ♥
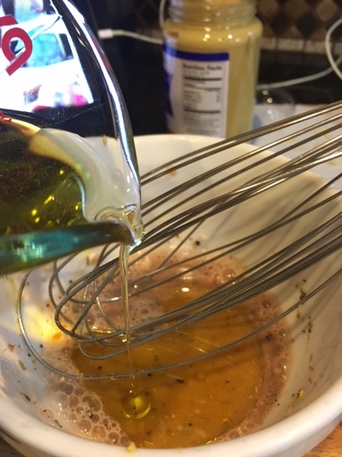
2 Comments
"One of the very best things about life is the way we must regularly stop whatever it is we are doing and devote our attention to eating. " - Luciano Pavarotti It's January, the month of healthy habits for many, so I'd like to encourage that by offering you one of my favorite winter salads. It's fresh and bright, healthy and delicious and full of powerhouse nutrients. It's also super simple to make. Leftovers keep well for up to 2 days so you can double the recipe to have some for lunch or dinner the next day or two. The main ingredients are shredded Brussels Sprouts and Fresh Kale. I've never been a huge fan of cooked Brussels Sprouts, but a couple of years ago I had my first fresh Brussels sprouts in an amazing salad served at Pizzeria Da Lupo in Boulder, Colorado and I became an instant convert! .To shred the Brussels Sprouts I use my Cuisinart food processor's shredding disc. Before I cut the kale in strips I remove the thick stems and discard them. They are not really all that palatable. THe dressing has a little natural sweetness from the apple juice concentrate which is a great counterpoint to the savory whole grain mustard. It's my favorite salad dressing to use in the colder months as it complements so well any fruits or nuts added to mixed greens. I hope you will love it, too! This month also brings a change to the blog. I am now including a PDF file link so you can download or print the recipe to make it even easier for you! Winter Greens Salad- serves 4-6 ...or just me. 3 cups shredded raw Brussels Sprouts 3 cups thinly sliced fresh Lacinto (aka Dinosaur) Kale 3/4 cup thinly sliced fresh celery 1/4 fresh pomegranate seeds plus more for garnish (or substitute Dried cranberries for seeds) 1/4 cup lightly toasted walnuts, coarsely chopped plus more for garnish Apple Cider Vinaigrette- 2 Tablespoons Thawed Organic Aple Juice concentrate 2 Tablespoons Organic Apple CIder vinegar Pinch each Kosher salt and Coarsely ground black pepper 1 teaspoon Dijon mustard 3 Tablespoons mild oil (Grapeseed, canola, Avocado or Light Olive Oil) 1 Tablespoon Walnut Oil 2 Teaspoons Whole Grain Mustard 1. Make Vinaigrette: In a medium bowl whisk together all the ingredients except whole grain mustard and oils. 2. Whisking continuously, drizzle in both oils. Stir in whole grain mustard. Taste for seasoning and adjust as needed. (Store in lidded jar in fridge until needed. Shake well before using). 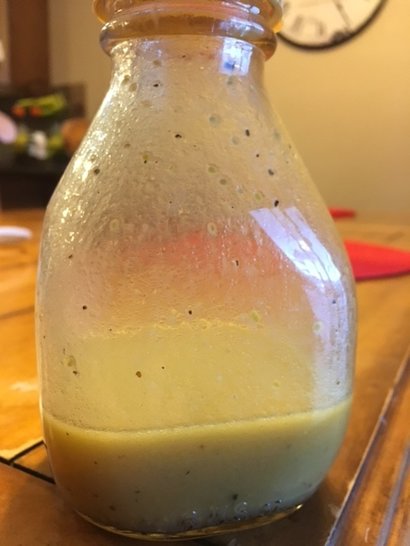 3. In a large salad bowl, place the shredded Brussels sprouts, kale, celery, pomegranate seeds and walnuts. 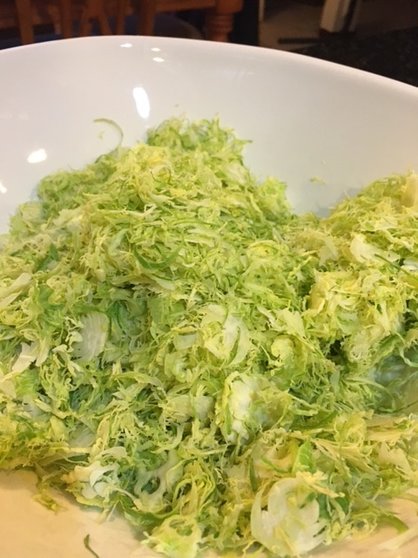 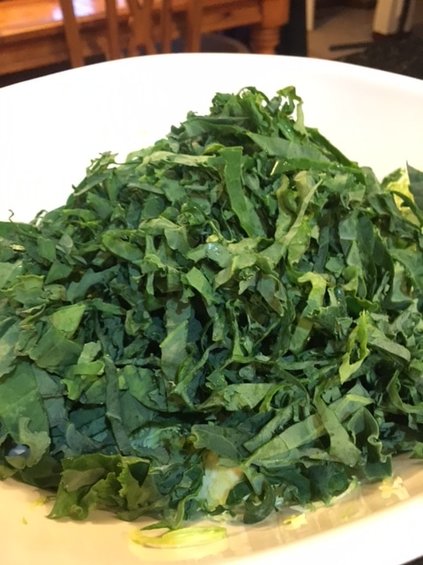 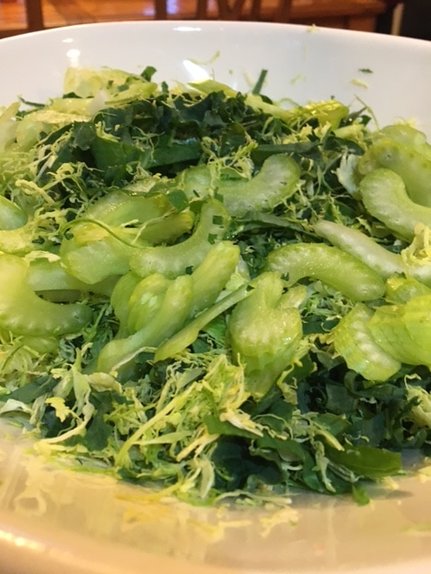 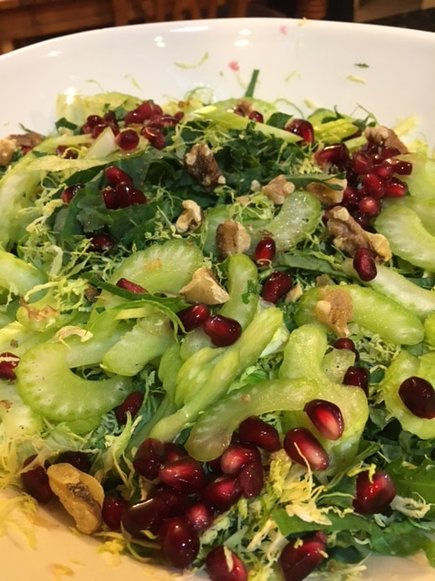 4. Toss to combine. Drizzle with desired amount of dressing (I am firmly in the less is more camp). Toss to combine. 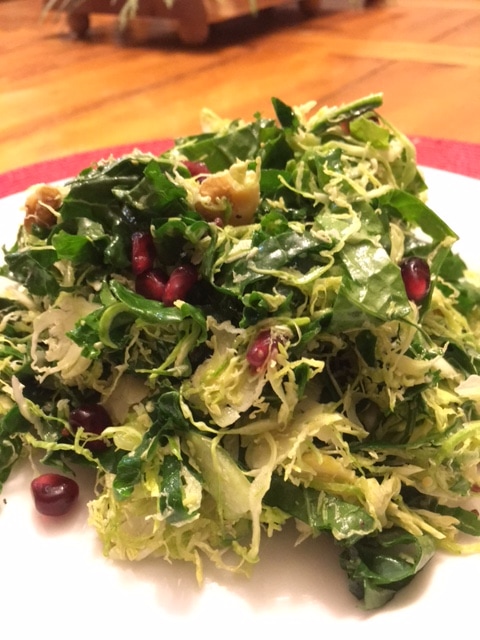 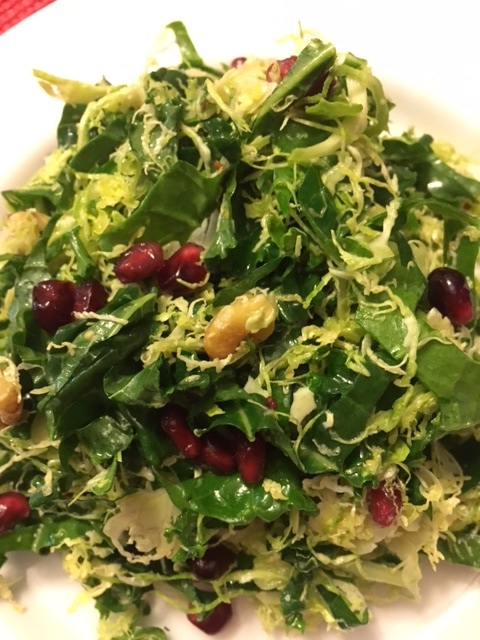 5. Serve immediately, garnishing with additional seeds and nuts, if desired.. Store leftovers, covered, in the fridge for up to 2 days. Here's to your health! ♥ Printable Recipe Here:
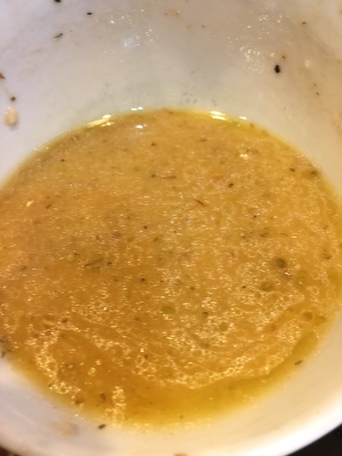
“To make a good salad is to be a brilliant diplomatist–the problem is entirely the same in both cases. To know exactly how much oil one must put with one’s vinegar.” – Oscar Wilde This blog post will be short and sweet. It's tomato season. Do you wait all summer long for those ripe off the vine tomatoes like I do and then eat as many as humanly possible in the few weeks they are available? I have been volunteering at a local farm (Artisan Gardens CSA) one day a week and I have been gifted some beauties- large, misshapen heirlooms so juicy and flavorful they make me giddy! So I did what any tomato loving gal would do and made a caprese salad. I used a vinaigrette to add some flavor. I know a lot of people drizzle caprese salad with balsamic vinegar, but I find it a little too sweet for my taste in this application. But if you prefer Balsamic, by all means use that. I am not the vinegar boss of you, afterall! : ) Deconstructed Insalata Caprese- serves 6 4 medium sized Heirloom tomatoes,any variety, sliced 1/3" thick* 1 16-oz. tub of fresh mozzarella pearls (or fresh mozzarella ball, torn into pieces), drained and patted dry. Dressing: 1 Tablespoon. red wine vinegar 1 teaspoon Balsamic vinegar 3 Tablespoons Extra Virgin olive Oil 1/8 teaspoon garlic powder 1/4 teaspoon dried oregano kosher or sea salt coarse ground black pepper 6 good-sized fresh basil leaves, cut into chiffonade 1. For dressing: whisk together vinegars, garlic powder, oregano and a pinch of both salt and pepper. Slowly drizzle in olive oil, whisking continuously. Set aside. 2. On an oblong platter, arrange tomato slices, slightly over-lapping in two or three rows. 3. Season tomatoes lightly with salt 4. Place mozzarella pearls or pieces evenly down the center of the tomatoes. 5. Re-whisk the vinaigrette and drizzle over the top of the salad to taste. 6. Sprinkle the fresh basil evenly on top of the salad and serve. Served at room temperature for best flavor. 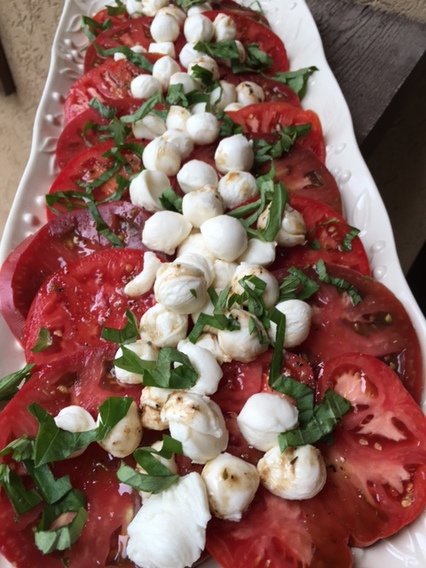 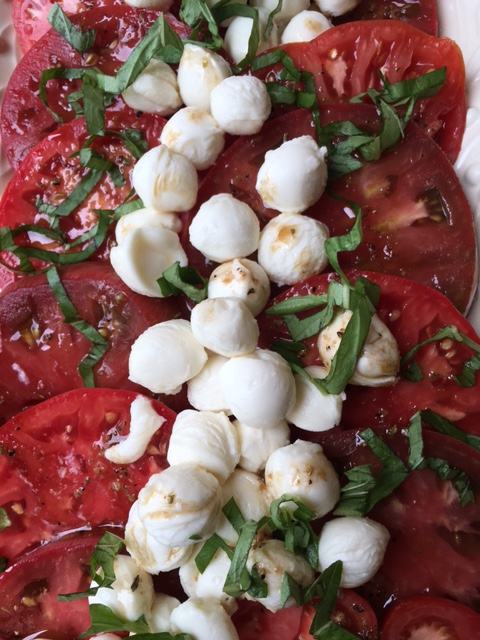 “But, you must remember, whatever you eat, make sure you have at least one bowl of salad with it.” -S.A. Tawks, The Spirit of the Imagination I don't know if I have mentioned it before, but I am an accidental vegan. It has been less than a year that I undertook a (mostly) vegan lifestyle. I had been living with a chronic, rare and so called auto-immune and incurable skin condition called granuloma annulare for nearly three years. Western medicine was unable to help me. Functional medicine approaches yielded no help, including the Paleo diet which is supposed to be really helpful for so called auto-immune disease). The condition only worsened and became more disfiguring by the month, appearing on most areas of my body including my face. Then this past November a book was released by Hay House called Medical Medium by Anthony William. It changed my life. Embarking immediately on a diet change incorporating as many organic raw fruits and vegetables as possible, the condition stopped spreading. Then in January I did the very strict 28-day cleanse out-lined in the book and I my skin cleared up 100% and has never come back. I have felt so good eating that way (both physically and emotionally, not to mention my hot flashes disappeared) I primarily stick with the diet of only raw fruits and vegetables (I am not 100% perfect 100% of the time, and that is good enough for me). Now my family is not following a vegan eating plan, and that's ok with me, too, so I cook for everyone in my family (exhausting sometimes, I'll admit!) Luckily, there are some recipes the whole family can enjoy, and this is one of them! I have been making this for years and it seems to turn up on our dinner table mostly in the summer. It makes a lot, but it lasts several days stored air-tight in the refrigerator, so great to have on hand. It's a perfect accompaniment to typical summer BBQ fare of grilled chicken and ribs, so it would be perfect for summer entertaining as well. It's crunchy, cool and refreshing, And it's so pretty on the plate! Give it a try, won't you? Cool and Crunchy Jicama Slaw- serves 8-10 special equipment needed - Mandoline with slicer and julienne blades Slaw: 1 large Jicama (about 1 1/2 pounds), peeled and julienned 1 cup of julienned radishes 4 cups shredded red cabbage 2 cups julienned carrots (about 3 medium, peeled) 1 cup red onion, halved, and sliced lengthwise 1 yellow or red bell pepper (or half and half), cored, halved cross-wise, seeded and sliced thinly 3/4 cup chopped fresh cilantro (or Italian parsley, if you are a cilantro hater) Dressing: 1 tsp kosher or sea salt 1/4 cup freshly squeezed 1/4 cup unseasoned rice wine vinegar 2 teaspoons honey (you can sub for another sweetener if you are strictly vegan) 1/2 teaspoon chili powder 1/8 teaspoon ground cumin 1 teaspoon minced jalapeno, seeded, optional 1/2 cup avocado oil 1. Place all of prepped veggie ingredients in a large bowl. 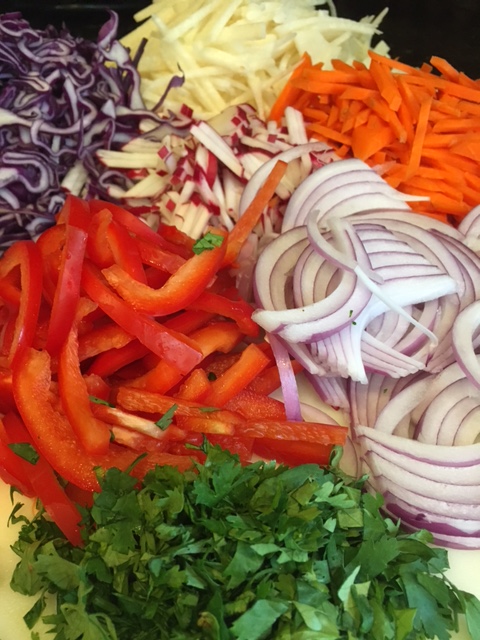 2. Prepare dressing. Combine all ingredients for dressing except the oil and whisk together. Gradually drizzle in the oil while whisking constantly.
3. Pour about half of the dressing over the ingredients in the bowl (I always like to start with less. You can always add more); toss. Taste and adjust seasoning to your taste. 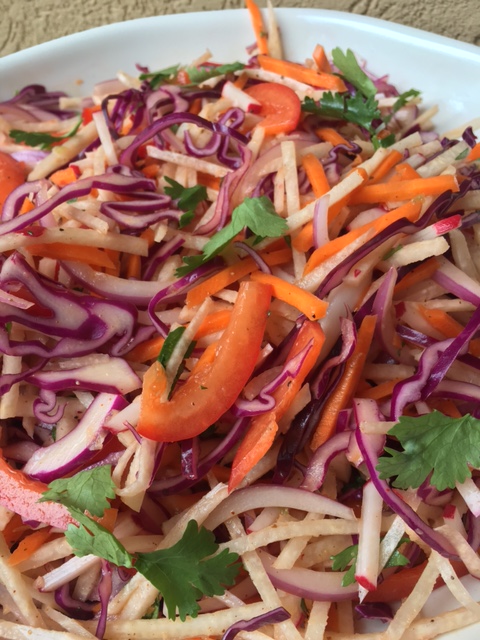 4. Serve on a bed of baby greens, garnished with a few slices of avocado for a main dish (top with some broccoli sprouts? Yes!), or as is for a great side dish. 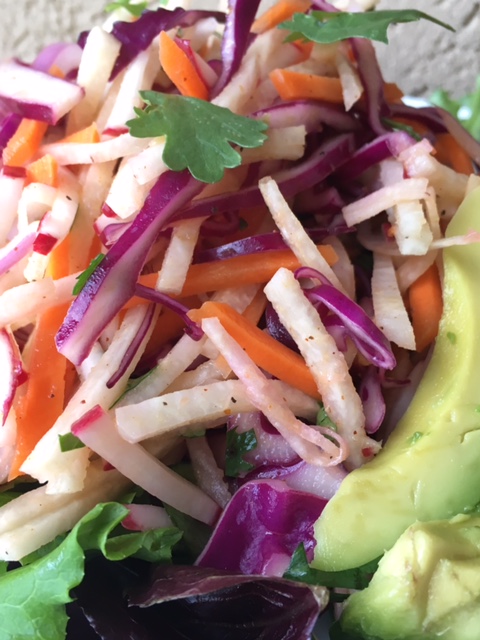 Disclaimer: I am not advocating for a vegan lifestyle, just sharing my story. However I will highly recommend the book Medical Medium if you have a chronic mystery illness (RA, fibromyalgia, Hashimoto's thyroiditis, MS, Lyme and more...) and can not get help with your condition. You CAN heal!
"But, for my own part, it was Greek to me." - William Shakespeare Greek salad , isn't something that has been too tinkered with that I can tell. It is pretty much universally the same tomato, cucumber, red onion, feta and olive mixture the world over, drowned in some kind of vinaigrette, some better than others. And I love it (minus the drowned part). It is like a summer garden in a bowl- colorful, fresh and delicious. However, when I make it at home,. I think, well, why not add.... and thus Greek Salad MY way! It's super easy to make, just dump, dress and mix, and you'll have a great summery salad to enjoy any day! Greek Salad My Way 12 ounces Grape or cherry tomatoes, halved 1 English cucumber (about 10" long) washed, halved lengthwise and cut into 1/2" half moons 1 1/2 Yellow Bell Peppers, seeded and cut into 1 " chunks 1 c. red onions, peeled and sliced 1/4 " thick into half moons* 1/2 cup canned chick peas, rinsed and drained very well (pat dry if necessary) 4 ounces fresh green beans, stemmed, briefly blanched and cut in half or thirds cross-wise 1/2 cup Castelvetrano olives, pitted and drained (so yummy!) 1/2 cup Kalamata olives, pitted and drained 2 Tablespoons fresh basil leaves cut in a chiffonade** 3/4 cups cup Cubed feta cheese (or to taste) -omit of you want a vegan version Romaine lettuce leaves, washed and dried Vinaigrette: 1 clove garlic, minced 1 Teaspoon Dijon Mustard 3 Tablespoons Red Wine Vinegar 1/4 teaspoon kosher salt 1/4 teaspoon coarse ground black pepper 1/2 teaspoon dried oregano, crushed with your fingertips juice from 1/2 lemon 3/8 cup extra Virgin Olive Oil 2 Tablespoons avocado oil 1. For Vinaigrette: In a small bowl whisk together garlic, Dijon, vinegar, salt, pepper, oregano and lemon juice. This will help dissolve the salt. 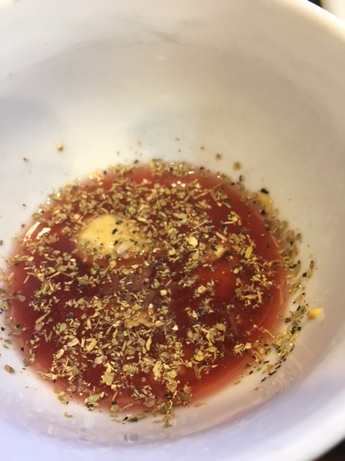 2. Combine the olive and avocado oils in a measuring cup with a pour spout. Slowly whisk the oil into the vinegar mixture. Whisk well.
3. If not using right away (or for leftovers) store in a glass jar with a lid. Use within a week. 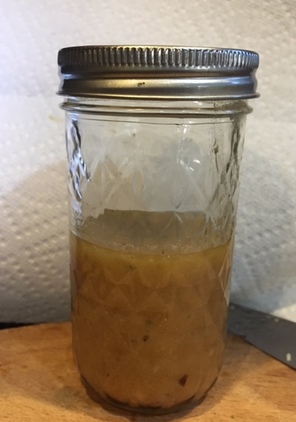 4. For Salad: Place all ingredients in a bowl, except the feta and vinaigrette. Toss gently to combine. 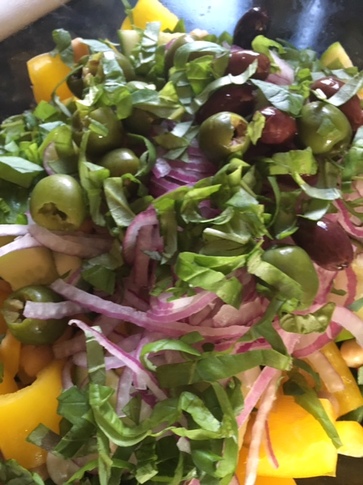 5. Top with feta, add vinaigrette (if it's been sitting mix well once again) judiciously, toss to combine. Taste and adjust seasonings and vinaigrette to your taste. 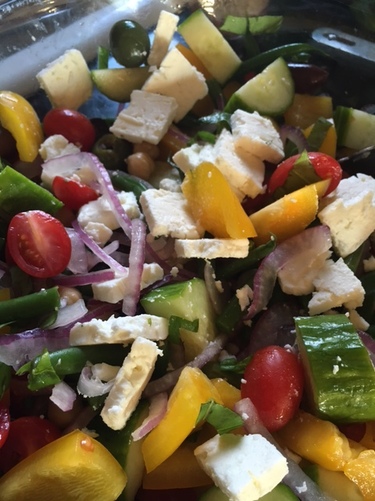 6. To serve, place a few romaine leaves on each plate and top with a generous portion of salad mixture. 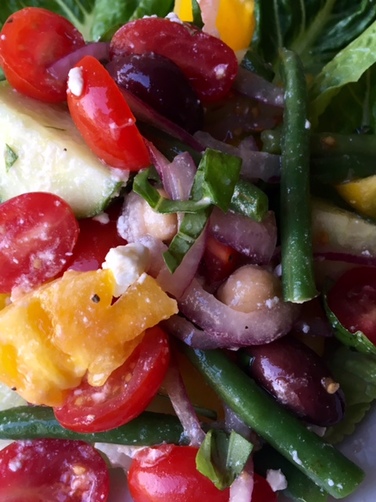 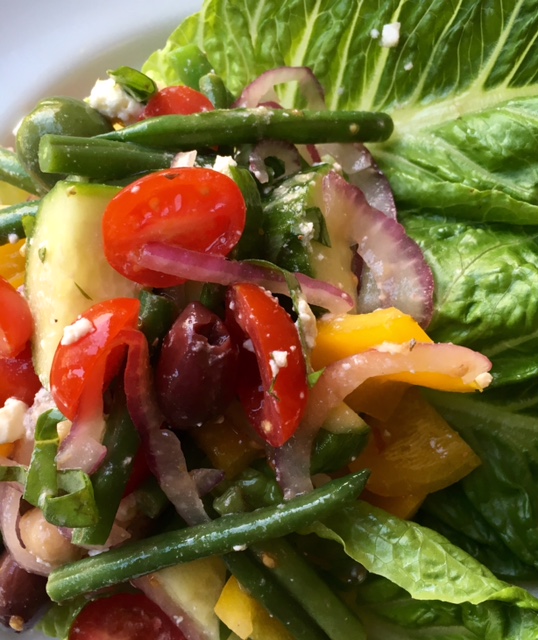 * to take the bite out of red onions, soak the sliced onions in a bowl of ice water for 30 minutes, drain, pat dry and proceed with recipe.
** to chiffonade basil, roll whole basil leaves into a cigar shape and then cut across the roll cross-wise with a very sharp knife into thin strips. “My love is pizza shaped. Won’t you have a slice? It’s circular, so there’s enough to go around.
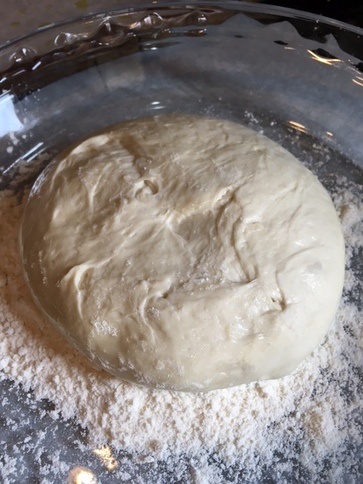
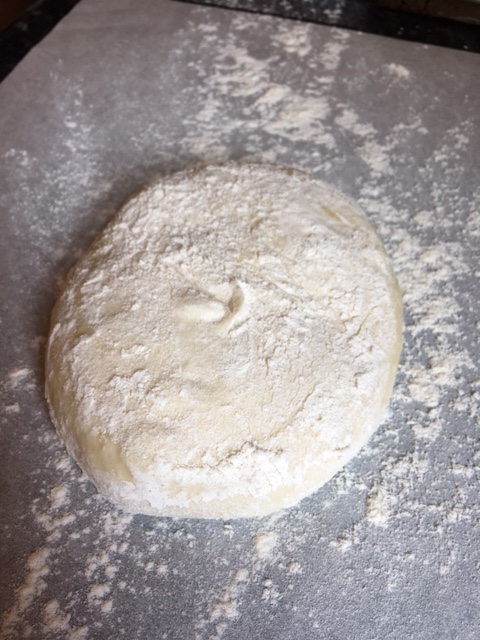
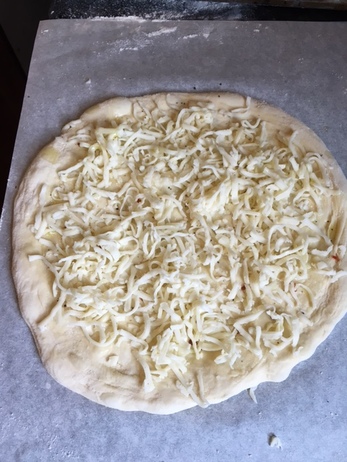
” -Dora J. Arod Last week I was back in Upstate New York where I grew up, helping my mom pack up her house of 51 years. It was at times wonderful, trying, sad and good. Maybe some of you have had a similar experience helping a parent move. I also got to see my brother, sister and their families, which was a delight for me. I don't get back there as often as I would like. One of the highlights was showing my nieces and nephew how to make homemade pizza one night as we celebrated my youngest niece's 11th birthday!. We had so much fun! They took to it like naturals, too. That got me thinking that I hadn't made pizza at home for a very long time. Now that we have a couple gluten free people in my household, we don't make it as often as we once did. So this weekend with some free time on my hands I thought I'd make one of my favorite pizzas-salad topped pizza. It is just baby mixed salad greens tossed lightly in a nice lemony vinaigrette sitting atop a sauce-less cheese pizza. It makes a wonderful lunch or light dinner It is super simple especially if you start with purchased quality dough from your favorite store, pizzeria or Italian deli. I usually make my own dough, but if I didn't plan ahead, I really like to use the fresh dough they sell at Whole Foods. Salad Topped Pizza (makes 2 -10 inch pizzas) 1 lb fresh pizza dough (purchased or homemade) sea salt coarse ground black pepper crushed red pepper flakes 2 cups shredded part-skim mozzarella 2 Tablespoons fresh grated Parmesan cheese plus more for shaving 4 cups lightly packed mixed baby salad greens or baby arugula 2 Tablespoons Extra virgin Olive Oil 2 teaspoons fresh lemon juice 1/4 teaspoon Dijon mustard 1/4 teaspoon minced fresh garlic, peeled all-purpose flour for dusting parchment paper 1. About an hour before making pizzas, place pizza stones inside oven and preheat oven to 550 degrees Farenheit (if you don't have a pizza stone, I have also had good success using inverted, heavy duty baking sheets as my "stones".). 2. Remove dough from fridge*. On a lightly floured surface, divide dough evenly into two pieces. 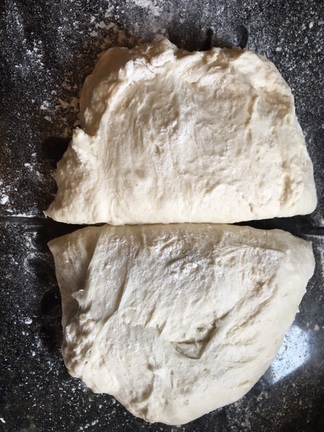 3. Take each half and fold the dough edges into the middle to make a rough ball. With the rough side down, roll the dough, using the counter as an aid, into 2 nice smooth balls. Place the balls on an oiled cookie sheet, several inches apart. Brush the tops of the dough ball with olive oil as well. Let rest on counter for about 1 hour. 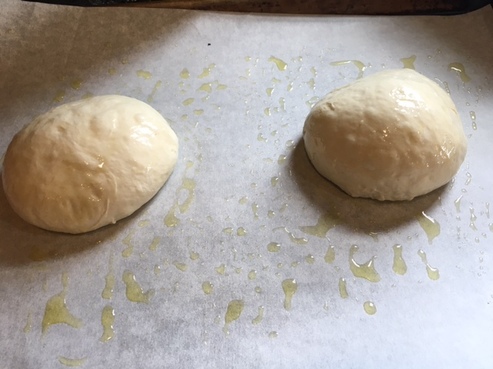 4. After an hour taking one ball of dough at a time, dip both sides of the dough ball in flour. Take a sheet of parchment, sprinkle it lightly with flour. Place the floured ball of dough on it and using your finger tips, dimple the dough.
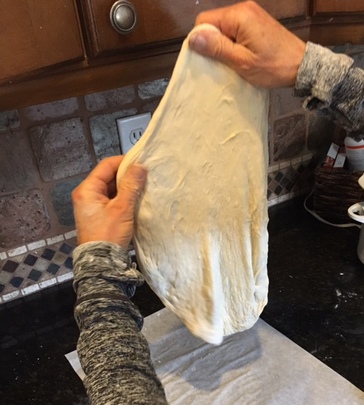
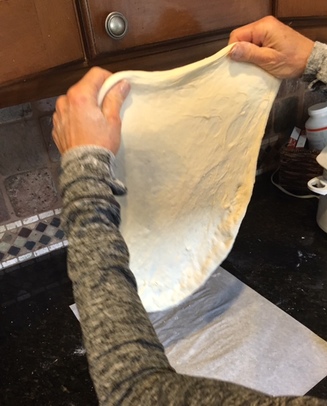
 5. Now pick up the dough with both hands (lightly floured) on the top edge of the dough. Using two hands, lift the dough in the air and letting gravity help you, spin the dough clockwise moving your hands around, until the dough has stretched out to about a 10" round. You can also keep it flat on your floured paper and stretch it by hand on the paper. I think you get a more even crust this way I demonstrate, but do what you are comfortable with. Just remember to keep your hands on the thick outer part of the dough and just allow the pull of gravity to do all the work, keeping the dough round in constant motion If your dough is really elastic. You may have to place the dough down on the floured paper and let it rest several minutes before trying again. Repeat with the other ball of dough. Also do not worry about getting a perfect round. A rustic shape is just as delicious!
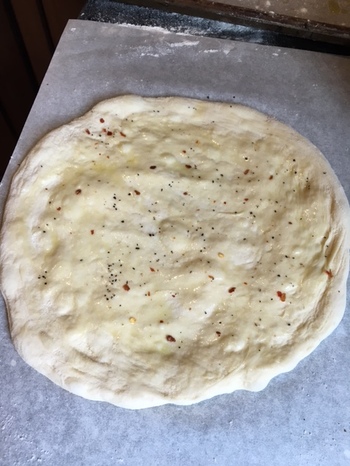
6. Once the dough has reached desired size, lay it gently back down on the floured parchment paper. 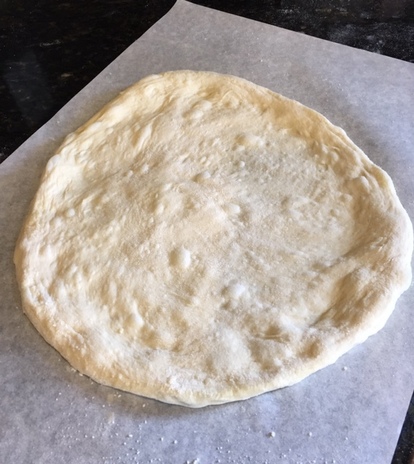 7. Lightly brush the tops with olive oil. Sprinkle each dough round lightly with a small pinch each of sea salt, black pepper and crushed red pepper. Top with mozzarella. Sprinkle each with 1 Tablespoon freshly grated Parmesan and drizzle very lightly with additional olive oil (optional).
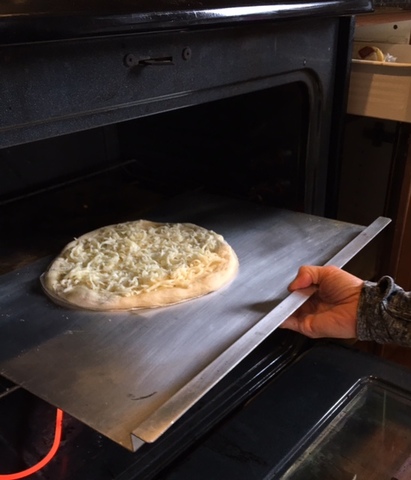
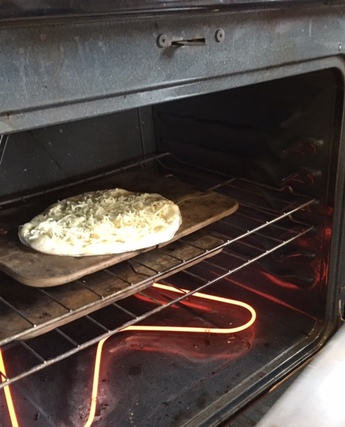
8. Trim parchment with scissors all around dough.  9. Using a pizza peel or rimless baking sheet, transfer pizzas to preheated pizza stones inside oven, parchment paper and all. This is my fool-proof "trick" for building and transferring a pizza into the oven. Works like a charm every time.
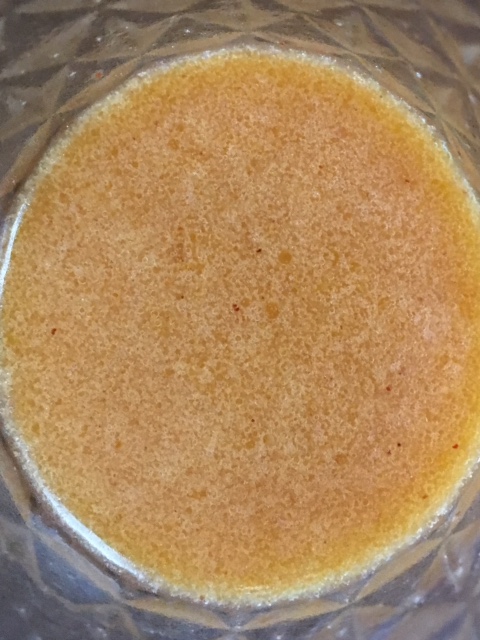
10. Let pizzas bake about 6-10 minutes. (Disclaimer: Every oven is a little different, so please check on your pizzas, rotate them as needed from top to bottom (using peel or rimless baking sheet) or rotate them around on their stone to ensure even baking. Your pizzas are done when the crust is golden and crackly, cheese is bubbly and maybe lightly browned in spots, and bottom of pizza is nicely golden. 11. While pizzas are baking whip up salad dressing: whisk together 2 Tablespoons Extra Virgin Olive Oil, lemon juice, pinch each salt and pepper, garlic and Dijon. Set aside. 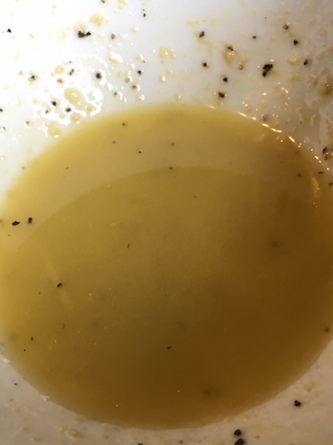 12. When done remove pizzas from oven and transfer to plates. 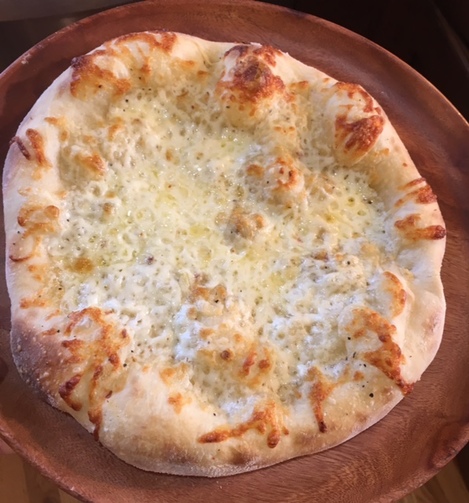 13. Immediately toss salad greens with dressing to taste. 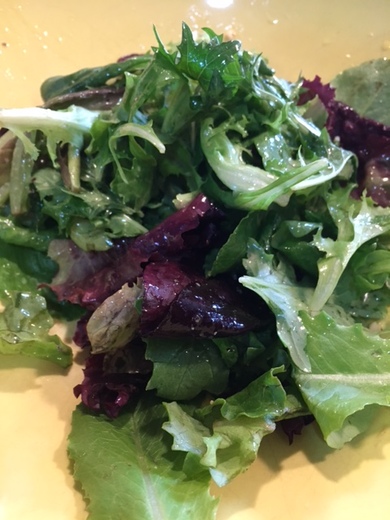 14. Once dressed, top hot pizzas with salad greens. Shave Parmesan cheese on top and serve. Dig in! 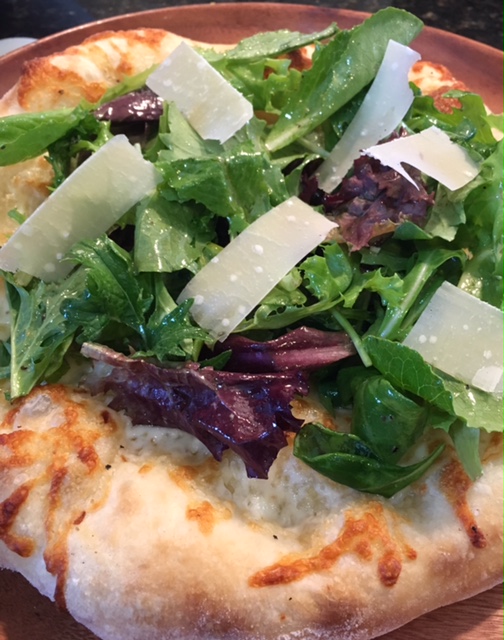 * if you are using home made dough (I have several favorites I will share with you another time) my suggestion is to let it rise slowly in refrigerator for several hours and possibly over-night to develop the best flavor. Don't punch it down, just gently divide the dough and roll into balls as instructed. The time on the counter is less about a second rise than it is about warming up the dough closer to room temp. However, if you have beat down the dough, you may need to let it sit out longer once you form into balls to allow the nice air bubbles to form again. These give the dough great character and lightness.
|

Archives
December 2019
Categories
All
|
||||||||||||||||

 RSS Feed
