|
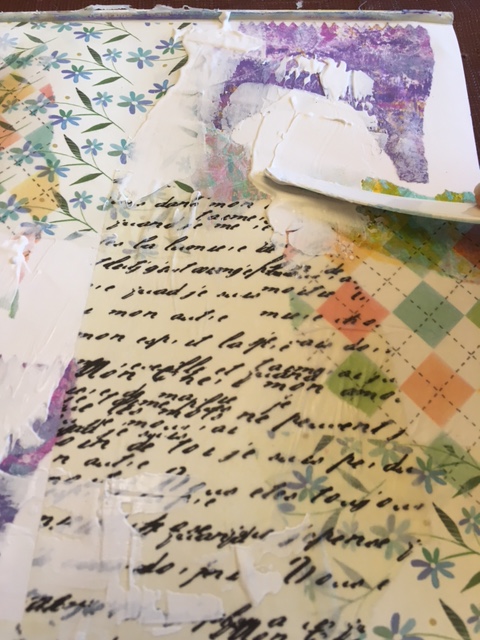
"I'm always thinking about creating. My future starts when I wake up every morning... Every day I find something creative to do with my life. " - Miles Davis If you have been following my blog for the past several months, you may know a little bit about my art journey. If not, and you want to know more, you can read about it here. Ifeel like my growth in art has taken a leap and that has me very excited. I am very much still in student mode and learning and trying all kinds of things. I find I am a lot less nervous to try new things than ever before. I think that helps. I am especially intrigued by intuitive painting, especially in the style of Tracy Verdugo, Flora Bowley and others.I have been super scared to try it on my own. Then I found this YouTube video from Willowing (artist Tamara La Porte) that is leaning in that direction (Donna Downey also has a couple), and thought I could tackle that. If you want to watch it, you will find it here. So that's what I attempted to do and here is the result. I kind of love it. 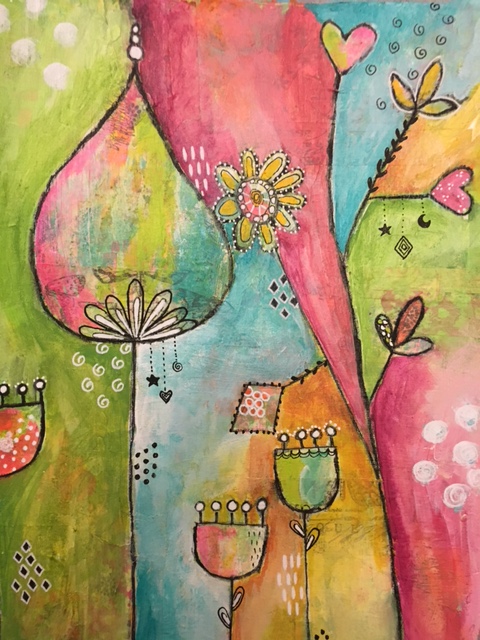 If you are newish to art like I am , I want to encourage you to try things. In the end it is only paint and paper and can be covered up and re-tried. I know I have gone into creating something with the expectation that it comes out "good." It's ok if it isn't good. I know I learn so much just by trying (yes I'd still like all my art to be good, but I will get there eventually!). What do you say we give this a try together? 1. First I started by collaging a variety of papers (gelli prints, tissue paper, scrapbook paper, book text...) to a piece of Bristol Vellum paper using Liquitex Liquid Matte Medium (you can use a glue stick, mod podge, etc.) The order and choice is completely random, though I did try to repeat the type of paper in a few places around the paper as you will see. 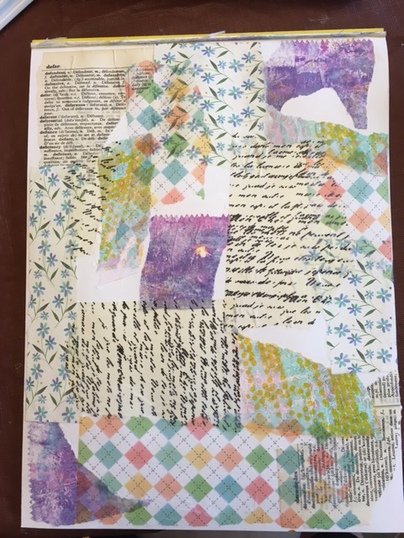 2. Then with a palette knife, I spread some Liquitex gesso over most of the piece, letting it have some texture here and there. It helps push the patterns back into the paper and also provides some "tooth" for the upcoming paint layers to adhere to.
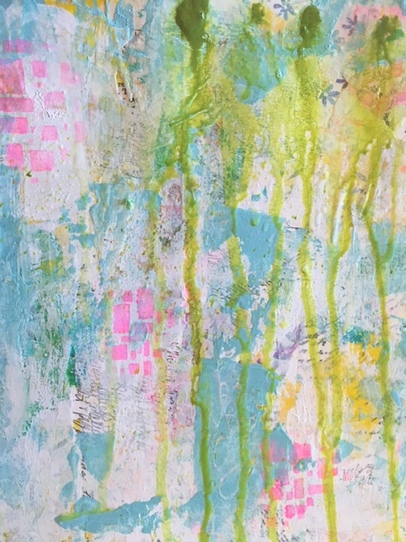
3. Then I added some scribble text here and there on any white space, alternating horizontal and vertical placement. It's completely optional, but I like the way it looks. I learned about this style of writing from Dina Wakely. Its scribble journaling. All my thoughts and feeling are there, but you can't really read it. most of it will be covered up anyhow. 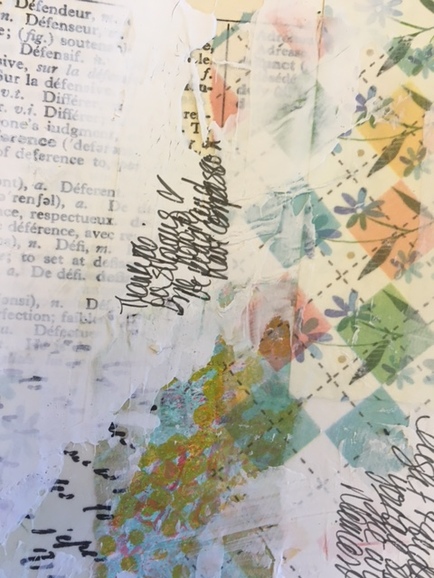 4. Then with a palette knife and a brayer, I started adding some paint layers.I used Golden Artist acrylics and Martha Stewart Craft paint. 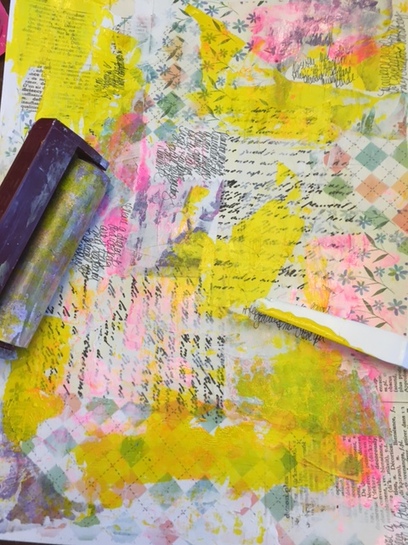 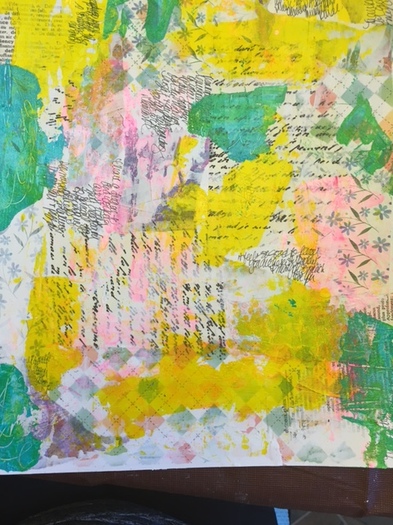 5. I also made some marks with the tip of a wooden skewer for added texture as I went along, completely random. Obviously you have to do that in wet paint.. 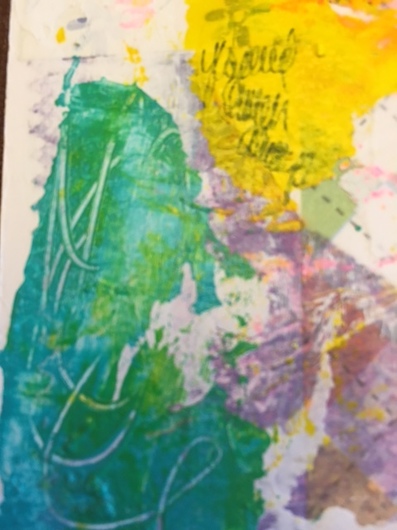 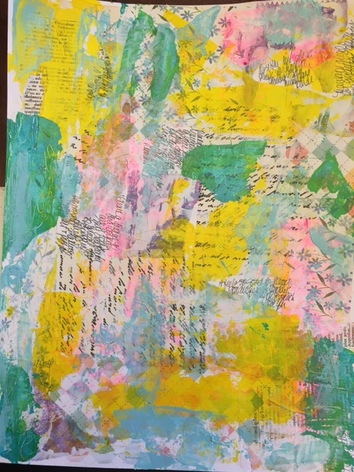 6. Next I added white paint with a brayer to once again, punch back all this craziness and give the piece some cohesiveness. It makes a big difference, don't you think? Next I added some more paint, this time through a stencil, using a make-up sponge (I buy them at the dollar store). 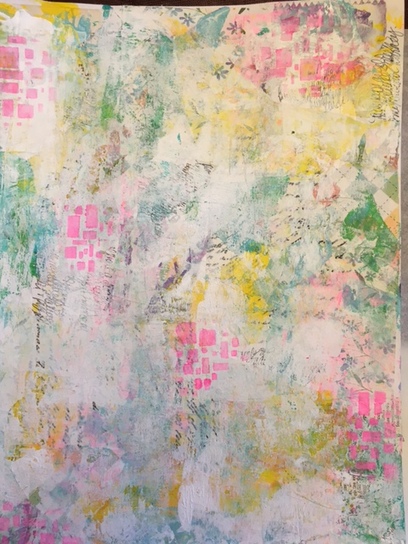 7. Then I added some drips using a Golden Fluid acrylic in Green gold spritzed with water and added some more paint with my palette knife.
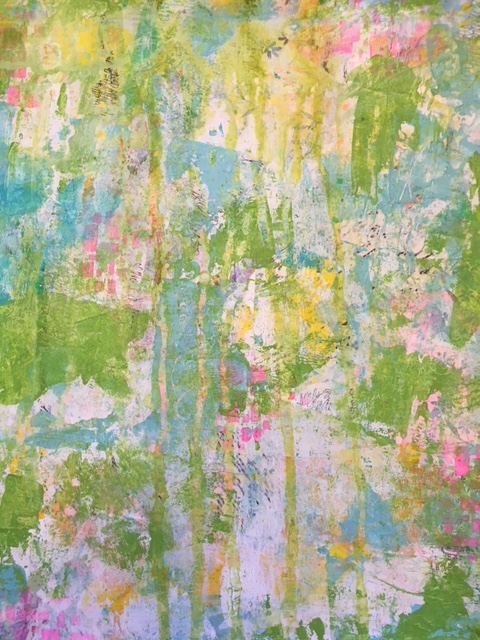
8. I patted back some of the drips with a baby wipe before proceeding with more stenciled paint. It's looking kind of crazy again (but so fun to do all this!). 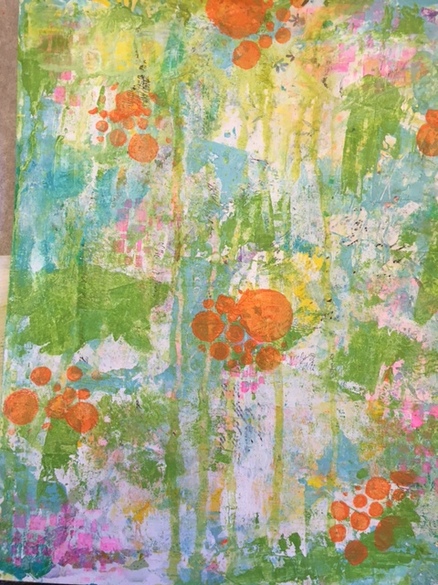 9. Next I added some washi tape pieces then a layer of Liquitex clear gesso. It helps glue the tape down and adds a little grit to the surface for future layers, but dries absolutely clear and matte. You could use regular matte medium here, too. 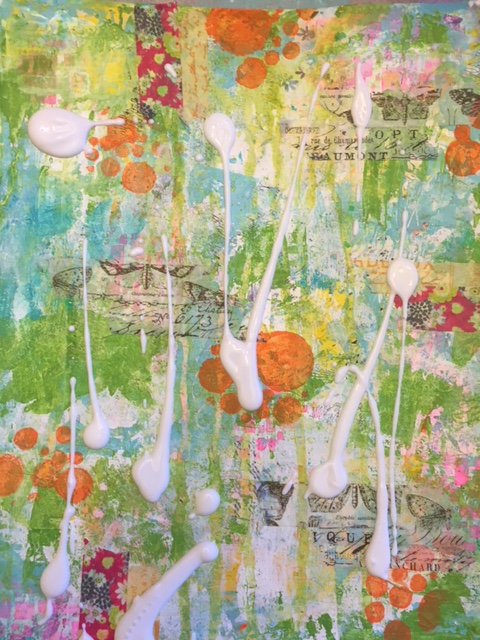 10. Up next some more white paint applied with my brayer or maybe just my fingers (I love to use my fingers) to try and unify the piece once again. 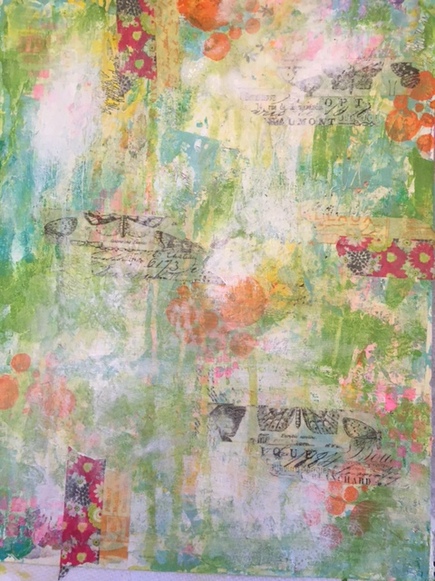 11. Now for the scary part- doodling the design. I used a Stabilo marks all penicl in black which reacts with water. More on that later. I ended up also adding another funky flower half in the lower left hand corner of the piece before adding more paint. 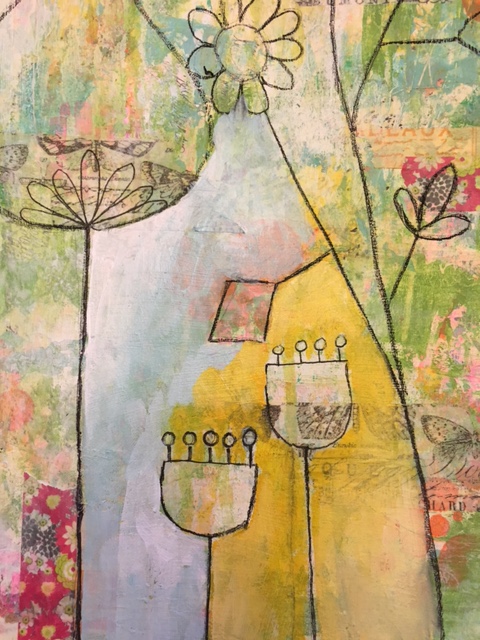 12. Now I started adding paint in blocks, paying attention, to the best of my ability and untrained eye, to lights and darks and using Golden's Fluid titanium white paint for some blending, too.I used my fingers and brushes for this. I was careful to try and not get paint on the Stabilo lines as even the paint would activate the pigment in the pencil. I wasn't perfect. Later on I went in and activated the pencil lines to make them darker using a waterbrush. 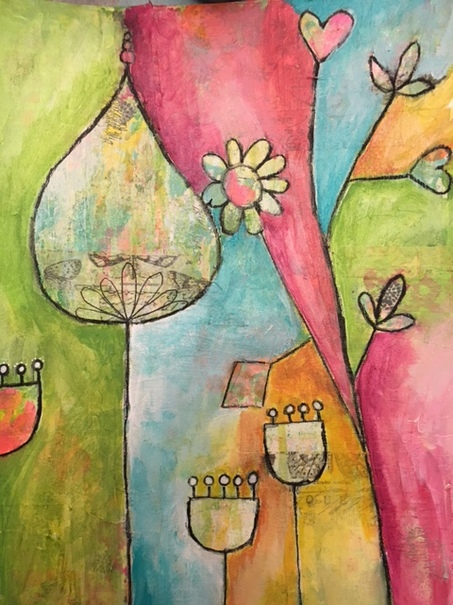 13. i continued adding/blending paints and added some doodles (let your imagination fly) with my Sharpie White paint marker and my black Sharpie (posca pens would be another great choice). Here is the finished piece as seen earlier.  14. Here are som close ups of different sections so you can see how the layers still show through, giving visual interest to the piece (so says me!). Isn't that fun?!!   
0 Comments
|

Archives
December 2019
Categories
All
|


 RSS Feed
