|
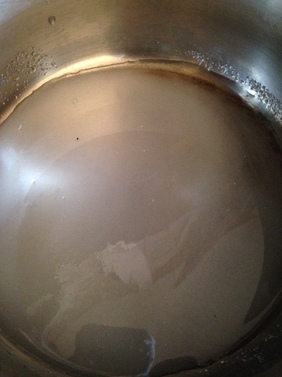
“And when all of the flourless chocolate cakes & chocolate mousse or ganache cakes have come and gone, there will still be nothing like a fudgy brownie, dry & crackled on top, moist & dense within, with a glass of cold milk.” -Richard Sax Did you try the brownies I featured last week (recipe here)? Well, if not, I bet today's post is going to have you running to preheat the oven! This recipe for Caramel Brownie Parfaits is so good! This recipe is a family favorite and we tend to make them for lots of our special occasion and holiday meals because they are, well, um... caramel and chocolatey , like together! There are a few steps, but all of them are quite simple. Also a little waiting is involved, so plan to start the recipe about 24 hours ahead, especially if you also need to make the brownies. In fact, this is a great make ahead dessert.. The caramel sauce can be made up to a week ahead, store in the refrigerator. The brownies can be made up to 3 days ahead, store tightly wrapped in the refrigerator. Make the caramel cream 24 hours in advance. Assemble parfaits up to 24 hours ahead of serving. Got your game plan ready? The recipe makes about 6 , depending on the size glass you use. They would also be so, so darling (and less caloric) made in little mini portions for a crowd. Whatever size you choose to make them, these creamy, fudgy, gooey parfaits will have you licking the spoons and the inside of the glass for every last bit! So let's get started, shall we? Caramel Brownie Parfaits 3 cups (approximately) of cubed (about 1/2") pre-made brownies 4 large egg yolks 1 1/2 Tablespoons corn starch 3/4 cup plus 10 Tablespoons granulated sugar, divided 3/4 cups milk, divided 1 1/2 cups plus 2/3 cup heavy cream, divided 2 teaspoons pure vanilla extract, divided 1 small pinch sea salt 1 tablespoon unsalted butter 1. Make Caramel Cream: In a medium sized bowl, whisk egg yolks well. While whisking, sprinkle in 3 Tablespoons granulated sugar. Combine well. Whisk in cornstarch and lastly, whisk in 1/4 cup milk; set aside. 2. In a 1 1/2- quart saucepan, combine 7 Tablespoons granulated sugar and 2 Tablespoons water.
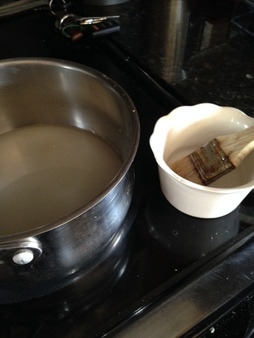
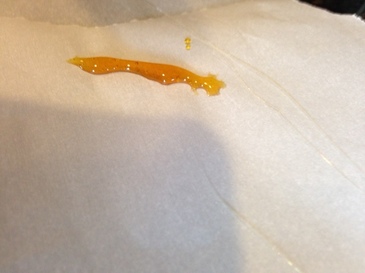
3. Cook sugar mixture over medium to medium heat, stirring. STOP stirring as soon as mixture begins to boil. Before mixture comes to a boil, brush down sides of pan occasionally with a wet pastry brush. Continue cooking sugar, swirling pan gently as needed to cook evenly, until mixture is a medium dark amber color.
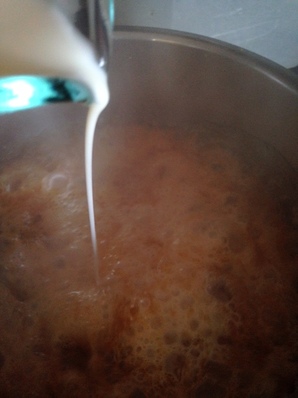
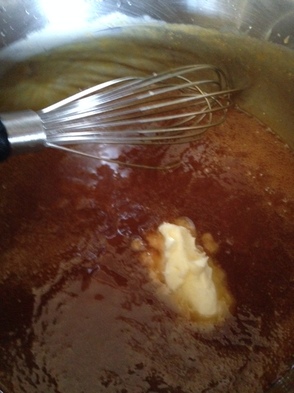
4. Once desired color is achieved, remove pan from heat and immediately yet carefully pour in 1/2 cup of milk. Mixture is extremely hot and will rise up and sputter- exercise the utmost caution here. 5 Return pan to heat and cook over medium-low heat, whisking continuously until caramel is melted and mixture is smooth. 6. Temper reserved egg yolk mixture by pouring about 1/3 of the hot milk-caramelized sugar mixture into egg yolks, while whisking constantly (you don't want scrambled eggs here). Return egg-milk mixture to pan and cook, over medium heat, stirring constantly with a heat proof rubber spatula, until mixture has come to a boil. Cook for 1 more minute, stirring constantly. 7. Immediately strain mixture through a fine sieve into a clean heatproof bowl to remove any lumps then stir in 1 teaspoon vanilla. 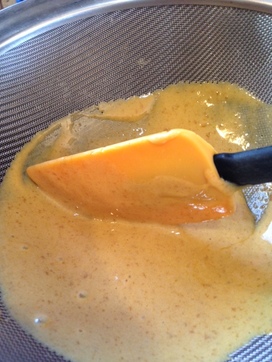 8. Cover mixture directly on the surface with plastic wrap, poking a hole in to allow steam to escape. Refrigerate until very cold at least 1 hour or up to 24 hours. 9. Make Caramel Sauce: in 1 1/2 qt sauce pan, combine 3/4 cups granulated sugar with 3 Tablespoons water. Combine well. As with caramel cream recipe, cook sugar over medium to medium-high heat, stirring, until mixture comes to a boil (brush down sides occasionally with wet pastry brush). 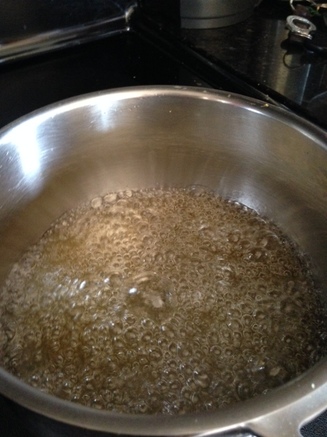 10. Once mixture comes to a boil, STOP stirring. Continue to cook, swirling pan occasionally as need to cook evenly, until mixture comes to that same medium-dark amber color mentioned above.  11. Remove from heat and very carefully pour in 2/3 cup heavy cream (mixture is extremely hot and will sputter-exercise extreme caution).
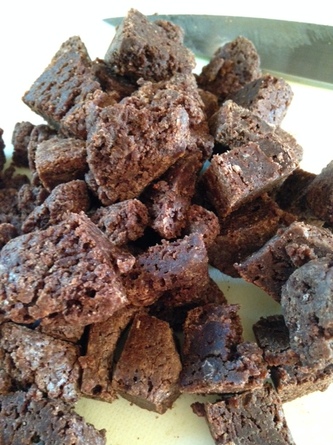
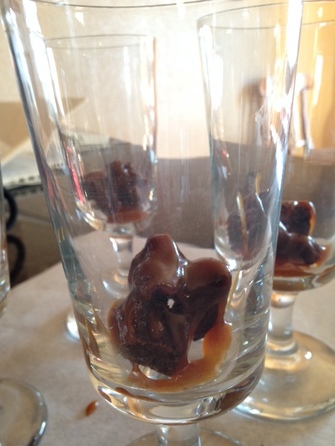
12. Return to heat and cook over medium-low heat until caramelized sugar has melted and mixture is smooth. Remove from heat and transfer to a heat-proof bowl or pitcher. Stir in butter, small pinch of sea salt and 1 teaspoon vanilla. Combine well. Allow to cool at room temperature, then cover and store in the refrigerator until needed. 13. Assemble Parfaits: Remove caramel cream from refrigerator. In a mixing bowl, beat 1 1/2 cups heavy cream with a hand held mixer until medium peaks form. 14. Whisk about 1/3 of cream into chilled caramel cream base, Fold remaining whipped cream into caramel cream; set aside.  15. Remove caramel sauce from refrigerator. Gradually and gently liquefy it at 15-20 second intervals in the microwave on defrost just to a drizzling consistency (you don't really want to heat it it as otherwise the hot caramel will melt your caramel cream. 16. Cut your brownies into cubes, if you have not done so already. Place 3 brownie cubes and 2 -3 teaspoons of caramel sauce in the bottom of each glass (adjust accordingly if you chose to make mini versions).
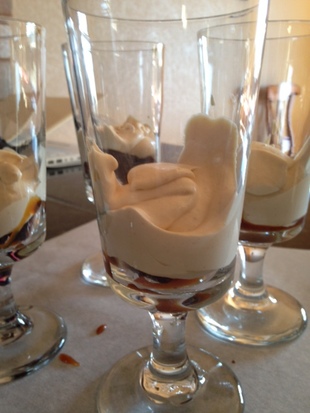
17. Top with approx. 1/4 cup of caramel cream. Continuing layering brownies, caramel sauce and cream, ending with brownie cubes and caramel sauce as shown.If not serving immediately, cover with plastic wrap and store in the refrigerator.
18. When ready to serve, top with whipped cream, chocolate sprinkles and a small brownie cube, if desired. 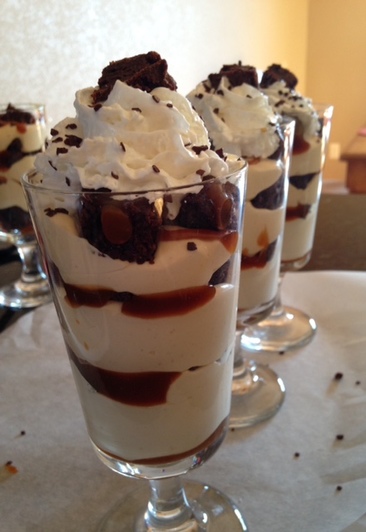 19. Dig in! Store any leftovers in the refrigerator for up to 2 days. 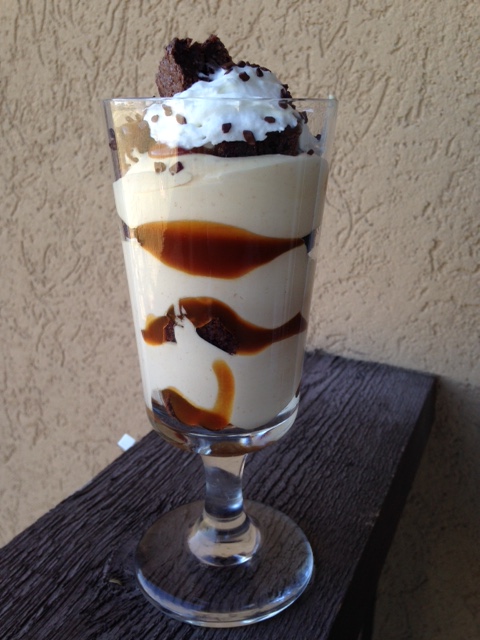 Note: this parfait would also be great with a little added crunch. Try layering toasted chopped pecans or these praline pecans (divine!!) in the brownie layer. Feel free to leave a comment if you try this recipe. I'd love to hear your thoughts!
Happy creating! ♥
0 Comments
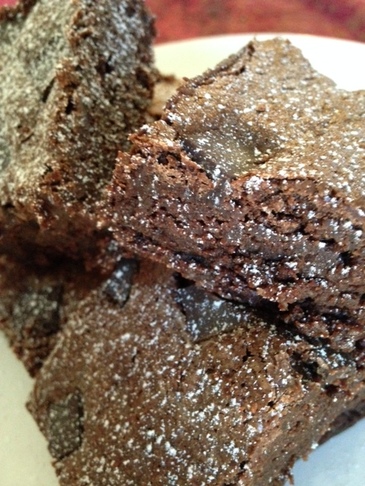
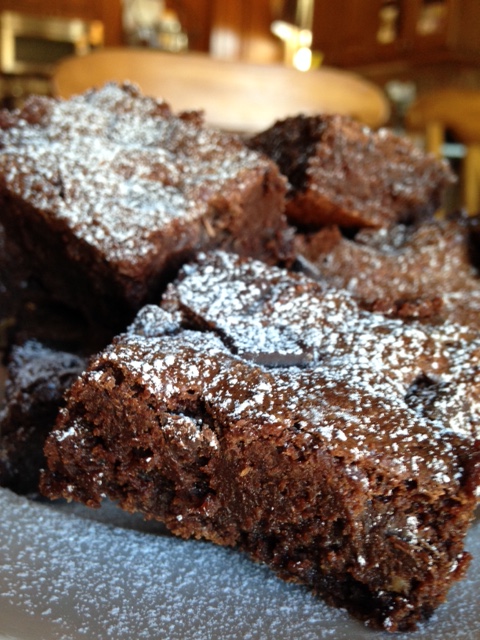
“There is nothing better than a friend, unless it is a friend with chocolate.” -Linda Grayson I am so all about the chocolate, always have been. I grew up in a home where not everything was chocolate (dad always wanted cherry pie for his birthday for example), but it actually seemed like it was. I was out of college before I even knew what a snickerdoodle was (chocolate chip cookies and brownies in rotation were our most common desserts). Now I enjoy lots of different flavors but chocolate remains my true love. I've been working on my chocolate chip cookie and brownie recipes for quite some time. Up until recently I was pretty happy with my current recipes. Then my daughter was diagnosed with gluten sensitivity, and I was also advised to stay clear of gluten as I try to resolve some auto-immune issues. Personally I am not a huge fan of gluten-free baked goods. I find the taste starchy and off-putting. For some reason I find the gluten free flours bother my tummy a bit, too. I have used Bob 's Red Mill 1 to 1 Gluten Free baking flour with really great results, but again, the taste is just not what I am looking for. It's just my personal experience. You may feel differently, and it's all good. So when I started thinking about gluten free brownies, the thought crossed my mind to make them in the style of flourless chocolate cakes, some of which use ground almonds in place of flour to add structure. So I did just that, and not only are they wonderful, I believe they are now my favorite brownie ever! The chocolate flavor is more vibrant than the version with all -purpose flour (which is an awesome brownie anyhow). So unless you are allergic to nuts, these grain free, gluten free (and decadently fudgey) brownies make one hell of a dessert! If you are allergic to nuts, don't worry, I tell you how much all purpose flour to use if you want to make them the traditional way, and you will NOT be disappointed!. Coming on Monday I'll be sharing an amazing dessert to use the brownies in-so stay tuned! It's a 2 for 1! Best Ever Fudge Brownies- makes 1- 9x13" pan 1 1/2 cups plus 1 Tablespoon almond flour (or you can use 1 1/3 cups all-purpose or 1:1 Gluten Free flour or Einkorn flour, if you prefer) 1/2 teaspoon baking powder 1 teaspoon kosher salt 1/8 teaspoon instant espresso powder 4 ounces unsweetened chocolate, chopped 8 ounces bittersweet chocolate, chopped 2 1/2 sticks (10 ounces) unsalted butter, cubed 2 1/2 cups granulated sugar 4 teaspoons pure vanilla extract 6 large eggs, room temperature 2-3 Tbsp whole milk or heavy cream (optional) 1 cup of chocolate chips or chunks (optional) Powdered sugar for dusting (optional) 1. Preheat oven to 325 degrees F. Line a 9x13" baking pan with aluminum foil. Spray with non-stick cooking spray; set aside. 2. With a whisk combine almond flour (OR all-purpose OR gluten-free flour, as you wish), baking powder, salt and espresso powder in a medium bowl; set aside. 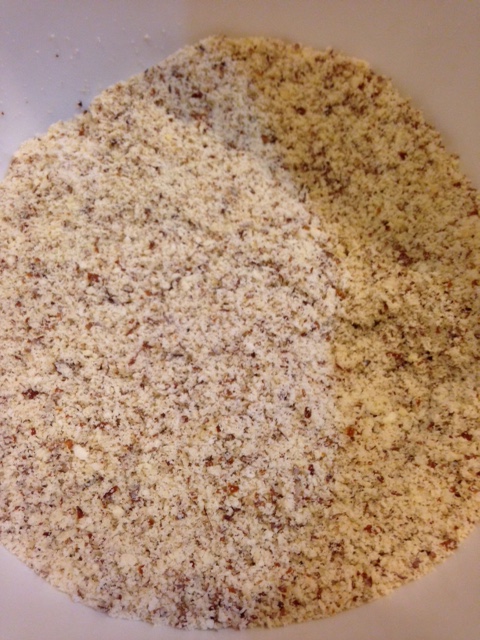 3. In a microwave safe bowl, combine the butter, unsweetened and bittersweet chocolates. Gently melt the chocolate-butter mixture in the microwave, at 1 minute intervals until completely melted and smooth. 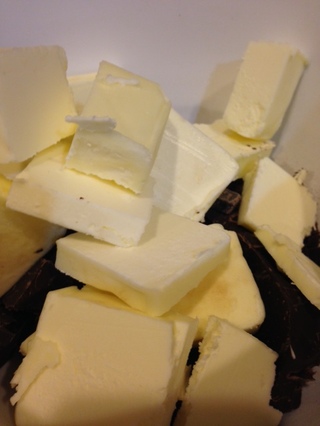 4. Whisk in the sugar until very well combined. Whisk in eggs, 2 at a time, and vanilla. Whisk until smooth. 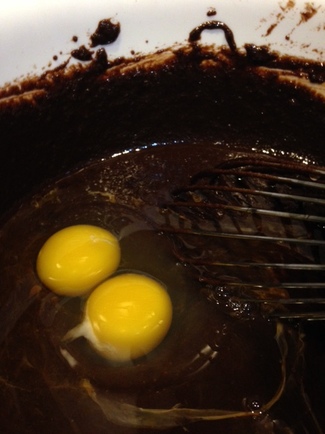 5. With a spatula or wooden spoon, stir in the almond flour mixture (or whatever flour you chose). 6. Dump brownie batter into prepared pan, smooth top to level it out . I like to lightly brush the top with milk or cream to keep it soft (totally optional). Sprinkle chocolate chips or chunks evenly on top if using. 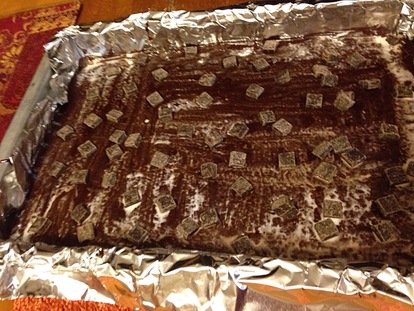 7. Bake the brownies on the center rack of the preheated oven for 30-35 minutes or until a toothpick inserted in the center comes out with a few moist crumbs clinging to it. 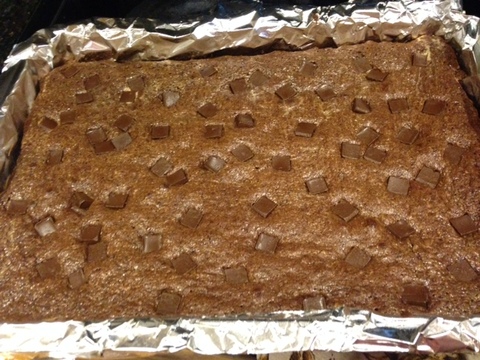 8. Let cool completely, then refrigerate for 3 hours or over-night before cutting. 9. Remove brownies from pan using the foil to help. Remove the foil from the brownies and cut into desired sized brownies. I like to trim the edges for nice neat squares (the pastry chef in me plus you need a snack about now, don't you?). Dust with powdered sugar, if desired. 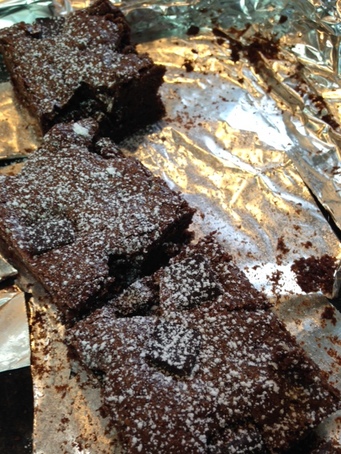 10. Grab a glass of cold milk and enjoy!
Note: I prefer to store these well-wrapped in the refrigerator to preserve freshness longer.
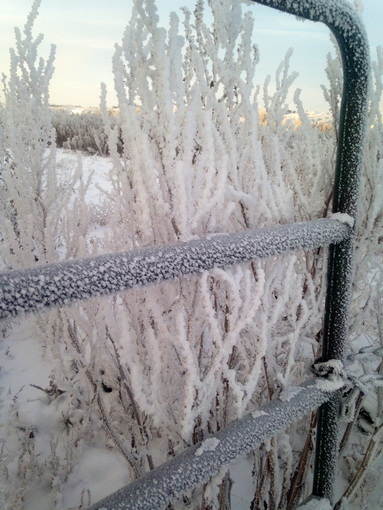
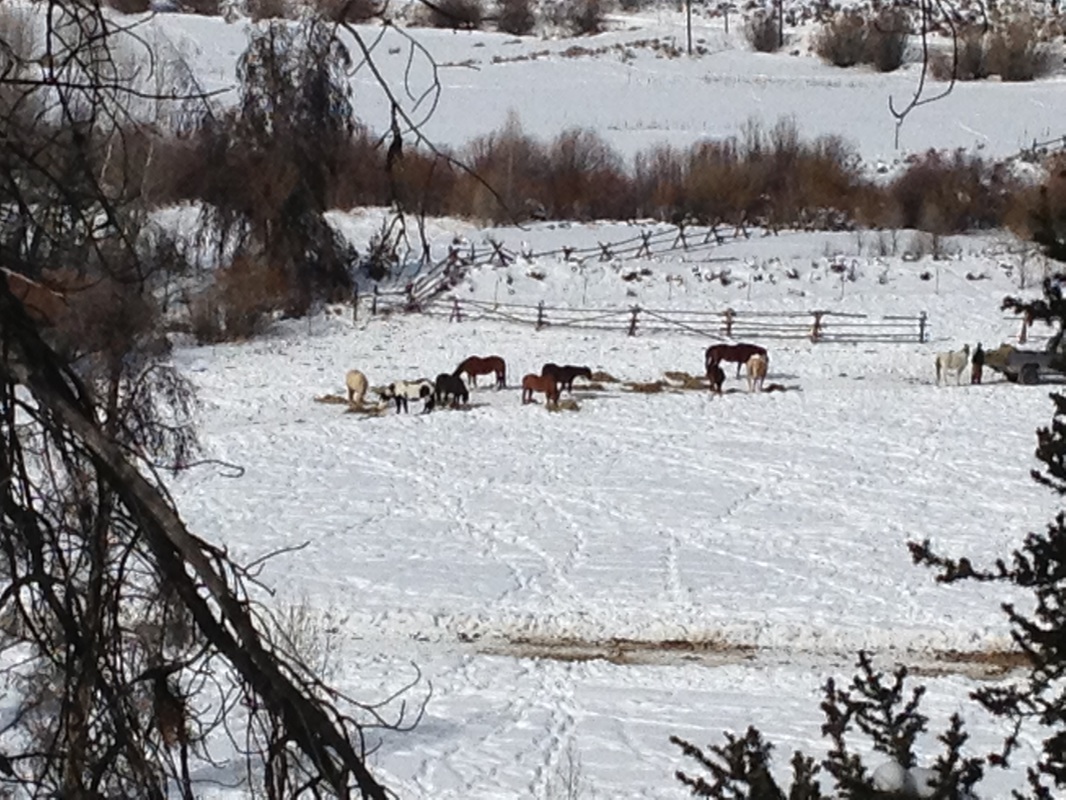
Remember to stop back on Monday for a super yummy dessert you can use scraps or chunks of these brownies in. I can't wait to share it with you!♥ “I wonder if the snow loves the trees and fields, that it kisses them so gently? And then it covers them up snug, you know, with a white quilt; and perhaps it says "Go to sleep, darlings, till the summer comes again.” -Lewis Carroll, Alice's Adventures in Wonderland & Through the Looking Glass I know my last post was a bit whiny about winter, but truth be told I love living where there are four seasons. Although I am not really a super fan of really cold nor really windy weather, both at least bit players in the whole winter thing, I truly love snow. I mean LOVE. I get as excited now as I did as a kid when it snows. I just think it is magically beautiful. Here are some of my favorite snow images. I hope you enjoy them, too. At least you won't have to shovel.
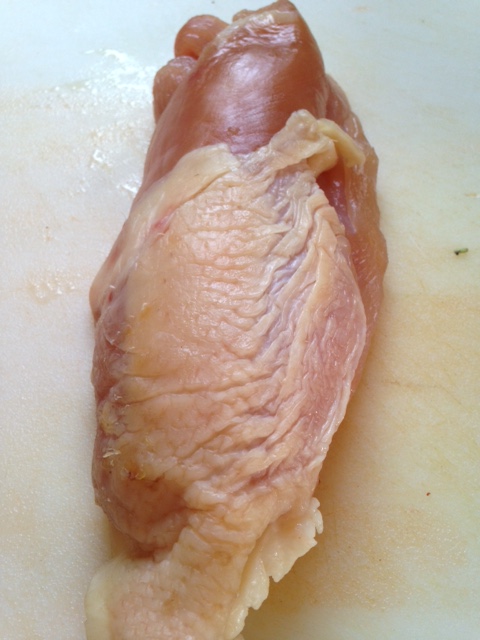
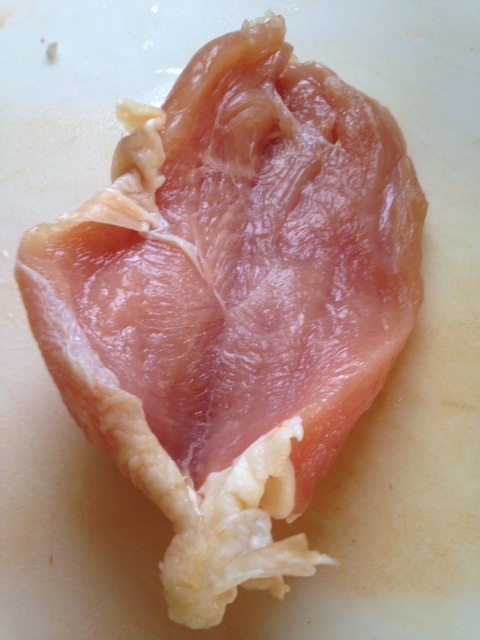
"I can't think of a more perfect meal than a comforting, big bowl of soup." -Cristina Ferrare Here in Northern Colorado we have been spoiled by over 2 weeks of unseasonably warm weather. It has been Spring Fever all the way (insert happy dance here)! And it's not like winter has been so unbearably difficult this year (it for sure hasn't), but for the first time in recent memory, we have had snow and consistently cold temperatures pretty much since Thanksgiving (that is pretty unusual for this area. Colorado , for a winter state, generally has it pretty good). So we are all kind over the winter thing...or so we thought. Then today happened. Though signs of spring are sprouting up everywhere, a cold front came in, gray skies and wind in tow, wagging a finger and letting us know "not so fast" on this Spring thing. So on a day like today, when a brisk chill is in the air, I automatically go into soup mode. Today I thought I'd make a hearty soup chock full of veggies with some smoked Polish sausage thrown in for good measure, not to mention great flavor. I used kale in this recipe, but you can easily substitute fresh baby spinach if that is more to your liking. Bring it, winter- I can handle it! Sausage and Bean Soup with Kale- serves 6-8 as a main course 1 lb. Smoked Polish Sausage, sliced lengthwise in half and cut cross-wise into 1/4 " half moons 1 1/2 cup diced onion 1 cup diced fresh celery 1 1/2 cups sliced carrots 2 cloves garlic, peeled and minced 1 -14.5 ounce can diced tomatoes in juice 2- 14.5 ounce cans of Great Northern or Cannellini Beans, rinsed and drained 8 cups chicken stock, purchased (low-sodium) or homemade 4 sprigs fresh thyme small pinch crushed red pepper flakes (optional) 1 bay leaf 2 cups, packed, thinly sliced Lacinto kale (center ribs removed) Kosher salt and coarse ground black pepper 1 Tablespoon good quality red wine vinegar Freshly grated Parmesan Cheese 1. In a 6-7 qt Dutch Oven or soup pot over medium heat, saute the sausage until browned, stirring occasionally. Remove the sausage to paper towels to drain. 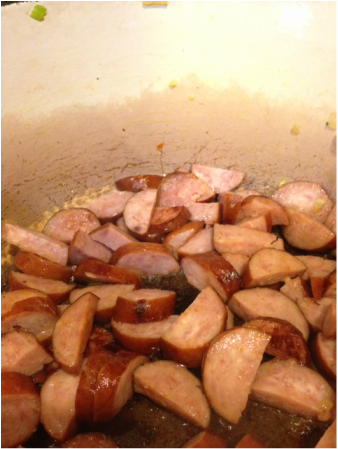 2. Immediately add 1 tablespoon of vegetable or olive oil to pot and stir in celery, carrots, garlic and onion. Season with a generous pinch of salt and pepper.Cook, stirring often, until wilted and onion is translucent. Stir in thyme sprigs, crushed red pepper, if using, and cook, stirring, for another 2 minutes. 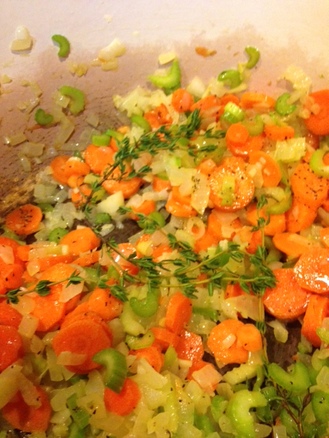 3. To the pot add in chicken stock, 2 cups of water, tomatoes, bay leaf and beans. Bring to a boil over medium high heat, stirring occasionally. Reduce heat to low, add in browned sausage and simmer 45 minutes longer, with the cover just slightly open. 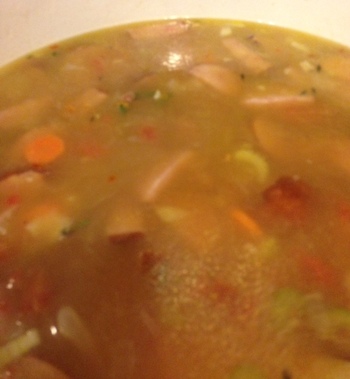 4. After 45 minutes, taste for seasoning and add salt and pepper as needed to suit your taste. Stir in kale. Cover pot and let simmer another 15 minutes, until kale is wilted and tender. 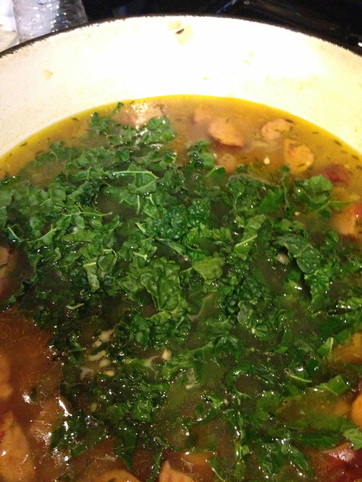 5. Stir in red wine vinegar. Cook 1 more minute. Taste for seasoning one last time and adjust as needed. Remove and discard bay leaf and thyme stems. Ladle soup into bowls, top with freshly grated Parmesan cheese, and serve immediately. Mmm, Mmm good!  “Cooking is at once child's play and adult joy. And cooking done with care is an act of love.” -Craig Claiborne It's no secret by now that I love to cook. I especially love fresh, un-fussy food. I love it even more when the fresh, un-fussy food appears to look like it is something really special. That's the case with this recipe for Pan-Roasted Stuffed Chicken Breasts. It's a slight variation on a recipe I used to offer at my now defunct business, Meals Made Easy, quite a few years back. It couldn't be easier, and it is really scrumptious. I use antibiotic free organic chicken whenever I can get it. When I do, I salt the chicken the night before with a generous sprinkle of kosher salt on both sides, then lay it on a cooling rack over a sheet pan and refrigerate it., loosely covered, over-night (24 hours). That ensures the chicken will be moist and delicious. It's a method made popular by the late great chef Judy Rodgers of Zuni Cafe fame years ago. If you buy chicken already containing a salt solution as part of its processing, I would probably skip that step. I use skin on, boneless chicken breast halves. Your butcher should be happy to remove the bones for you, but it really isn't difficult to do at home either. You can see a tutorial here. Pan-Roasted Stuffed Chicken Breasts-Serves 6 6 Boneless, skin ON chicken breast halves 5 ounce fresh goat cheese log (chevre) 1/4 cup chopped sun-dried tomatoes, packed in oil and drained 1/4 cup fresh basil, cut in thin chiffonade Kosher Salt and Coarse ground Pepper 2-3 large cloves garlic, peeled and smashed 4 sprigs fresh thyme 2 tablespoons unsalted butter 2 tablespoons vegetable oil 1. Preheat oven to 375 degrees F. 2. In a small bowl, place the fresh goat cheese, chopped sun-dried tomatoes, basil and a small pinch of salt and pepper. Mix with a wooden spoon or spatula until well combined; set aside. 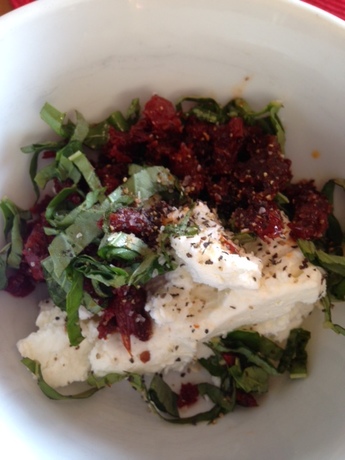 3. On a clean cutting board, slice each breast through the middle, stopping just shy of cutting all the way through so the breast half will open up like a book.
4. Divide the goat cheese mixture evenly on top of the bottom half of all 6 sliced chicken breasts Spread it evenly out across the opening, leaving a border around the edge clear. 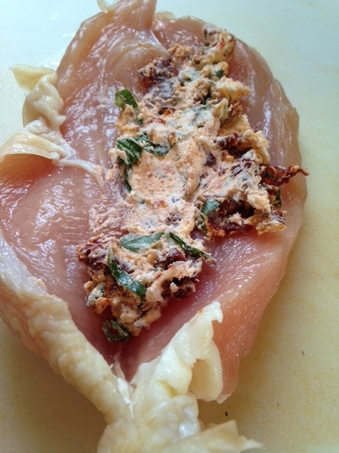 5. Fold top flap of chicken over the filling, and gently but firmly press seam together, pushing the skin down over the seam as it will allow. Season the top with salt and pepper (omit salt only in this step if you salted the chicken over-night). 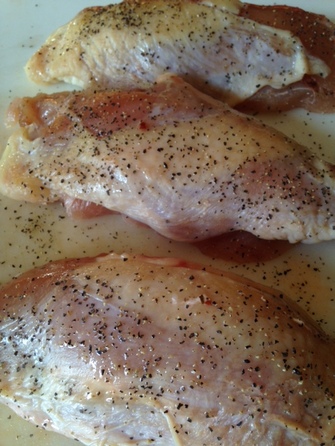 6. In a large oven-proof skillet (I used cast iron) heat butter and oil over medium heat until sizzling but not smoking. Place the chicken skin side down in skillet and cook, 7-10 minutes, until nicely browned. Flip chicken, add in thyme sprigs and garlic and place in hot oven. 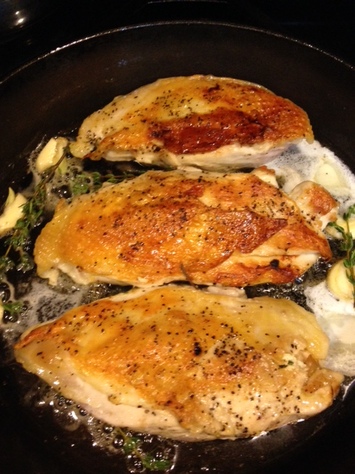 7. Roast chicken in oven for another 7-10 minutes or until done (chicken will read 160 degrees F on an instant read thermometer. Carefully remove from oven (remember pan will be HOT!). Discard thyme and garlic.Transfer chicken to a cutting board and let rest 5 minutes before slicing. 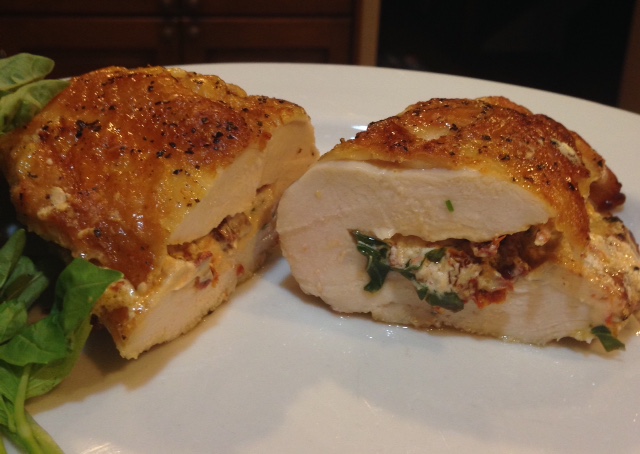 Doesn't that look scrumptious?!! Now get your bad self in the kitchen and whip this up stat! You won't be sorry.♥
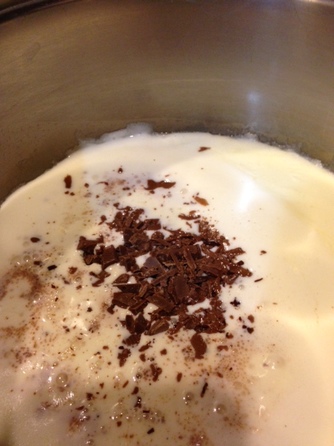
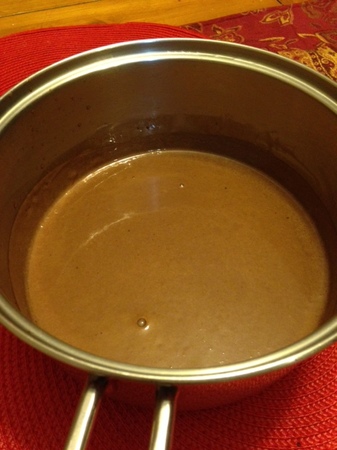
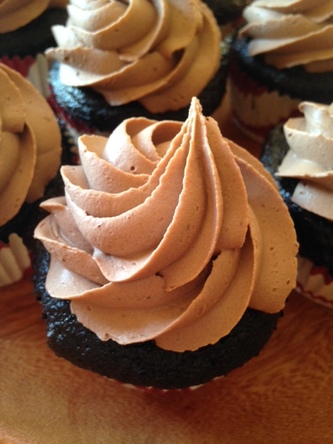
“Love is like a hollowed out piece of chocolate, filled with melted music.” -Jarod Kintz Tomorrow is my daughter's 17th birthday and Valentine's Day is not far behind. For me any celebration calls for chocolate. So I thought I'd share my technique for making an easy showstopper of a cupcake that you can whip up in time for Valentine's day or any time you need a little chocolate indulgence. You'll need to begin the recipe 24 hours ahead of time, but that's just to allow for refrigeration and time for the delightful cream (sooo delicious) to set up. Start with a baker's dozen of chocolate cupcakes, homemade (best) or store-bought. If you have more, simply increase the ingredients accordingly.Use the best quality chocolate you can afford as the flavor will be front and center. You will need a scale for this recipe as well that measures in both grams and ounces. Showstopper Cupcakes 13 prepared chocolate cupcakes, cooled 500 grams Heavy Cream pinch instant espresso powder (optional) 180 grams good quality Milk Chocolate(Lindt, Valrhona, El Rey or Callebaut are some brands to consider), finely chopped 4 ounces good quality Semi-sweet or Bittersweet Chocolate, finely chopped 1. In a medium saucepan, bring the cream to a boil.. Remove from heat and immediately add chopped milk chocolate and espresso powder to cream. Let sit 5 minutes, covered. Gently whisk until combined and smooth.
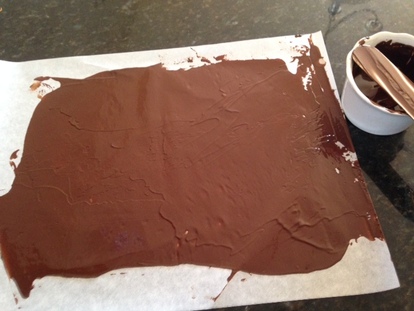
2. Immediately transfer mixture to a mixing bowl, place a piece of plastic wrap directly on the surface. Poke a slit in plastic wrap to allow steam to escape. Place in refrigerator for 24 hours. 3. Meanwhile, gently melt the 4 ounces of semi-sweet or bittersweet chocolate. Have 4 sheets of parchment paper nearby. 4. Lay out two sheets of parchment paper on a smooth, level surface. Pour half of chocolate onto one sheet. With an off-set spatula, spread the chocolate into a thin, even layer. Place another layer of parchment on top of chocolate, smoothing it out.
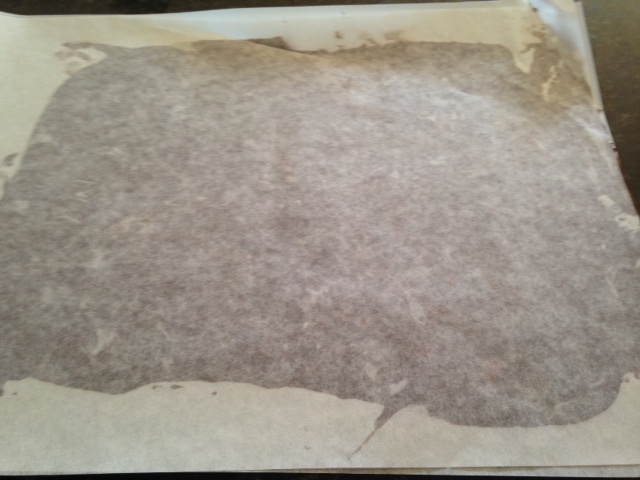
5. Roll chocolate sheet up and insert into an empty paper towel or toilet tissue tube. 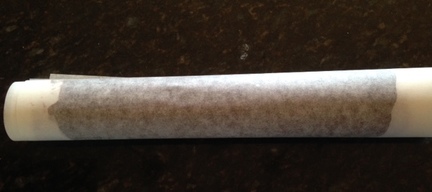  6. Repeat with the other half of the chocolate. Place both rolls in the freezer to set, for at least 30 minutes or over-night. 7. After 24 hours, remove the cream mixture from the fridge. With a hand-held or stand mixer, whip the chocolate cream on medium speed until thickened and the consistency is somewhere between whipped cream and soft mousse. It will be fairly thick. 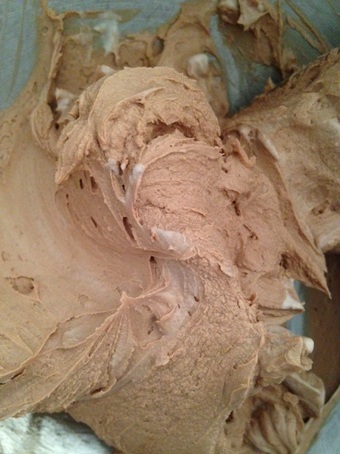 8. Remove chocolate rolls from freezer. On a clean sheet pan, unwrap the rolls, leaving shards of chocolate to use. Place sheet pan in freezer until ready to use. 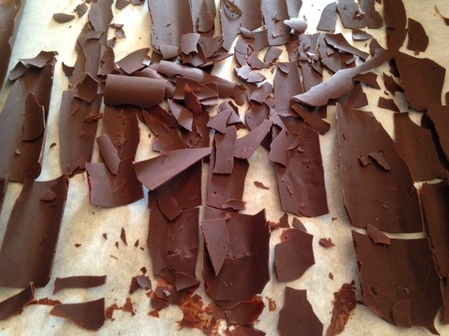 9. Meanwhile, place whipped milk chocolate cream in a pastry bag fitted with a large star tip. Pipe the cream mixture on top of each cupcakes in a generous rosette.
10. Remove chocolate shards from freezer. Top each cupcake with the chocolate shards as desired. Sprinkle tops of cupcakes lightly with powdered sugar. Eh voila! "Oohs" and "aahs" will abound! Share the love! ♥ 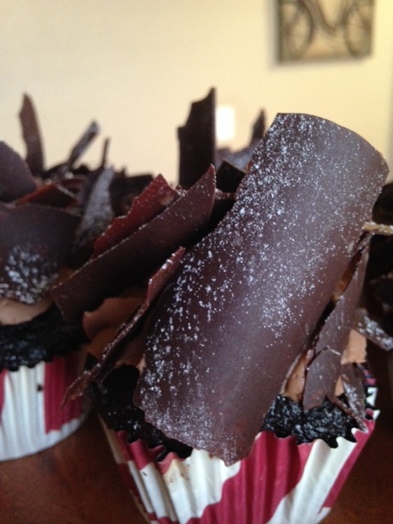 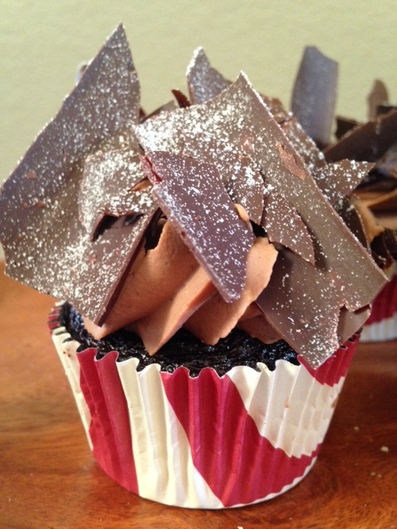 Note:
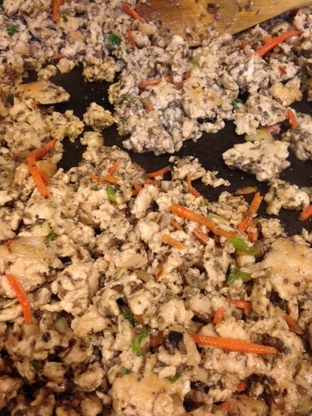
Cupcakes are best eaten within 24 hours. The cream will start to wilt in a day or two. Keep cupcakes stored in the refrigerator. Remove from refrigerator and let sit at room temp 20-30 minutes before serving. "Tell me and I'll forget, show me and I may remember, involve me and I'll understand." -Chinese proverb Not that Chicken stir-fry lettuce cups are authentically Chinese, but they are in the spirit of Chinese cuisine.You may have had them at the popular restaurant, P.F. Chang's. My local Chinese eatery, South China Restaurant in Fort Collins (the best!!), has a version that is to die for. Ming Lee, the chef-owner, serves them with a very unique orange sauce that I wish I knew how to make. So delicious! You can finds lots of recipes for Chicken Lettuce cups on-line; this is mine. It is a featured recipe in my e-cookbook on poultry which you can find here. My kids love this dish and I have made it for groups of their friends always to rave reviews (they don't even know it is full of mushrooms). It is fun to serve it family style and let everyone personalize their cups with the toppings they prefer. I know ground chicken isn't always easy to find. If you have a nice butcher he or she may be happy to grind it for you to order. I will caution you that if you decide to substitute ground turkey for the chicken, the taste will not be the same. When made with chicken the dish tastes is lighter and cleaner. Don't be put off by the long-ish ingredient list. The trick is to have everything ready to go. It comes together very quickly once the prep is complete. Asian Chicken Stir-Fry Lettuce Cups- serves 4 (or more for appetizers) 1 pound ground chicken breast 2 port0bello mushrooms, stemmed and gills removed, minced (I use a food processor) 2 Tablespoons Tamari (gluten-free soy sauce) or low sodium soy sauce 4 scallions, sliced very thinly, white and some of the green parts, plus more for garnish 1 teaspoon cornstarch 1/3 cup shredded carrot pinch crushed red pepper flakes 1 teaspoon minced fresh garlic 1 teaspoon peeled and minced fresh ginger (I use a microplane to mince) 2 teaspoons oyster sauce (this brand is gluten free according to the manufacturer) juice from half an orange 2 tablespoons chopped fresh cilantro, plus more for garnish 2 Tablespoons coconut or light olive oil Sliced toasted almonds Asian Sweet Chili Sauce ( this brand is gluten free) Fresh radishes, cut into thin matchsticks (I use a mandoline) whole lettuce leaves for serving chicken (butter and iceberg work well) 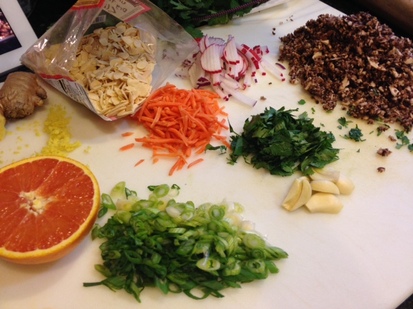 See all these yummy fresh ingredients that are about to become your dinner?!! 1. In a medium bowl, combine the ground chicken, 4 sliced scallions, cornstarch and Tamari sauce. Marinate the ingredients for 10 minutes. 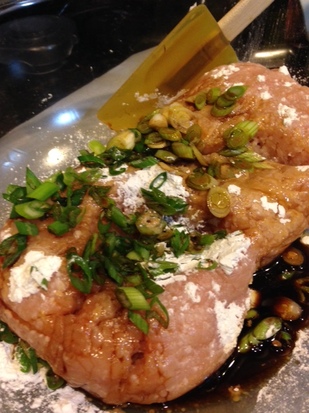 2. In the meantime, arrange the lettuce leaves on a large platter. Pour the chili sauce into a ramekin and place on platter. Place all the other garnishes (almonds, radishes, green onion and cilantro) into individual ramekins and arrange on platter, leaving room for the chicken mixture once it's done. 3. Over medium-high heat 2 tablespoons of coconut or other oil in a skillet or wok, if you have one. When it is hot but not smoking, stir in minced mushrooms. Stir-fry mushrooms 15-20 seconds. Stir in carrots, red pepper flakes, garlic, ginger and stir-fry another 15 seconds.  4. Add in chicken mixture and cook, stirring often, until browned and cooked through, being sure to crumble it up as you cook it. You want a very small texture, not big chunks. Stir in orange juice, 2 tablespoons cilantro and oyster sauce. Cook 30 seconds more.
5. Remove chicken from heat and spoon onto your serving platter. 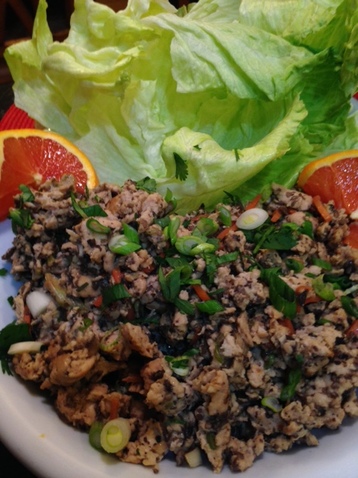 6. To serve, spoon some chicken mixture into your lettuce cup and top with desired garnishes. Eat immediately!  If you are looking for more delicious poultry recipes, please take a look at my e-cookbook on Amazon!
"I suppose there are people who can pass up free guacamole, but they are either allergic to avocados or too joyless to live. " -Frank Bruni Oh, guacamole, how do I love thee? I grew up in upstate New York, not far from the Vermont border. Mexican and southwestern-inspired cuisine was not part of the landscape in the 70's. Fast forward 22 years, I found myself living in Southern California after college. California, it seemed, was the epicenter of Mexican food to this Northeastern gal. There at El Torito Grill near South Coast Plaza in Costa Mesa, California, I discovered guacamole. At El Torito Grill at the time, they served fresh, warm tortillas with guacamole, made fresh at the table. I could have made a meal just out of that. It was soooo good! The restaurant is no longer there, and I now live in Colorado. Thankfully, watching them prepare the guac table-side all those times gave me a good idea how to make a great guacamole. I have been making it this way ever since. Healthy fat and chock full of freshness, I can't think of a better snack to have on hand for this weekend's Super Bowl 50. Of course, these measurements are just suggestions. Once you make it yourself, you may want to adjust them to your liking. Heck, you may even want to add diced mango to yours (no kidding, it's amazing) ! Guacamole 4 ripe Haas avocados, halved, pit removed 2 Tablespoons minced red onion 2 Tablespoons finely chopped cilantro 1 clove garlic, minced Half a Roma Tomato, seeds removed half of a jalapeno pepper, stemmed, seeded and minced juice of 1 lime 1/8-1/4 teaspoon fine sea salt Tortilla chips and/or veggie sticks for serving 1. Assemble all your ingredients- so fresh and good! 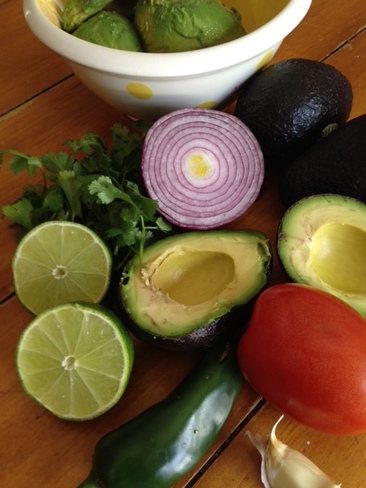 2. With a spoon, scoop out the flesh of 7 of the eight avocado halves into a bowl. Dice the flesh of the remaining avocado; set aside. 3. Coarsely mash the avocado in the bowl with a fork, leaving it somewhat chunky (texture is a good thing). 4. Gently fold in 1/8 teaspoon salt, red onion, reserved avocado pieces, tomato, jalapeno pepper, garlic, lime juice and cilantro. Taste for salt and lime juice ( I always use a tortilla chip to taste since the salt on the chip will play into the salt factor). Adjust to suit your taste. 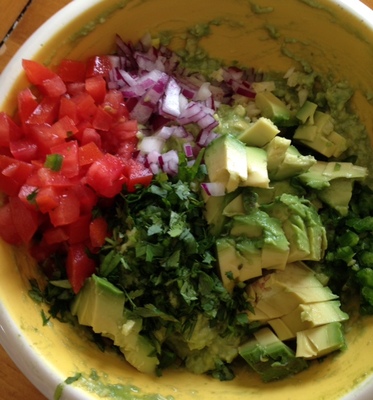 5. Transfer guacamole to a serving bowl and serve with chips or veggie sticks (or on turkey sandwiches or burgers....you get the idea). If made a few hours ahead, press plastic wrap directly on top of guacamole and refrigerate. The lime juice will prevent browning for a few hours. 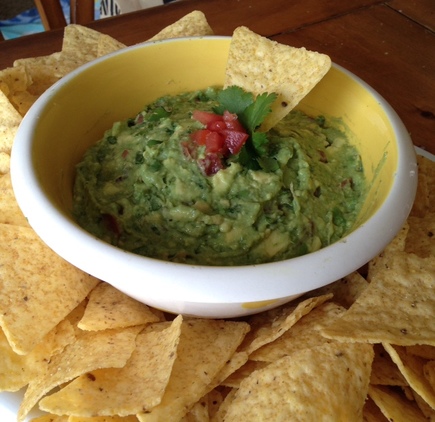 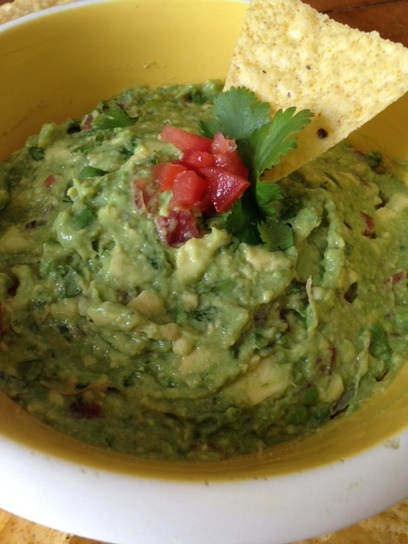 Doesn't this make your mouth water?! Hurry- go buy your avocados so they have time to ripen, before it's too late! ♥
P.S. If you are interested in a good chili for game day, check out my recipe for White Chicken Chile and My Favorite Turkey Chili. Either (or both) would sure to be a hit and can simmer in your crockpot! |

Archives
December 2019
Categories
All
|


 RSS Feed
