|
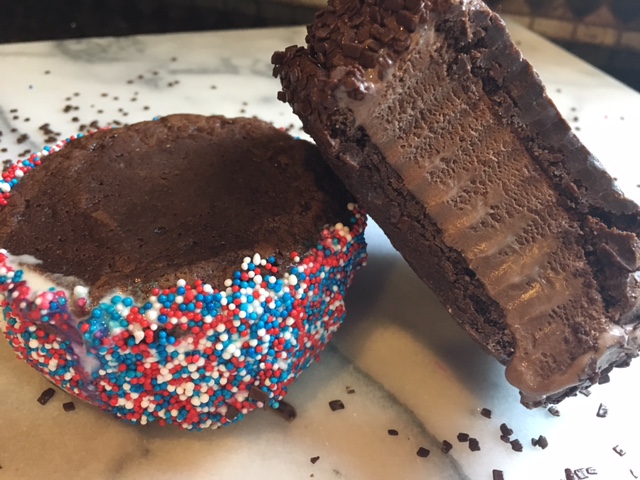
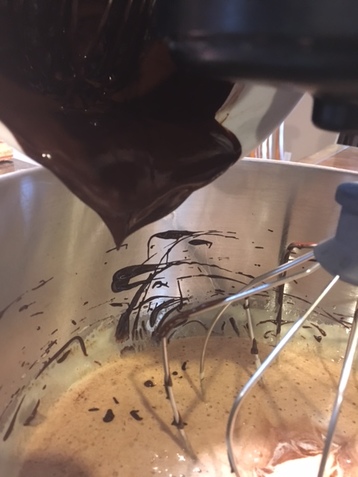
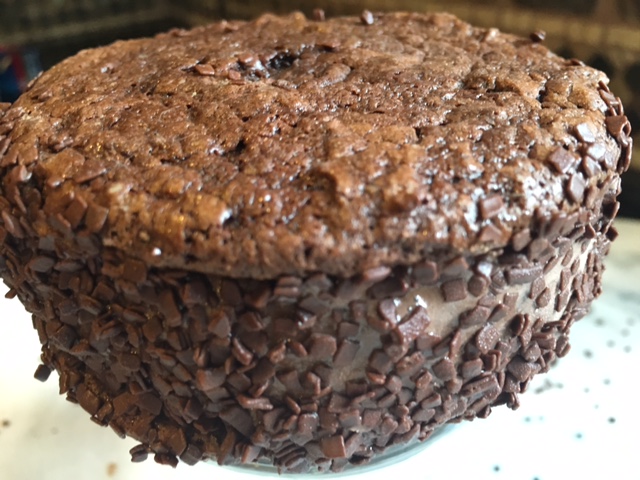
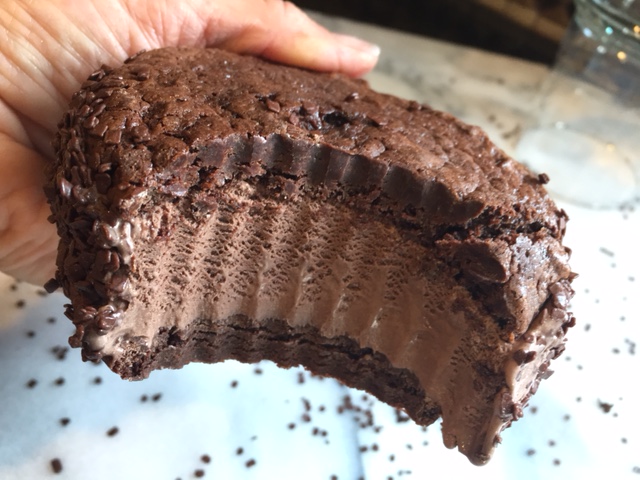
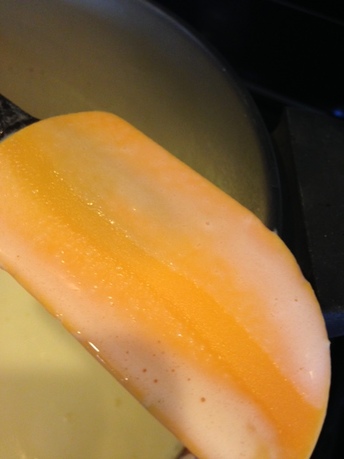
"It is always sad when someone leaves home, unless they are simply going around the corner and will return in a few minutes with ice-cream sandwiches. " Lemony Snicket Ice cream sandwiches...I remember so fondly eating them up as a kid with the soft cakey-cookie outside and the meltingly delicious inside. The only problem is that they weren't actually all that good. Ah, nostalgia! Lol! The idea of them, however, is very good. And they are not so hard to improve upon. I start with a flourless (and therefore gluten free...bonus!) brownie cookie and sandwich premium ice cream in-between two cookies. Roll them in sprinkles and you are good to go. The brownie cookie is a good base for almost all of the flavors you could imagine- from plain vanilla to everything but the kitchen sink (maybe not so great with an apple pie flavored ice cream, but you get the idea- peanut butter, coffee, cookie dough, strawberry, butter pecan, mint chocolate chip....) The brownie cookie stays somewhat soft even when frozen so it makes eating pretty easy. These are pretty big so you might want to split yours with someone special. You can make them any size just watch the baking time in the cookies if you go smaller. As for the decorations, finely chopped nuts, sprinkles or non-pareils, finely crushed candies.... use your imagination for endless combinations. Great project to make with the kids, too, so why not get the whole family involved! Brownie Ice Cream Sandwiches-makes approx 14-16 3" cookies, enough for 7-8 sandwiches 12 ounces 70% bittersweet chocolate, choppped 4 ounces (1 stick) unsalted butter, cubed 3 extra large eggs 1/8 tsp. instant espresso powder 1 1/2 tsp vanilla 1 cup granulated sugar (7 ounces) 3 ounces almond flour 1/2 tsp baking powder 1/4 tsp kosher salt approx 1/2 gallon your favorite ice cream(s), slightly softened sprinkles, nuts or other garnishes for the sides, optional 1. Combine the almond flour, baking powder and salt. Set aside. 2.In the top of a double boiler or in the microwave gently melt the chocolate and butter together. Once melted, stir to combine and set aside for a few minutes to cool slightly. 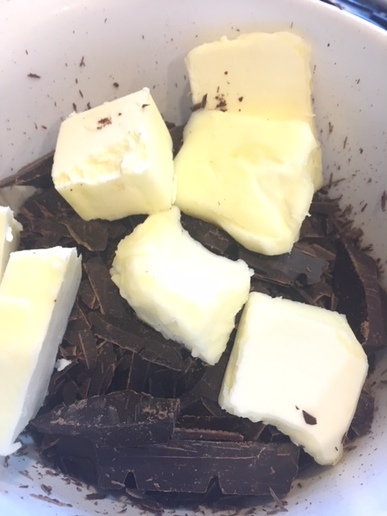 3. Using an electric mixer with the whisk attachment on medium speed, beat the eggs, sugar, vanilla and espresso powder until increased in volume and lighter in color, about 2-3 minutes. 4. Reduce speed to low and drizzle in chocolate. Combine well.
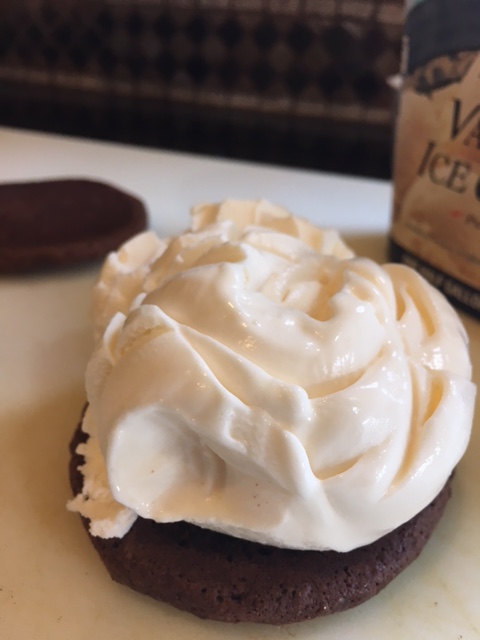
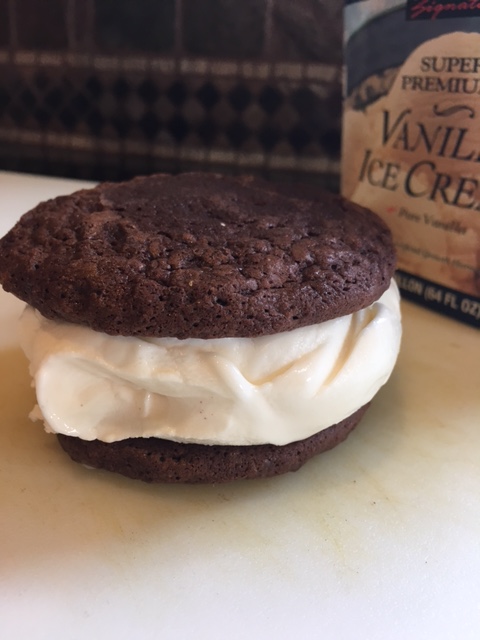
5. On low speed stir in almond flour mixture, until just combined. Remove bowl from mixer and cover with plastic wrap. let set on counter for 45 minutes or refrigerate for up to 30 minutes to firm up a bit. 6. Preheat oven to 350 degrees F. Line two baking sheets with parchment paper; set aside. 7. When ready, using an ice cream scoop that holds approximately 1/4 cup, scoop dough onto parchment lined baking sheets about 3 inches apart. Pat dough down slightly using moistened fingertips.  8. Bake for 10-12 minutes until just set and tops no longer appear wet. Remove from oven and cool on baking sheet. Once cool transfer to freezer for 30 minutes (can be made up to a week in advance, store airtight in freezer for longer storage). Repeat with any remaining dough. 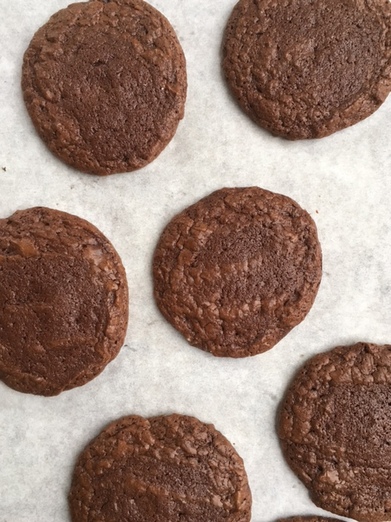 9. When ready to assemble sandwiches, place any sprinkles or other garnish in shallow bowls or pie plates. Remove ice cream from freezer to allow it to soften slightly. Place a parchment -lined baking tray in your freezer. 10. Working with a pair of cookies at a time, scoop a generous amount of ice cream onto the base (Flat side) of the cookie. Top with the second cookie, pressing down slightly to push ice cream to the edge of the cookie.
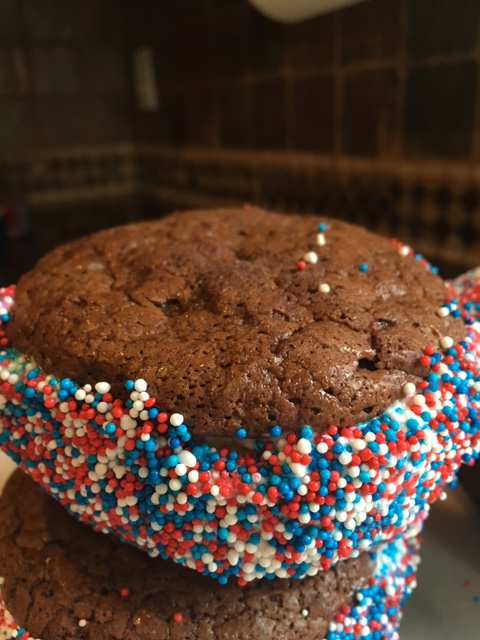
11. With a small off-set spatula, smooth edges of ice cream, sandwich (Working quickly). Roll edges in desired garnishes (sprinkles here) and immediately place on tray in freezer. 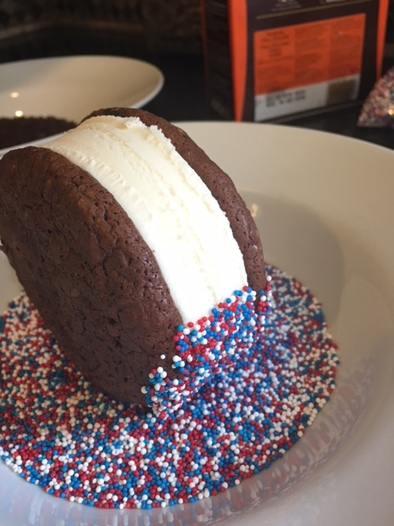 12. Repeat with remaining cookies, until all have been filled and garnished, if desired.  13. Serve immediately or wrap individually in wax paper or plastic wrap and store air-tight in a freezer bag in the freezer for up to a week or two. 14. Share! : )
0 Comments
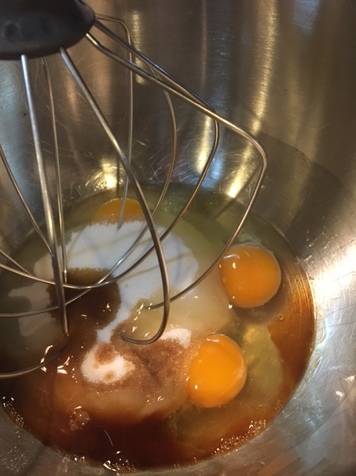
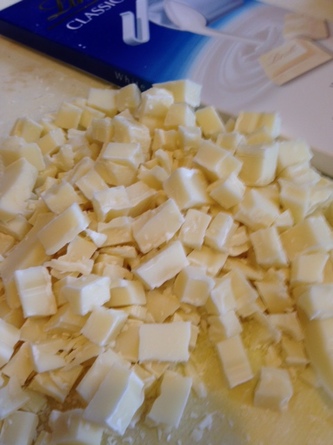
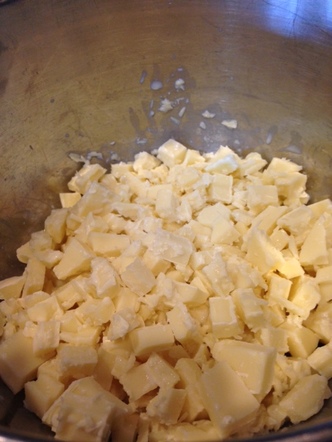
" I doubt whether the world holds for anyone a more soul-stirring surprise than the first adventure with ice cream." - Heywood C. Broun Does ice cream elicit the same emotional response in you as it does in me? I would almost have to say ice cream is my most favorite dessert, or perhaps a tie with a simple home made chocolate chip cookie (frozen, of course- more on that another day). And of all the flavors out there, mint chocolate chip would have to be my all-time favorite. The minty fresh flavor of it adds to the coolness. The chocolate pieces are a wonderful contrast, as long as they are substantial, and give the taste buds more to explore (no thank you to the striated chocolate for me in some brands). I like ice cream so much that on more than one occasion I have given serious thought to opening up an ice cream shoppe (yes, definitely with two "P"s). Luckily I came to my senses each time! lol! However, it remains one of my favorite things to make and tinker with in spurts. Recently, I had a couple bars of good white chocolate that kept catching my attention every time I opened the cupboard they were stored in. I rarely eat white chocolate out of hand (I am most definitely in the camp of dark chocolate lovers) but there are a few desserts I make with white chocolate that have been long-time favorites,so I like to keep a bit on hand. Finally it occurred to me to make ice cream with them. We were having a run of nice warm weather, spring was in the air, and it seemed like perfect timing to get out my ice cream maker and get to work. So I settled on making White Chocolate Mint Chocolate Chip Ice Cream. Oh, yes! And let me tell you, it came out pretty darn wonderfully. The base for the ice cream I adapted from an old favorite recipe found in Death By Chocolate by Marcel Desaulniers. The method is a bit unusual as he calls for whipping the eggs, but it makes a lusciously creamy ice cream. The white chocolate mellows the mint a bit, and I used actual mint chocolate bars for the chips. You could use regular bittersweet chocolate, if you can't find the mint, but then I'd probably amp up the mint in the ice cream base, but we'll talk more about that soon. Obviously you will need an ice cream maker for this recipe. If you don't already have one, I'd recommend a Cuisinart one without reservation. I have this one , but I am sure you would get great results with any Cuisinart Ice Cream Maker. They seem to have one for every budget. At one time I had a fancy counter-top model ice cream maker before and ended up selling it at a garage sale. For the money I'd go Cuisinart over and over again. So get your machine out and lets get churning! White Chocolate Mint Chocolate Chip Ice Cream (makes approx 1 quart-ish) 8 ounces good quality white chocolate (not chips)- will contain only cocoa butter as the fat, chopped 2 cups whole milk plus 3 Tablespoons 2/3 cup granulated sugar small pinch of fine sea salt 2 whole eggs 1 1/2 teaspoons pure Peppermint Extract 6 ounces Lindt Mint Chocolate bar (or bittersweet chocolate) 1. Make ice cream base at least 4 hours ahead or 1 day before : Set up an ice bath with 2 large bowls that can nest together. The bottom bowl will have ice and water in it and the top bowl will hold your custard base shortly. Leave the top bowl off the ice for now. Place it aside. 2. Place the chopped white chocolate and 3 Tablespoons of milk in the top of a double boiler or in a heat-proof bowl that will fit over the top of saucepan. Bring the water to a boil over medium high heat. Place the bowl of white chocolate and milk over the water.
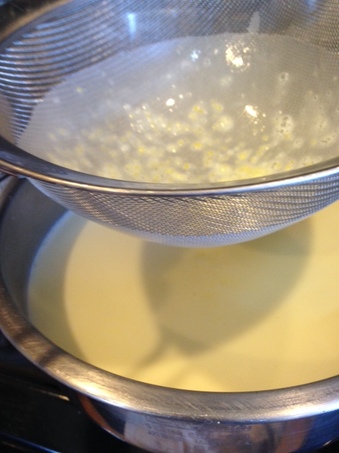
3. Turn off heat and let white chocolate melt completely, about 10 minutes. With a rubber spatula, stir mixture until perfectly smooth; set aside. 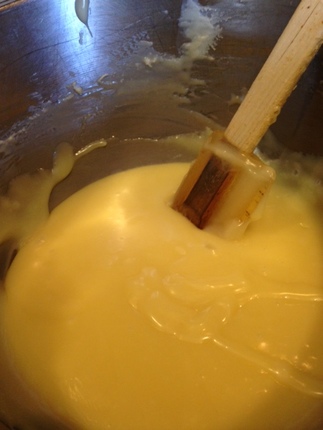 4. In a 2.5 -quart saucepan, heat the remaining 2 cups of milk, pinch of salt and 1/3 cup granulated sugar, stirring to dissolve the sugar. Bring to a boil. 5. Meanwhile in the bowl of the stand mixer, beat the 2 eggs with the remaining 2/3 cups sugar until light and thickened, about 3 minutes. If the milk has not come to a boil by then, reduce the speed on the mixer and keep mixing to maintain the volume created. 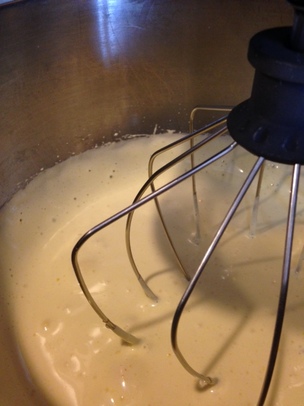 6. Pour the boiling milk into the beaten eggs, while the mixer is going, to avoid scrambled eggs (also ok to remove bowl from mixer and whisk in the milk by hand. This is called tempering). Return the egg-milk mixture to the saucepan and continue cooking over medium heat, until mixture has thickened, and when you run a finger through the mixture on a spatula it leaves a clean trail. Do not boil the mixture. 7. Immediately strain the mixture through a fine sieve into the bowl you previously set aside.
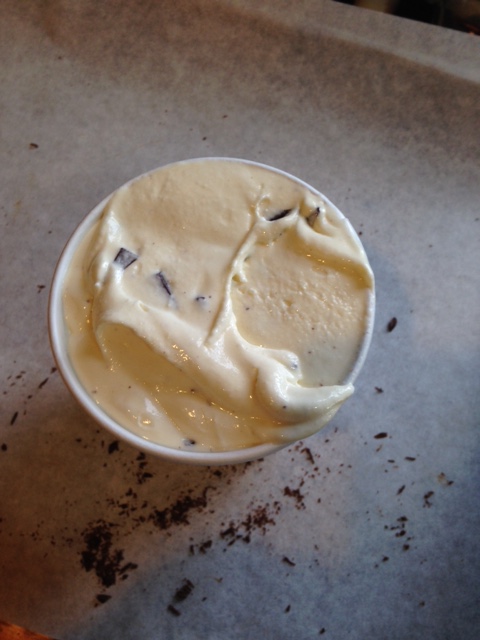
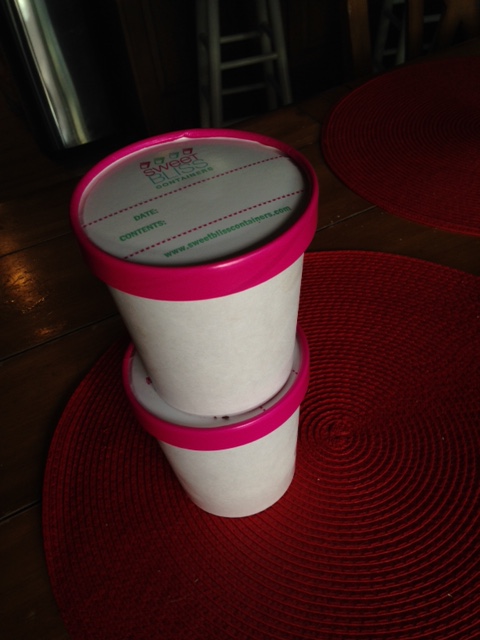
8. Immediately whisk white chocolate mixture into base and place on top of ice bath to chill (about 15 minutes) stirring occasionally. Stir in peppermint extract. Cover and chill in refrigerator for at least 4 hours or overnight. 9. Meanwhile, chop mint chocolate and gently melt over double boiler or in microwave, stirring occasionally until completely smooth. 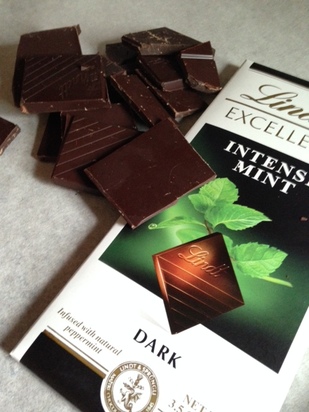 10. Place a sheet of parchment paper on a baking sheet. Spread the melted mint chocolate in an even layer on the parchment-lined pan, about 1/16"- 1/8" thick. You want the " chips" you will be making to have some bite to them later, but not too thick as to be a nuisance. Place the pan in the freezer for 15 minutes until chocolate has completely hardened. 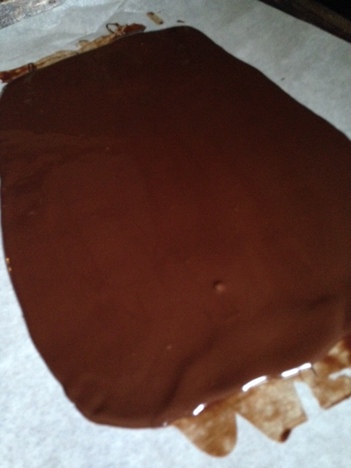 11. Remove the pan from the freezer and chop the chocolate into roughly 1/4 " squares. It will crack in places and not be exact. That's ok. Return the chocolate to the freezer until ready to use. 12. After base has sufficiently chilled, remove from refrigerator. At this time taste base for flavor. Not all extracts are the same. You may want your ice cream a little more minty than I want mine. Additionally, once frozen the flavors will be slightly muted. I'd start with 1/8 teaspoon more per time, if you want to increase. Whisk in well and taste again. 13. Place custard into machine and churn per manufacturer's instructions for your machine. When ice cream is almost completely frozen, add in mint chocolate chips, 1/3 at a time. Isn't that looking good?!! 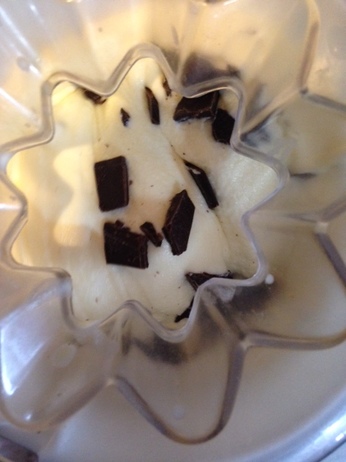 14. When completely churned, remove from ice cream maker and quickly transfer to containers to freeze. I had these cute little pint containers I found on-line. Here's something similar. Tupperware containers would be fine, too..
15. Let ice cream "ripen" in the freezer for several hours before serving. Then scoop out and enjoy! 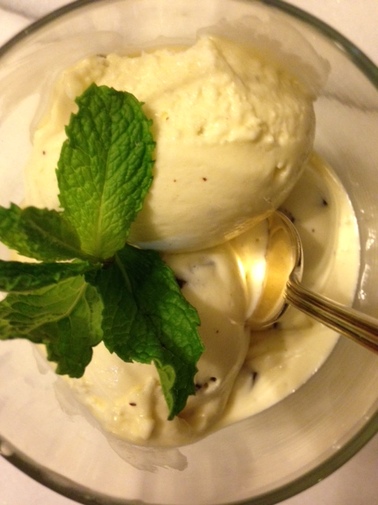 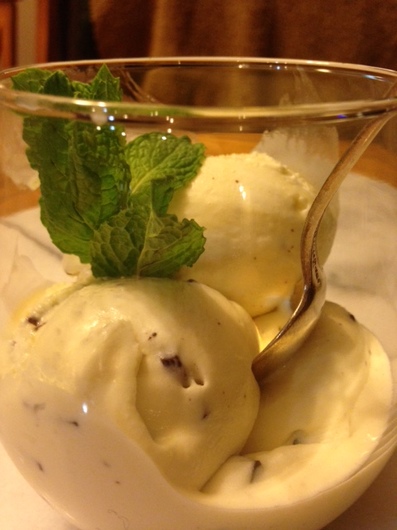 yum!
|

Archives
December 2019
Categories
All
|


 RSS Feed
