|
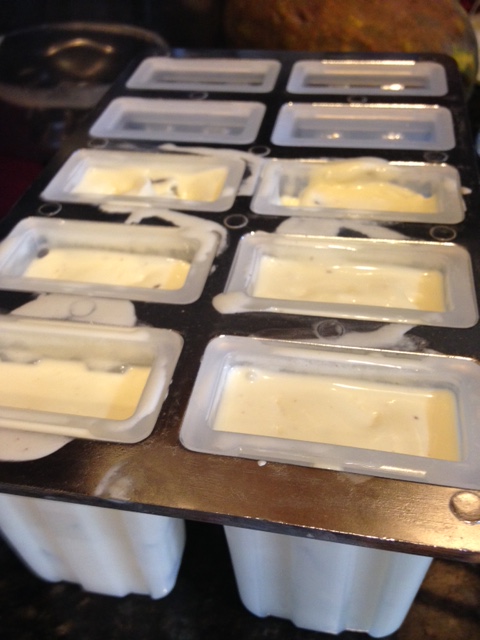
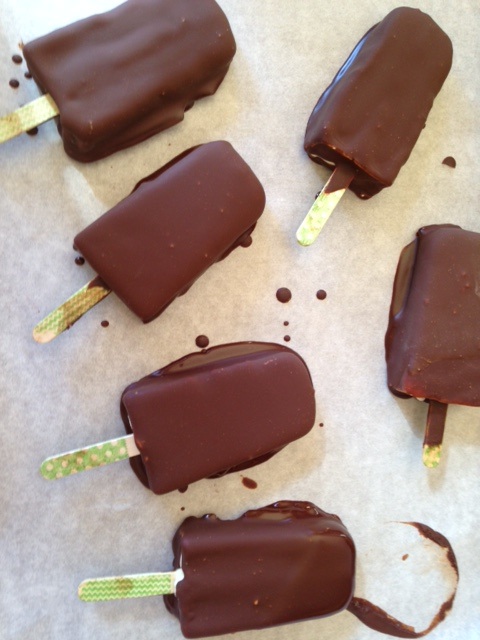
"Without ice cream there would be darkness and chaos." - Don Kardong Happy Easter! I hope you enjoyed a beautiful day, if you celebrate.Here in Northern Colorado the day started off a bit chilly , but ended gloriously-a wonderful spring day. My oldest wasn't home for Easter. He was on Spring Break from college this past week, but had to go back early for his job. So we celebrated Easter while he was still home. That made me feel much better. Since we still had leftovers to eat, I played a little in the kitchen since I didn't have to do much cooking. Remember last week I posted the recipe for White Chocolate Mint Chocolate Chip Ice Cream here? Well while I was making the ice cream I had the idea to try and make ice cream bars on a whim to see what would happen. I had these cool molds. I bought them on clearance at the end of last summer and never used them. Then when thinking about how to coat them I thought about a homemade "Magic Shell" recipe I had tried previously. Put two and two together, and well, it's a pretty fun outcome. I'll walk you through how I made them. Chocolate-Covered Ice Cream Bars 1 recipe White Chocolate Mint Chocolate Ice cream 1 recipe "Magic Shell" chocolate Coating 1 .Prepare ice cream according to directions. 2. Once ice cream has finished churning, spoon ice cream into molds, tapping down on counter from time to time to get ice cream to settle all the way into the molds. Cover molds and place sticks into ice cream as shown (the molds came with them, or you can buy them at craft stores- I stamped them with permanent ink to add a fun touch). Place into freezer immediately . Freeze until firm or at least 24 hours.
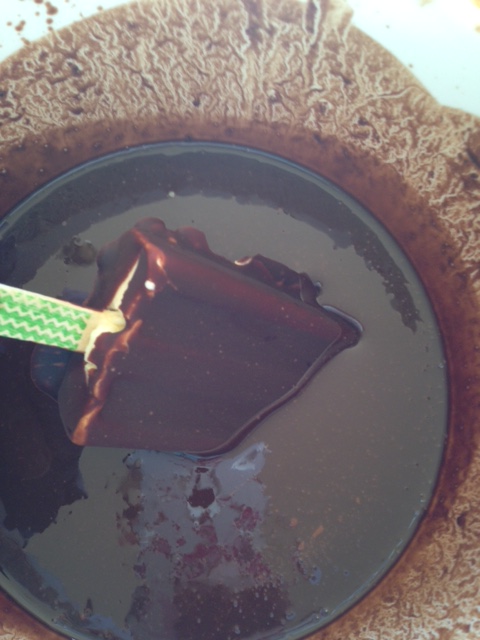
3. Line a sheet pan with parchment. Remove mold from freezer and run quickly under hot water just enough to loosen ice cream from mold. You will need to work quickly. Place bars on parchment lined sheet and place in freezer once again to firm back up, at least an hour. 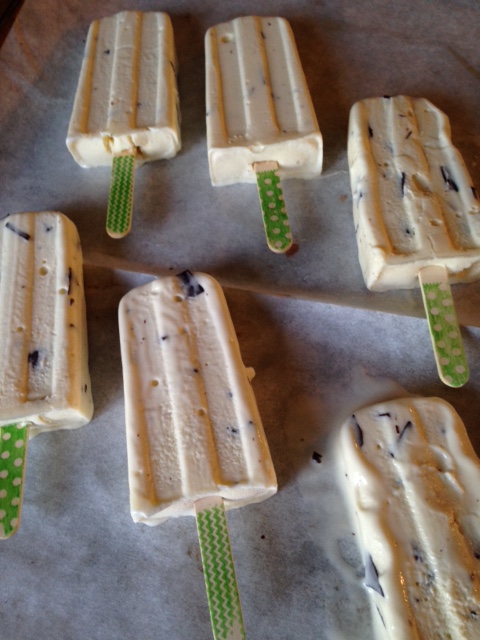 4. Meanwhile prepare Chocolate "magic Shell" coating according to directions. It stays fluid for a very long time, so make it ahead and let it cool to room temperature for best results. 5. Remove ice cream bars from freezer. Place a clean sheet of parchment on the cold tray, removing the sheet with ice cream on it to your work space. Working quickly dip bars into chocolate coating to completely cover. Place onto lined sheet pan to set. Repeat until all are coated. Return immediately to freezer (work in batches if your bars are starting to melt to quickly).
6. Once they bars are hardened, store in ziploc bags in the freezer, as air-tight as possible, for up to two weeks (if they last that long). See that, you don't even have to wait for the Ice Cream man to come around!♥ 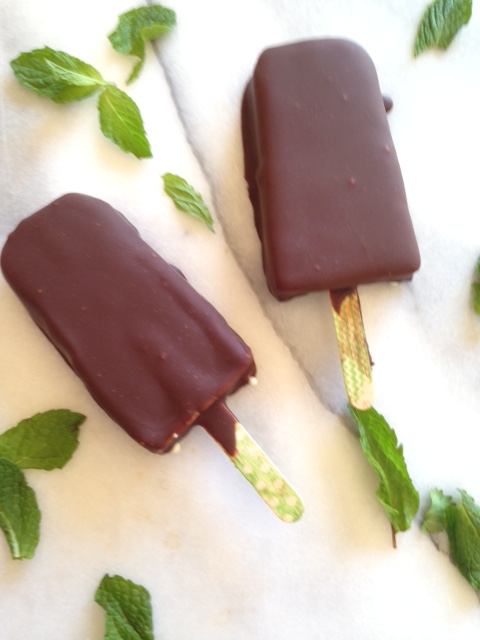 Note: Store any unused "magic shell" in a jar, covered, in the refrigerator. It will keep, refrigerated, for several months. Gently heat to liquefy. It is also great to use for chocolate-covered frozen bananas (hint, hint) or to dip ice cream cones in.
0 Comments
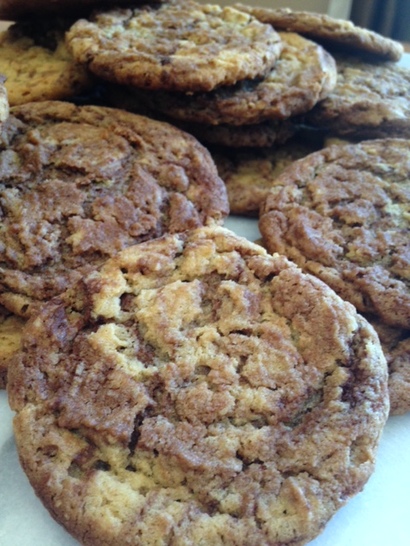
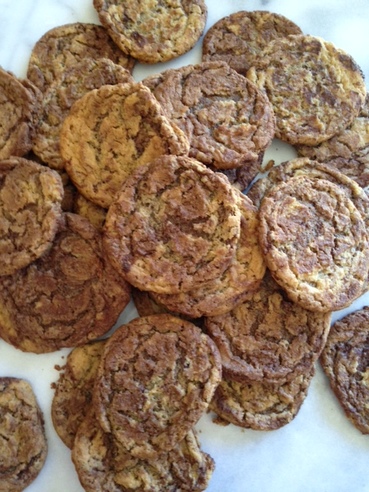
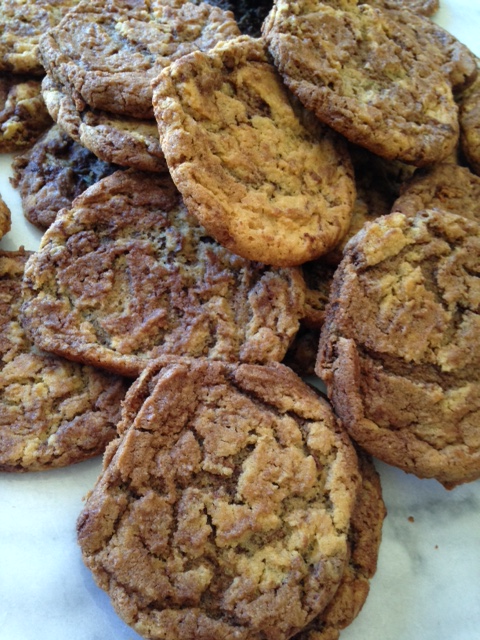
"It's like peanut butter and chocolate. Each is great, but they're better together." -Richard Whitehead I'm dating myself, but anyone else remember the Reese's Peanut Butter Cup commercial that had that line in it? In the end it was a good thing though! Chocolate and peanut butter together is a match made in heaven. A while back there was a really nice magazine published (or at least I thought so) called Chocolatier. Are you familiar with it? Sadly it is no longer. As a pastry fan and pastry professional hopeful and then a working pastry professional, it was a magic door into pastry worlds I only dreamed of. I remember one recipe for a cookie I think was called Tiger Striped Cookies. It was a drop peanut butter cookie with chocolate streaks through it. Once it was baked it had a pretty striking appearance and a great flavor. I had the recipe for a long time and then through subsequent moves and whittling down my recipe collection it somehow disappeared. I was thinking about that recipe the other day and thought I'd just try to recreate it to the best of my memory. Here is the result for that cookie- super easy, super tasty. If you are in the chocolate-peanut butter lover's camp I bet you will love it. Let me know, won't you? I used Einkorn flour for my gluten sensitive daughter but the recipe shows the ingredients for both all-purpose or Einkorn flour. For that matter you can also use a 1:1 ratio gluten free baking flour just as easily. Peanut Butter "Tiger Stripe" Cookies- Yield: approx. 3 dozen cookies 2 cups light brown sugar, lightly packed (14 ounces) 1 cup creamy peanut butter (I used Jif) 1 cup ( 8 ounces)unsalted butter, room temperature 2 large eggs, room temperature 1 teaspoon pure vanilla extract 2 1/4 cups all-purpose flour (OR 10 3/4 ounces Einkorn Flour) 1 1/2 teaspoons baking soda* 1 teaspoon baking Powder* 1/2 teaspoon fine sea salt 3 ounces good-quality semi-sweet or bittersweet chocolate, chopped, melted and cooled 1. Preheat oven to 350 degrees F. 2. Whisk together flour, baking soda, baking powder and salt; set aside. * I am 5,o00 ft above sea level. I reduce baking soda to 1 1/8 teaspoon and baking powder to 3/4 teaspoon, in case you are baking at high altitude, too. 3. Cream together sugar, peanut butter, and butter on low speed of stand mixer until well -combined. 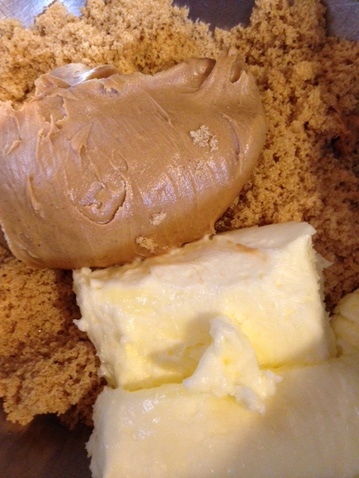 4. Add in eggs and vanilla. Mix on medium speed until well incorporated. 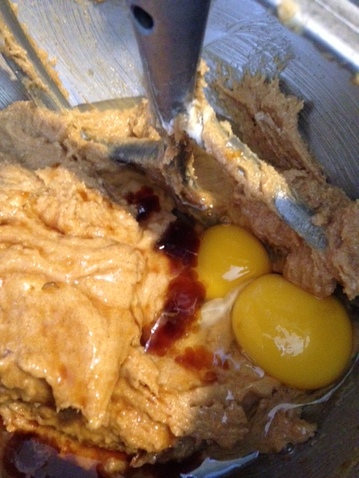 6. Reduce mixer to low speed and stir in flour mixture just until combined. Remove bowl from mixer. 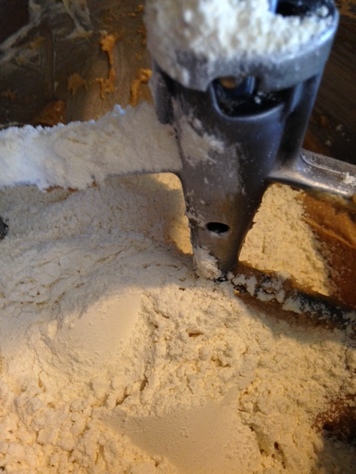 7. Drizzle melted chocolate on top of dough in a random fashion 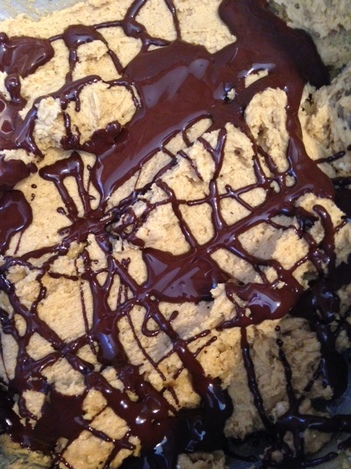 8. By hand, using a rubber spatula, carefully fold the melted chocolate into the dough, leaving distinct areas of peanut butter and chocolate dough. The idea isn't to make this a chocolate dough. It should look marbled, more or less like this: 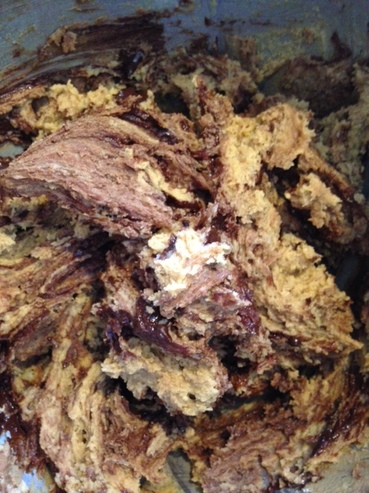 9. Line a baking sheet with parchment paper. Using a spring-loaded cookie (ice cream) scoop, dish out balls of dough onto baking sheet, spacing 2 " apart. 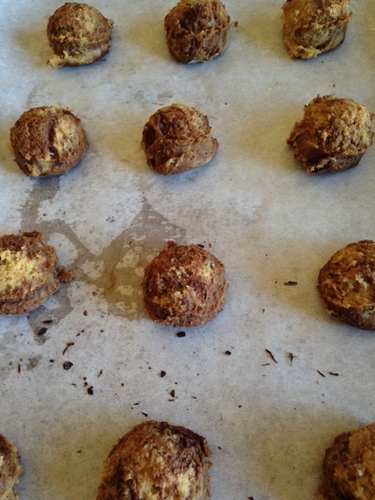 10. Bake cookies in preheated oven for 12-13minutes until done. Remove from oven and cool completely. Repeat with remaining dough until all the dough is baked off. 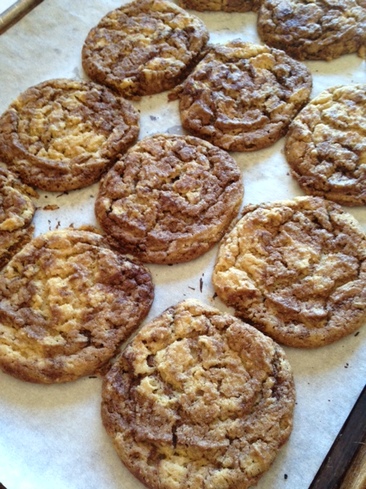 11. Well now you have left to do is eat them (though sharing them would be a nice idea, too). ♥
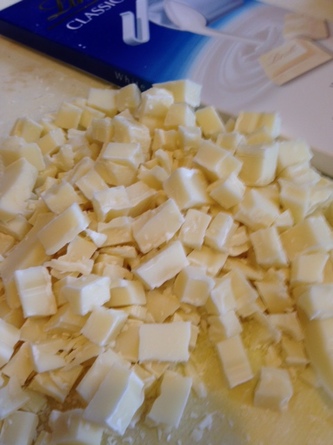
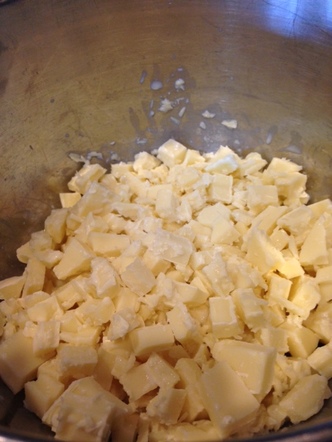
 " I doubt whether the world holds for anyone a more soul-stirring surprise than the first adventure with ice cream." - Heywood C. Broun Does ice cream elicit the same emotional response in you as it does in me? I would almost have to say ice cream is my most favorite dessert, or perhaps a tie with a simple home made chocolate chip cookie (frozen, of course- more on that another day). And of all the flavors out there, mint chocolate chip would have to be my all-time favorite. The minty fresh flavor of it adds to the coolness. The chocolate pieces are a wonderful contrast, as long as they are substantial, and give the taste buds more to explore (no thank you to the striated chocolate for me in some brands). I like ice cream so much that on more than one occasion I have given serious thought to opening up an ice cream shoppe (yes, definitely with two "P"s). Luckily I came to my senses each time! lol! However, it remains one of my favorite things to make and tinker with in spurts. Recently, I had a couple bars of good white chocolate that kept catching my attention every time I opened the cupboard they were stored in. I rarely eat white chocolate out of hand (I am most definitely in the camp of dark chocolate lovers) but there are a few desserts I make with white chocolate that have been long-time favorites,so I like to keep a bit on hand. Finally it occurred to me to make ice cream with them. We were having a run of nice warm weather, spring was in the air, and it seemed like perfect timing to get out my ice cream maker and get to work. So I settled on making White Chocolate Mint Chocolate Chip Ice Cream. Oh, yes! And let me tell you, it came out pretty darn wonderfully. The base for the ice cream I adapted from an old favorite recipe found in Death By Chocolate by Marcel Desaulniers. The method is a bit unusual as he calls for whipping the eggs, but it makes a lusciously creamy ice cream. The white chocolate mellows the mint a bit, and I used actual mint chocolate bars for the chips. You could use regular bittersweet chocolate, if you can't find the mint, but then I'd probably amp up the mint in the ice cream base, but we'll talk more about that soon. Obviously you will need an ice cream maker for this recipe. If you don't already have one, I'd recommend a Cuisinart one without reservation. I have this one , but I am sure you would get great results with any Cuisinart Ice Cream Maker. They seem to have one for every budget. At one time I had a fancy counter-top model ice cream maker before and ended up selling it at a garage sale. For the money I'd go Cuisinart over and over again. So get your machine out and lets get churning! White Chocolate Mint Chocolate Chip Ice Cream (makes approx 1 quart-ish) 8 ounces good quality white chocolate (not chips)- will contain only cocoa butter as the fat, chopped 2 cups whole milk plus 3 Tablespoons 2/3 cup granulated sugar small pinch of fine sea salt 2 whole eggs 1 1/2 teaspoons pure Peppermint Extract 6 ounces Lindt Mint Chocolate bar (or bittersweet chocolate) 1. Make ice cream base at least 4 hours ahead or 1 day before : Set up an ice bath with 2 large bowls that can nest together. The bottom bowl will have ice and water in it and the top bowl will hold your custard base shortly. Leave the top bowl off the ice for now. Place it aside. 2. Place the chopped white chocolate and 3 Tablespoons of milk in the top of a double boiler or in a heat-proof bowl that will fit over the top of saucepan. Bring the water to a boil over medium high heat. Place the bowl of white chocolate and milk over the water.
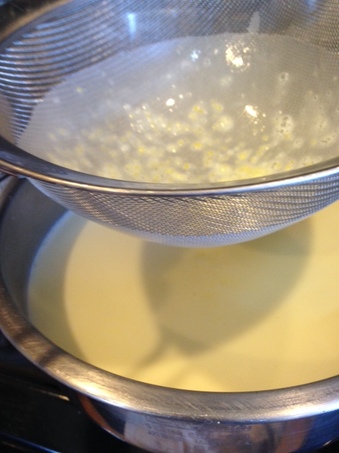
3. Turn off heat and let white chocolate melt completely, about 10 minutes. With a rubber spatula, stir mixture until perfectly smooth; set aside. 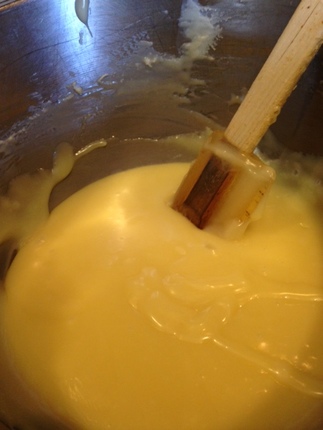 4. In a 2.5 -quart saucepan, heat the remaining 2 cups of milk, pinch of salt and 1/3 cup granulated sugar, stirring to dissolve the sugar. Bring to a boil. 5. Meanwhile in the bowl of the stand mixer, beat the 2 eggs with the remaining 2/3 cups sugar until light and thickened, about 3 minutes. If the milk has not come to a boil by then, reduce the speed on the mixer and keep mixing to maintain the volume created. 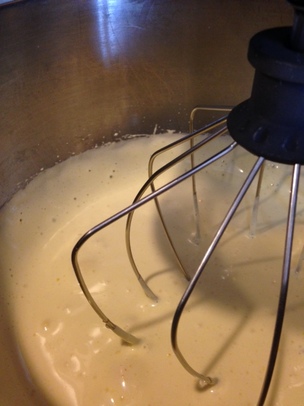 6. Pour the boiling milk into the beaten eggs, while the mixer is going, to avoid scrambled eggs (also ok to remove bowl from mixer and whisk in the milk by hand. This is called tempering). Return the egg-milk mixture to the saucepan and continue cooking over medium heat, until mixture has thickened, and when you run a finger through the mixture on a spatula it leaves a clean trail. Do not boil the mixture. 7. Immediately strain the mixture through a fine sieve into the bowl you previously set aside.
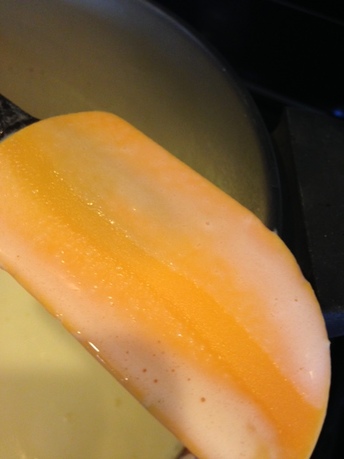
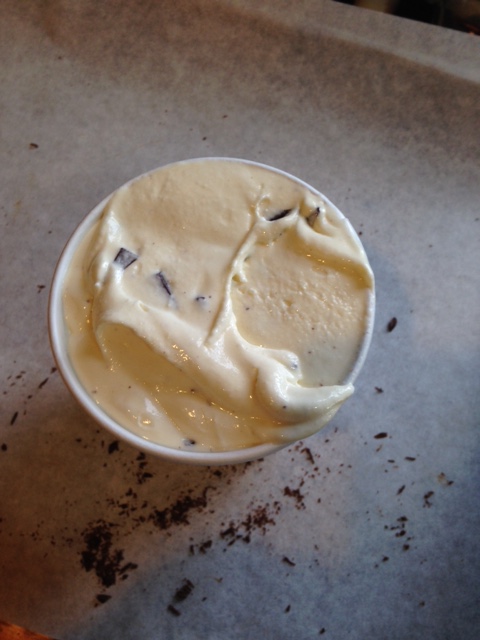
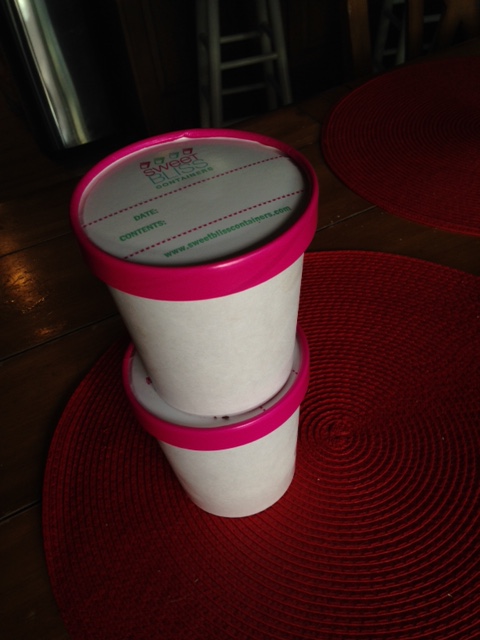
8. Immediately whisk white chocolate mixture into base and place on top of ice bath to chill (about 15 minutes) stirring occasionally. Stir in peppermint extract. Cover and chill in refrigerator for at least 4 hours or overnight. 9. Meanwhile, chop mint chocolate and gently melt over double boiler or in microwave, stirring occasionally until completely smooth. 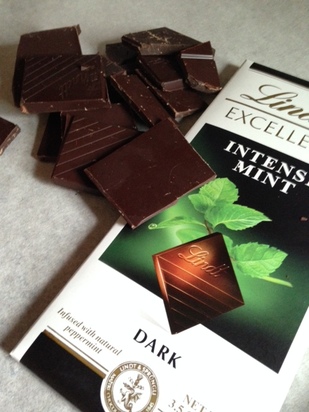 10. Place a sheet of parchment paper on a baking sheet. Spread the melted mint chocolate in an even layer on the parchment-lined pan, about 1/16"- 1/8" thick. You want the " chips" you will be making to have some bite to them later, but not too thick as to be a nuisance. Place the pan in the freezer for 15 minutes until chocolate has completely hardened. 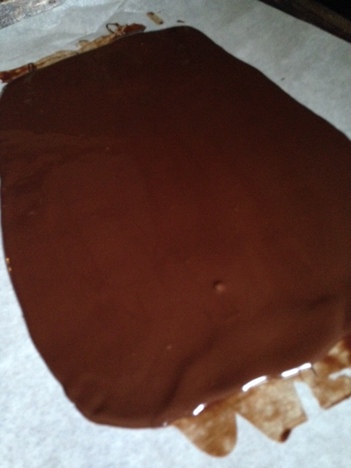 11. Remove the pan from the freezer and chop the chocolate into roughly 1/4 " squares. It will crack in places and not be exact. That's ok. Return the chocolate to the freezer until ready to use. 12. After base has sufficiently chilled, remove from refrigerator. At this time taste base for flavor. Not all extracts are the same. You may want your ice cream a little more minty than I want mine. Additionally, once frozen the flavors will be slightly muted. I'd start with 1/8 teaspoon more per time, if you want to increase. Whisk in well and taste again. 13. Place custard into machine and churn per manufacturer's instructions for your machine. When ice cream is almost completely frozen, add in mint chocolate chips, 1/3 at a time. Isn't that looking good?!! 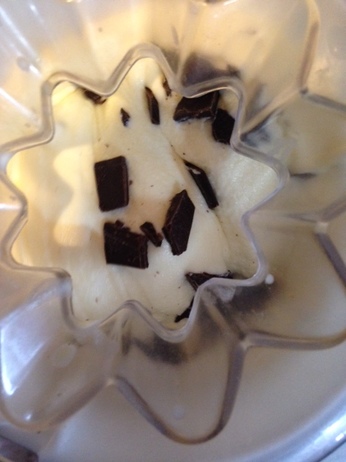 14. When completely churned, remove from ice cream maker and quickly transfer to containers to freeze. I had these cute little pint containers I found on-line. Here's something similar. Tupperware containers would be fine, too..
15. Let ice cream "ripen" in the freezer for several hours before serving. Then scoop out and enjoy! 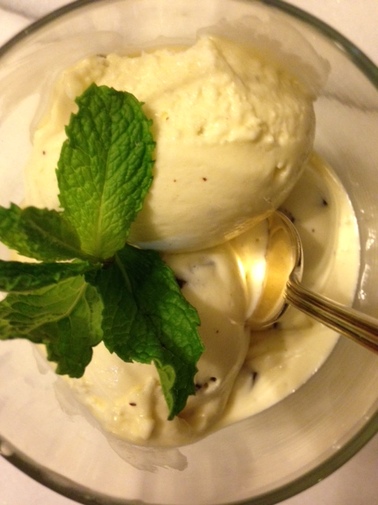 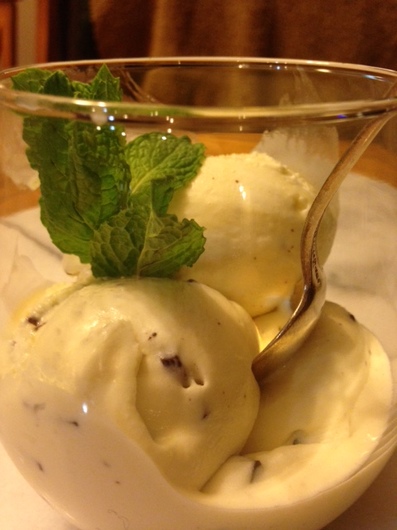 yum!
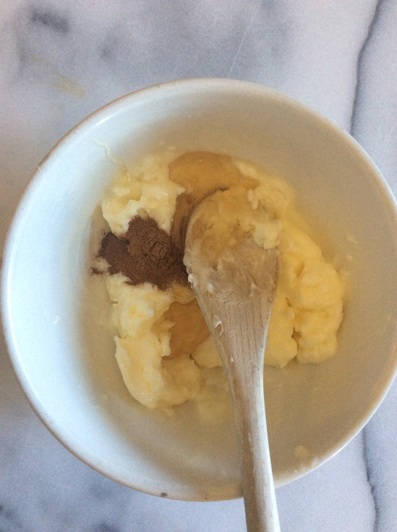
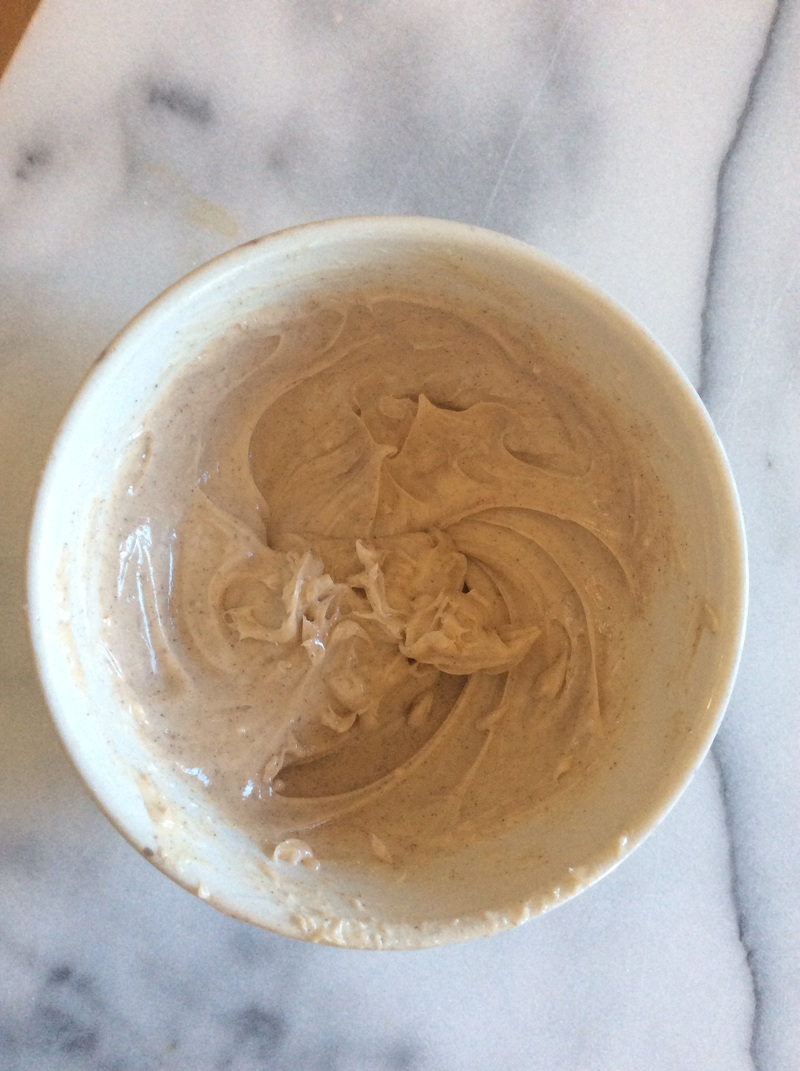
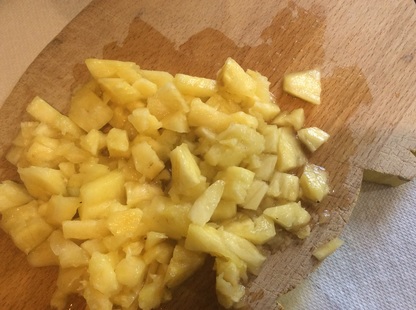
"If I call you darling, will you make me pancakes?" -Unknown I should have had this posted sooner, but it's Spring Break around here, and my daughter and I took advantage of the time to go on our first college visit. She is a junior and well, college is just around the corner. I am not sure how she got to be almost ready for college, since yesterday she was just kicking around her first soccer ball, but there you have it! We had a really nice time on a very long road trip. More of that to come! Speaking of my daughter, she has always loved pancakes. We have a local eatery called Snooze. We don't go often, but when we do, she always orders the Pineapple Upside Down Pancakes. So I thought I'd surprise her with my version. They turned out really well , and she gave them two thumbs up. The base pancake recipe you will use is my tried and true one for deliciously light, fluffy and wonderfully flavorful "Best Ever" buttermilk pancakes. The link is in the recipe below. You will enjoy these for weekend breakfasts and weeknight dinners, if you are anything like us. Glazed Pineapple-Upside Down Pancakes with Honey-Cinnamon Butter Makes approx 12 1 Recipe Best Ever Pancakes 3/4 cups chopped fresh, ripe pineapple granulated sugar for sprinkling 3/4 cup (6 ounces) softened unsalted butter, divided 3/8 teaspoon ground cinnamon 1 Tablespoon mild honey 1 cup powdered sugar, sifted 2 Tablespoons heavy cream 1/4 teaspoon vanilla 1. Make Cinnamon-Honey Butter: Combine 1/2 cup softened butter with honey and cinnamon. Combine well. (can be made several days ahead, place in an airtight container and refrigerate. Bring to room temperature before using). Set aside.
2. Make Glaze: Melt remaining 4 Tablespoons of butter. Stir in powdered sugar, vanilla and cream, to make a drizzling consistency, adding more cream as necessary. Set aside.  3. Preheat your griddle to medium (that's 350 degrees F on my electric griddle). Meanwhile prepare the Best Ever Pancakes according to directions. 4. When griddle is hot, grease with butter or shortening. Drop about 1/4 cupfuls of batter onto hot griddle. Evenly divide the chopped pineapple over the pancakes (approx 1 heaping tablespoon). Sprinkle approx 1/4 teaspoon of granulated sugar over the pineapple side of each pancake.
5. Flip pancakes and continue to cook until done, about 1-2 more minutes, depending on how hot your griddle is. Repeat with remaining batter until it's all used up. You can keep previous batch warm in preheated 200 degree oven until ready to serve, if desired. 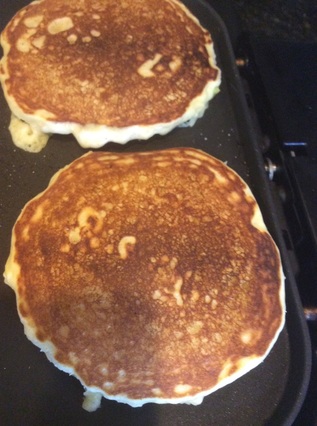 6. Serve pancakes topped with a dollop of cinnamon butter and drizzle with glaze. Warm, pure maple syrup on the side is also wonderful. 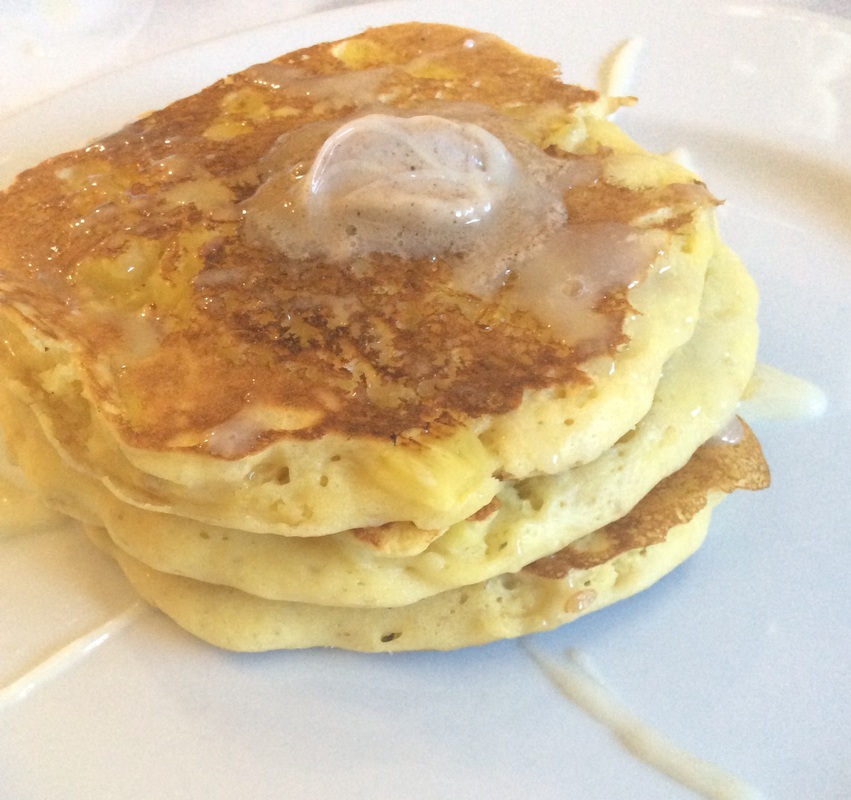 From my kitchen to your's-enjoy!♥
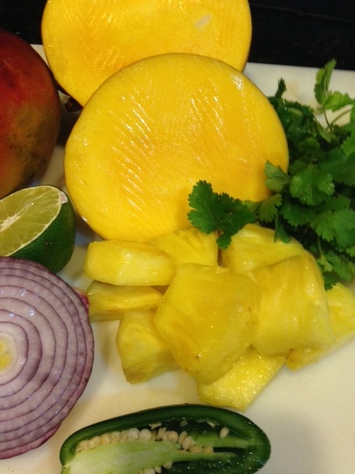
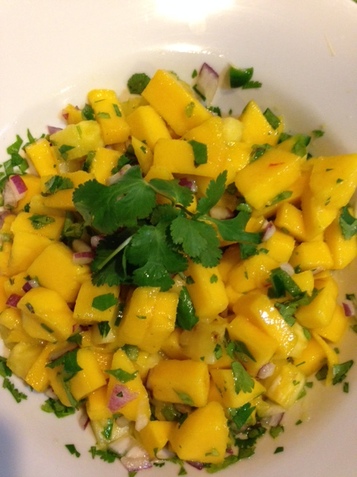
"Sometimes, a Sunday afternoon needs a whole mango to be kept entirely to oneself, and eaten in one sitting." -Alison Pil Mango is really that good. Sometimes you just don't want to share it. And totally off topic, but I'm not the only one who loved The Newsroom and Alison Pil as Maggie in it, right? (I confess to binge-watching all three seasons on Amazon in about 4 days. I know...) Back to mango...in the off chance you are feeling a little more generous and maybe sharing the mango is an option, can I talk you into making Grilled Mahi-Mahi with Mango-Pineapple salsa? It is super easy to make, a great option for a quick, light week-night meal or a casual weekend meal with friends. Minimal prep, maximum flavor. If I were you, I'd double or triple the seasoning rub as it's great on chicken and works on pork, too. It's not quite grilling season here in Northern Colorado, but my indoor grill fit the bill just fine today. This recipe comes from my days as a business owner with my meal prep business, the long gone Meals Made Easy. It was my first time tasting mango salsa and I was smitten immediately. I've added a little fresh pineapple to the salsa, and it's a winner. Easy, colorful and fresh, what could be better?! Grilled Mahi Mahi with Mango-Pineapple Salsa- serves 6 2 teaspoons ground cumin 1 teaspoon ground coriander 1 teaspoon chili powder 1 teaspoon garlic powder 1/8 teaspoon cayenne pepper 2 teaspoons kosher salt plus more for the salsa olive oil 1 large mango, peeled and diced 2/3 cup diced fresh pineapple 2 Tablespoons minced red onion 2 Tablespoon minced fresh cilantro 1/2 fresh jalapeno, seeded and minced juice from 1/2 fresh lime 6 mahi mahi pieces approx 5 ounces each 1. Preheat your grill to medium high. 2. Combine cumin, chili powder, coriander, garlic powder, cayenne pepper and salt in a small bowl; set aside. 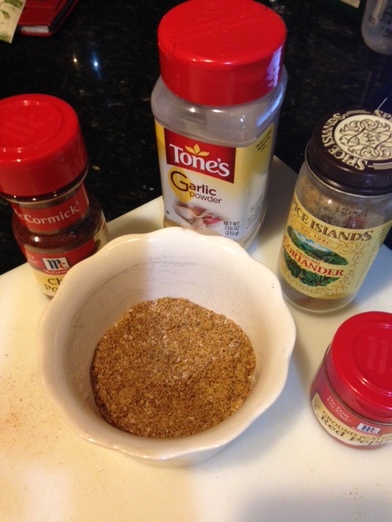 3. Place mango., pineapple, red onion, cilantro, jalapeno, lime juice and a pinch of salt together in a medium bowl. Stir to mix well. Taste for seasoning and adjust accordingly.
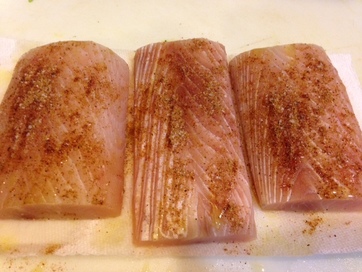
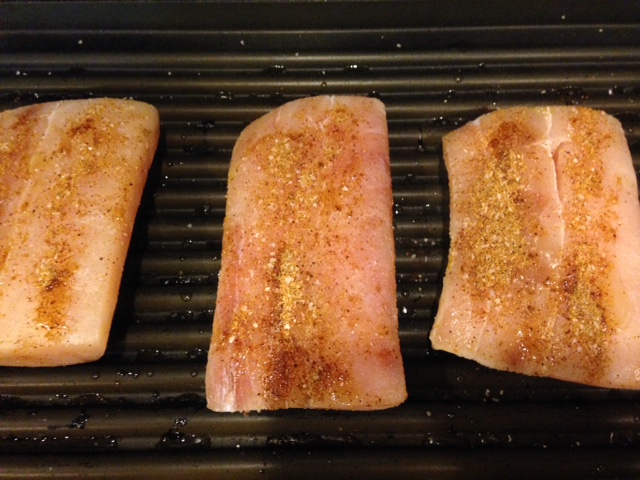
4. Pat fish dry. Drizzle each piece with a little olive oil and sprinkle evenly with spice mixture. Place spice side down on grilling surface and cook about 4-7 minutes a side, depending on thickness of fish and heat of your grill. Before flipping, drizzle top side with olive oil and sprinkle evenly with spice mixture (any leftover spice mix can be kept in an air-tight container in your cupboard for 2 months).
5. Continue cooking, until fish is just done, approximately another 4-7 minutes. DO NOT over-cook. Mahi gets an unpleasant texture when over-cooked. You won't like it. Remove from grill immediately. 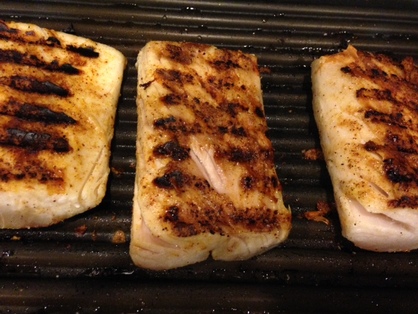 6. Top with salsa and serve. Doesn't that look so delicious? That salsa alone....swoon!  Oh, and did I mention it's even good for you? Healthy, quick, easy AND tasty?!! Winner!
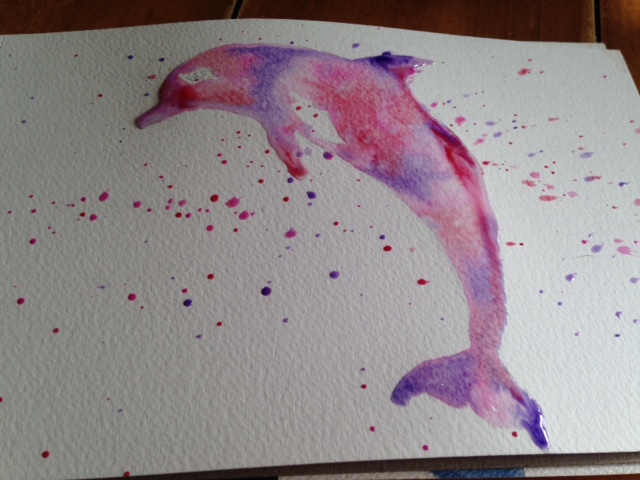
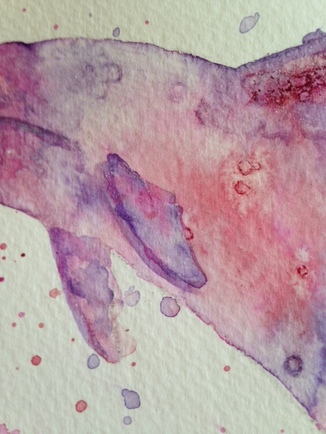
“There is no right or wrong when it comes to making art. Making sure that you have fun is the most important part. Splash a little paint, draw a little line. Just make sure that you have fun each and every time.” -Mickey Mouse What luck finding that quote today! I think it sums up how I feel about art more and more. I am a newbie at this art thing, a life-long creative person, but artist? I don't think so. My tag line is that I doubt that I'll ever be a "fine" artist, but I always hope to be a "fun" artist! How about you? For the last 2 years plus, since I have been practicing it more and more, art has been the creative outlet I have needed. It has brought messages to me that I want or needed to hear. It has been colorful, fraught with mistakes, full of super wonderful surprises and most of all fun! I once heard that the best way to learn something is to teach someone else. So that's why you have me, a very under-qualified teacher, attempting to teach you an art lesson! Ha! So here we go , students together! About a year ago I took a beginner watercolor workshop with a local Artist (that would be capital A artist!) Deb Groesser. She was fun and delightful in every way. I already knew her a bit as I had worked with her partner at a previous job. She is one of the nicest people anywhere, and her watercolor art is very impressive and beautiful, to say the least. She loves watercolor and she wanted us, her students, to love watercolor. The one sure way to get us to love it was for us to have success with it (such a tricky one she is!). So she taught us a technique whereby we took an outline of a subject, in this case a rooster, we flooded the image with water and proceeded to splash color on it fairly willy nilly. And voila...we made art! 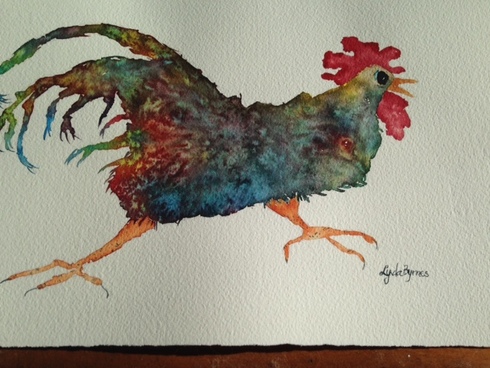 Pretty cool, don't you think? I know I thought so! I can hear you now, "but I can't draw anything like that." I know-me neither! So another trick of the trade she taught us is to draw, if you can, or cheat and trace the image using graphite paper. Who knew? This stuff is a game changer! I bought some at a local art supply store, but it is available on line, too. So I totally traced my image and then did the watercolor part. Another trick for this technique is to use cold press watercolor paper. This particular rooster was done on Arches 140 lb cold press paper, but any cold press paper of that weight should work for this technique. The cold press paper has rougher texture to it and allows the paint to be absorbed into the fibers more so than hot press (hot press is very smooth and the water and paint tend to lie on top more. I LOVE hot press paper, but not so much here). Lastly, in order to have the best result with this technique, you want to use colors that "play well together" (i.e. don't make mud). In the rooster example above, Deb had us use the primary colors, blue, red and yellow. Of course those three colors make all the other colors in the color wheel. If you don't want to play with primary colors, then use colors in the same family, or those that are next to each other on the color wheel. I remember using Winsor Newton artist paints in her class, but not the specific color names. And just look at the vibrant results achieved! The texture you see in some areas was achieved by sprinkling salt on the wet paint and waiting...and waiting...and waiting for it to dry. I'll show you more in a bit. Please know you don't need any fancy artist watercolors to have success with this technique, but you may find you don't get the same color vibrancy as you would with artist colors if you use student grade or craft watercolors. But for practice? Who cares (another piece of wisdom-never let your lack of supplies, keep you from making art)! In the time since taking Deb's class, I didn't play much with this technique. Right after the class I made this piece, a little bunny. Pretty cute, huh?  I actually like it quite a lot (and drew it free hand, too!). But you can see I also made a little mud. Orange and purple for example , are opposites on the color wheel, and don't play all that nice together. However, I don't think it looks all that bad here. And it's just a small piece of inexpensive watercolor paper. A do over would be easy. Then just recently I saw an amazing version of this technique on YouTube by an artist who goes by the name of Coco Bee Art. I encourage you to watch it. It is pure happy. Anyhow that video inspired me to try this technique again. This was the result. I am so super loving this one! 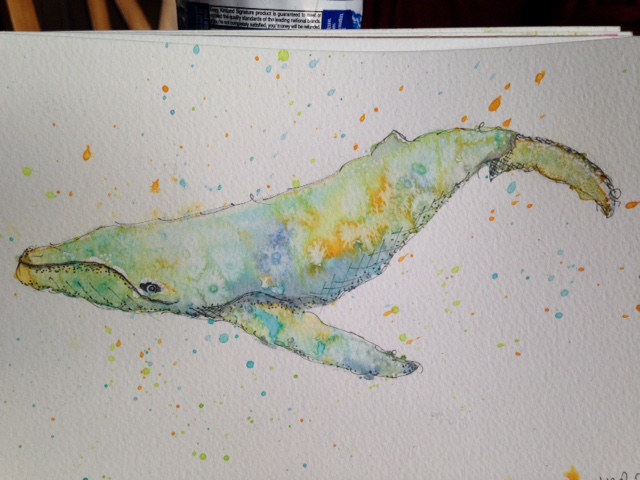 I did cheat and used graphite paper to get the image of the whale on my watercolor paper. No shame! Then this watercolor whale inspired me to try another version and seeing if I could make a tutorial from it. And boy did I choose well because unlike the whale which I love so completely, in the tutorial here I had several "oops" moments, so you will get to learn from my mistakes. Hooray! Shall we get started? For this tutorial we will be making a dolphin that will turn out to look like this, maybe (or even better?)!! 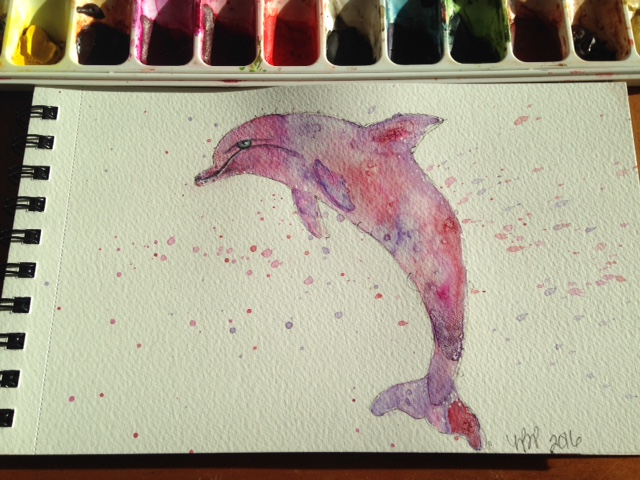 Step 1: Draw or trace your image (you can search Google for one you like , if you don't have one) onto cold press watercolor paper, any size you like. 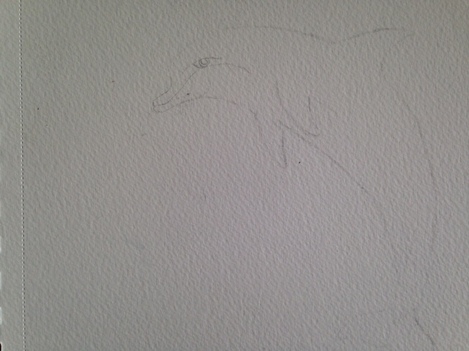 The image is faint because you don't want the pencil or graphite lines to show through the finished work. So use a light hand! Tip: Pencil under watercolor does not erase. Pencil over watercolor will erase. Step 2: Prepare your paint colors. Make enough washes of each color to complete your project. You will need to work fast once you get going.I chose purple, pink and red for this project. Make the washes as vibrant or as pale as you like (you can always add pigment but can't really take it away so easily with this technique), remembering that watercolor always dries lighter. 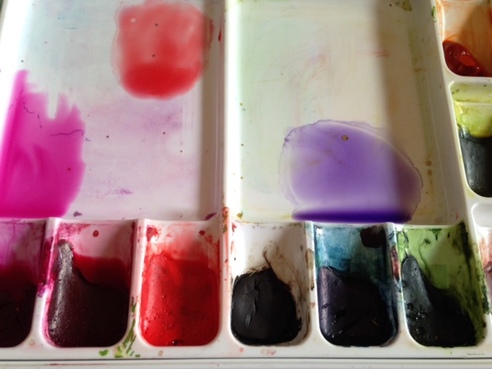 Step 3: Once you have your washes ready, take your brush and wet the area you want the paint to flow in. Notice I left one of the fins and the eye area dry so I could go back in later to finish them. I did not make my dolphin as wet as I was shown to do in the rooster, and that is a choice you can make for yourself. 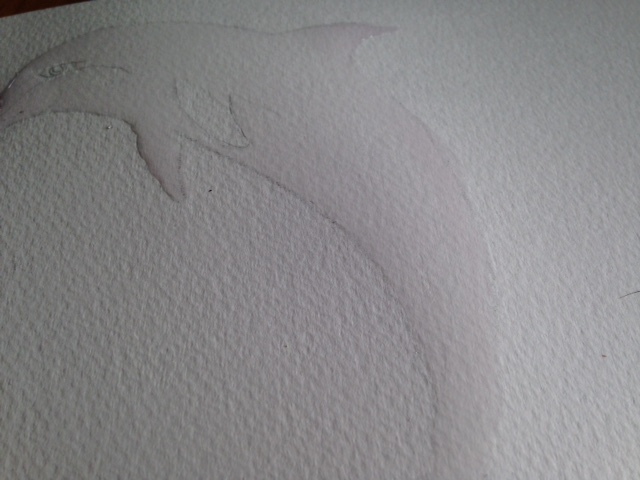 Step 4: Ok ready? Now drop your paint using a round brush you feel comfortable with for the size of the piece you are working on (you may want a brush for each color to make things go faster). You need to act quickly as you don't want the water to dry before you have been able to get color everywhere. I couldn't show you a step by step but you can see where the different colors are and how they start blending together for fun effects. I also used this time to splash the colors over the painting, using the same round brushes loaded with paint, as I had done with my whale. It adds playfullness, or at least I think so. This is also the time to add more color (more pigment) if you think you maybe need/want to intensify it.
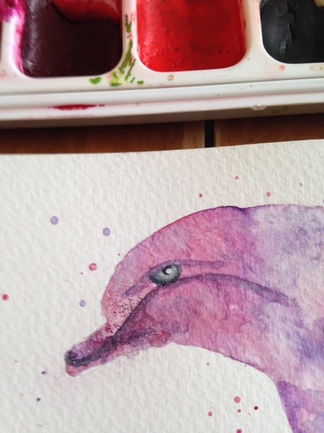
Step 5: Take salt (I used kosher salt here, but tables salt is fine) and sprinkle it sparingly over your image while it is still wet (I didn't add it to my splatters). I also messed up and got to much on some areas ( see the dorsal fin). Oh, well....  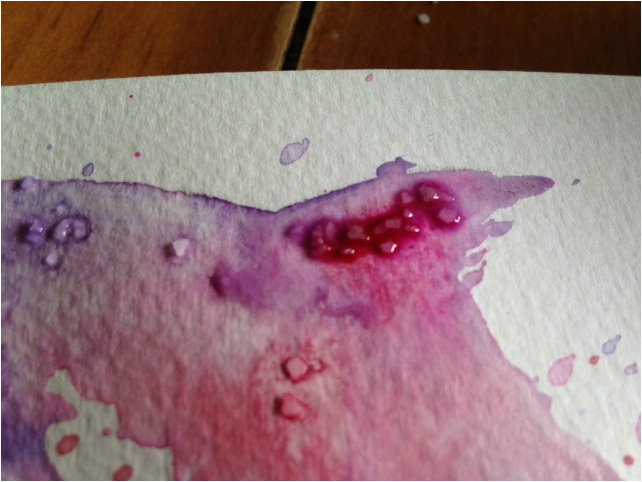 Step 6: Let it dry. Walk away, go for a walk, do laundry, have a snack, check your Facebook page... do anything except touch your art . Let. It. Dry. Completely. Yes, completely. Step 7: Sure it's dry? Ok, well then just take your hand and wipe away the salt! 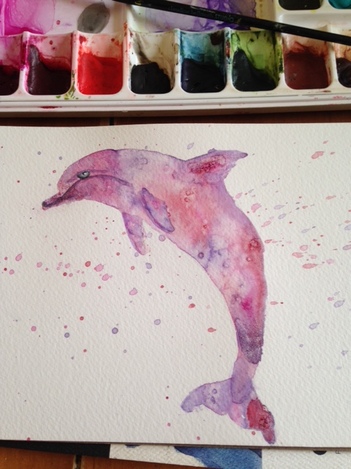 Step 8: Then add the detail to the eye, remaining fin and mouth (see how I messed that up? Don't do like I did. That was a result of not seeing my pencil line AND not consulting my image for how the mouth actually went. Oy!). For the eye you can use paint or pens. I used both. For the pen I used a Micron 01 and a Sharpie white paint pen. For the watercolor I used Payne's Grey (such a useful color).
Step 9: You can stop here if you want to. You have a wonderful piece of art! Pretty cool, huh?!! And if you don't, which I doubt, just try again, promise? We're learning together! OR you can go one more step and add some pen work. Again I used the micron 01 and The white Sharpie paint pen. It's all random and sketchy and just gives a little definition and high-lighting here and there. This is not my area of expertise (baking is), but I try! Don't be afraid to try. 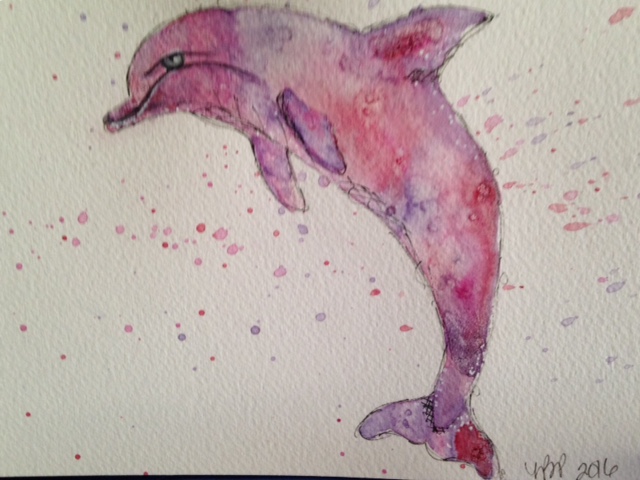 See, wasn't that fun? This technique has endless applications- geometric shapes, animals, flowers...the list goes on and on. Why not just try your hand at a few? I know I will be using this technique more often. You know why? I don't feel I have the skill, nor maybe even the patience, to make a realistic representation of very many things. This (along with tracing) allows me to paint things I never imagined painting before and getting super fun results. Look, I mean, it's a dolphin...and I painted it (insert happy dance here)! Make art. Have fun! Share your results (go ahead and post a pic of what you create using this technique on my Facebook page here )! ♥
|

Archives
December 2019
Categories
All
|


 RSS Feed
