|
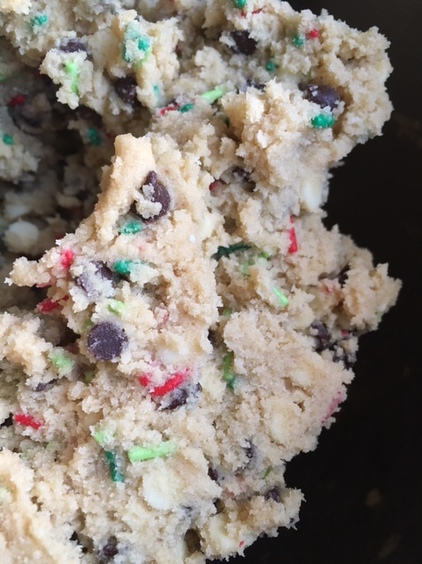
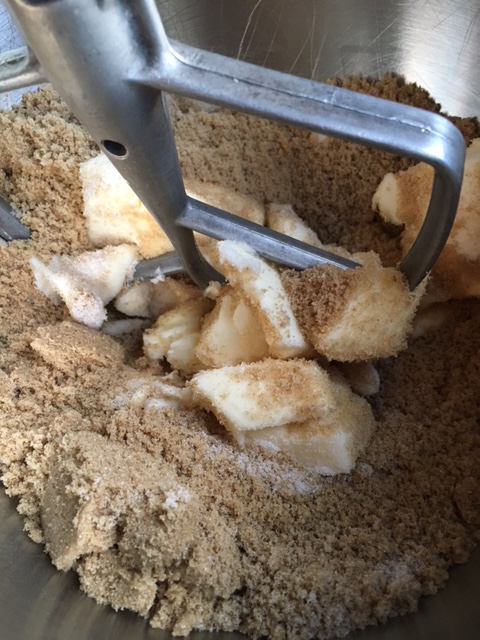
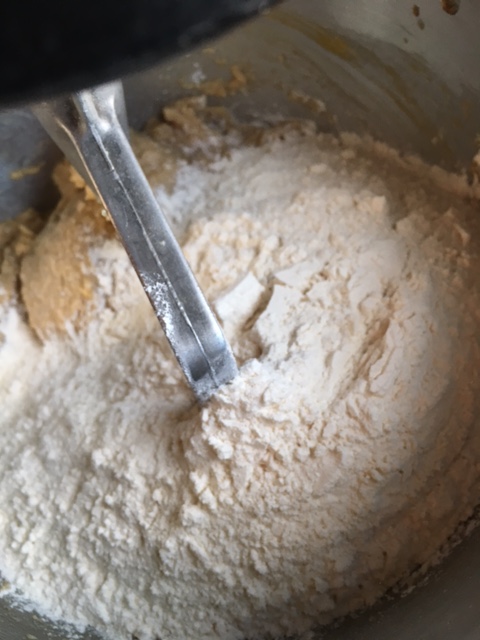
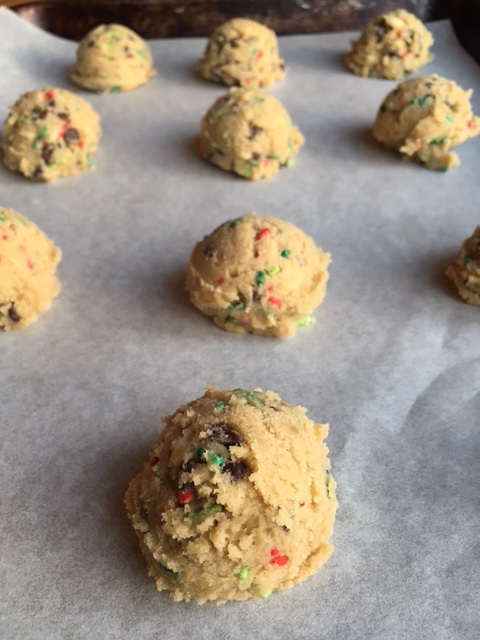
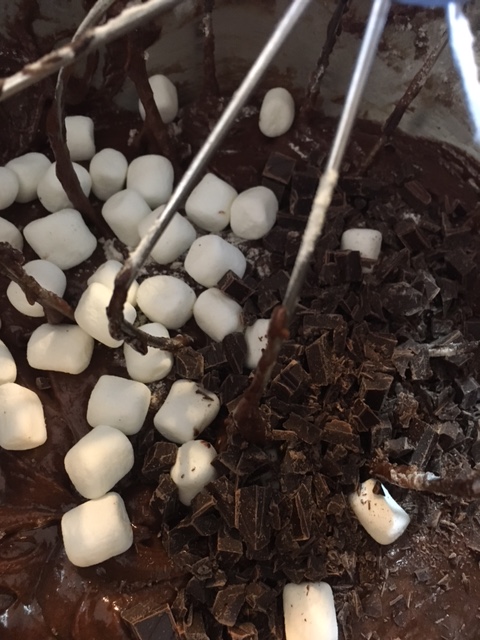
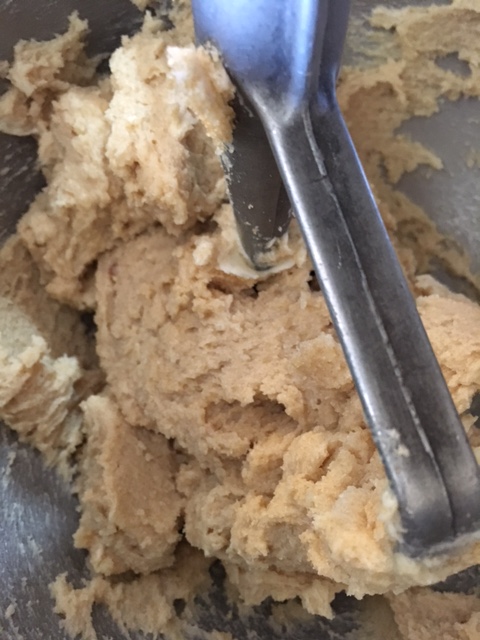
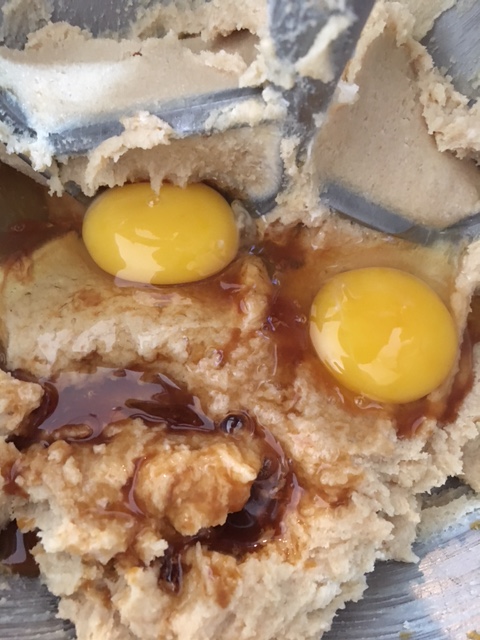
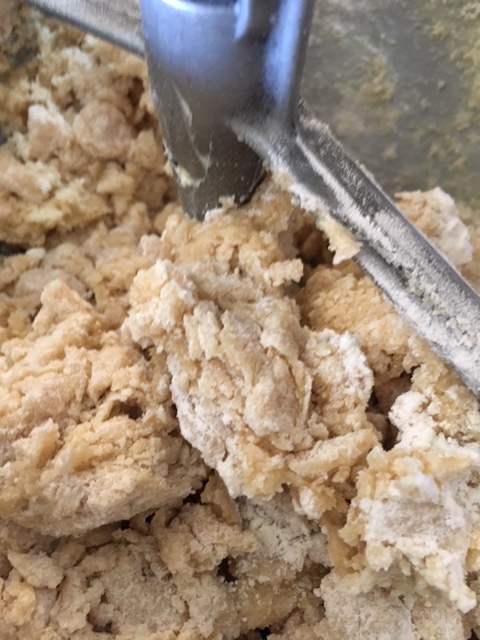
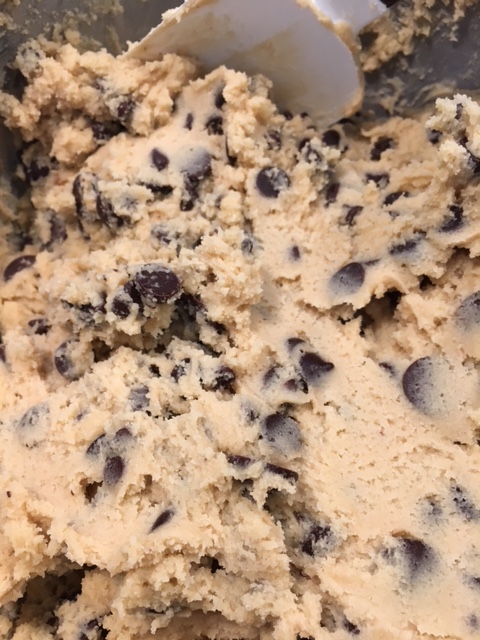
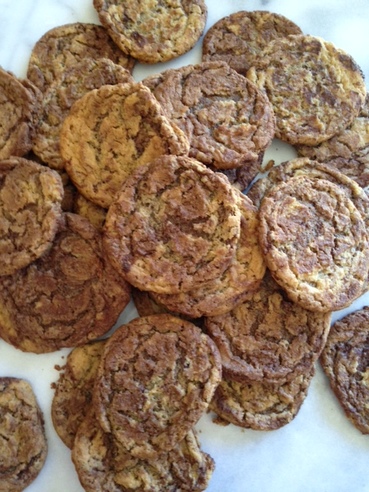
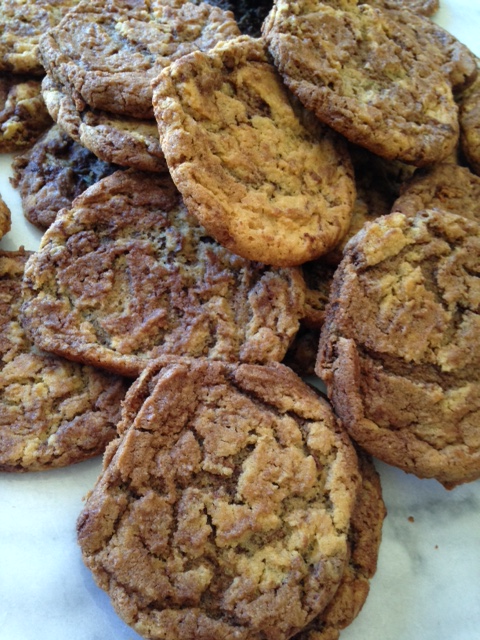
"All you need is love and Christmas Cookies." - unknown I can hardlly believe Christmas is only 19 days away. This year has gone by so very fast to me! And since it's the Christmas season, seems only fitting to offer up a cookie to add to Santa's plate. This is a cookie that's a rif on the Funfetti (PIllsbury trademark) cake that's beloved by children everywhere. You can make them any time of the year by customizing the jimmies (elongated sprinkles) used. In this case I used a mix of light and dark green with red. Festive, no? Last year I made logs of raw dough which I festively wrapped as gifts leaving the actual baking to my friends. It sure saved me a lot of time and it turned out really cute. It's another idea for you to keep in mind if you are gifting treats this holiday season. Some of my other favorite cookie recipes are here. If toffee is your thing, the ever popular Christmas Crack is a sure crowd pleaser, but for now, Confetti Cookies it is! So let's hop on over to the mixer and get this holiday baking going! Christmas Confetti Cookies 11 1/2 ounces( 1 cup 7 Tablespoons) unsalted butter, room temperature 7 ounces (1 cup) granulated sugar 10 ounces brown sugar (1 1/4 cups) packed 2 large eggs 2 teaspoons pure vanilla extract 16 ounces (about 3 1/3 cups) all-purpose flour 2 ounces (4 Tablespoons, plus 2 teaspoons) yellow cake mix* 1 1/8 teaspoons baking powder 1 1/8 teaspoons baking soda 1 1/2 teaspoons kosher salt 3 ounces (about 1/2 cup) holiday colored jimmies 10 ounces( about 1 1/2 cups) mini chocolate chips 6 ounces (about 1 cup) mini (or regular) white chocolate chips** 1 Preheat oven tp 350 degrees F. In a medium bowl, whisk together flour, cake mix, baking powder and soda and salt; set aside. 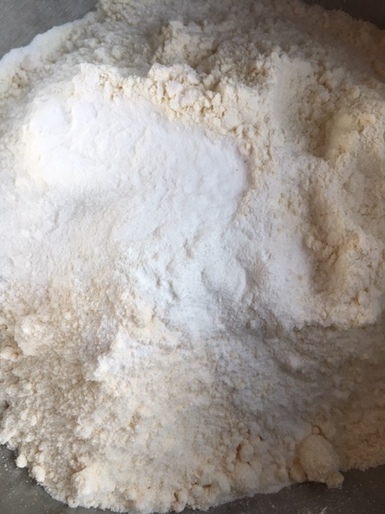 2. in bowl of a stand mixer, cream together butter and sugars on low speed until well combined.
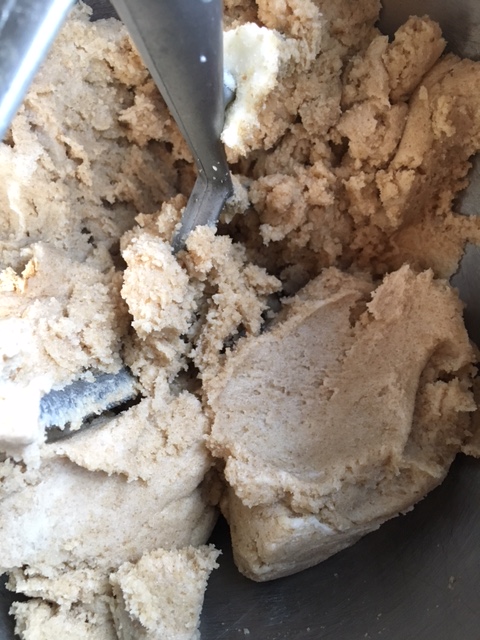
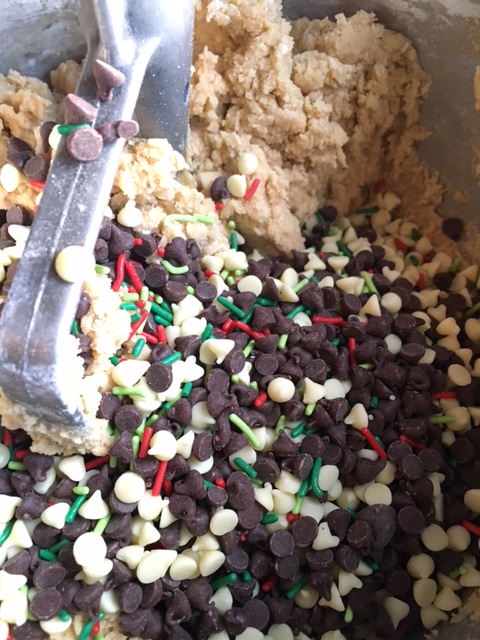
3. On low speed stir in eggs and vanilla. Increase speed to medium for 15 seconds. Reduce speed to low, and scrape down sides of bowl. 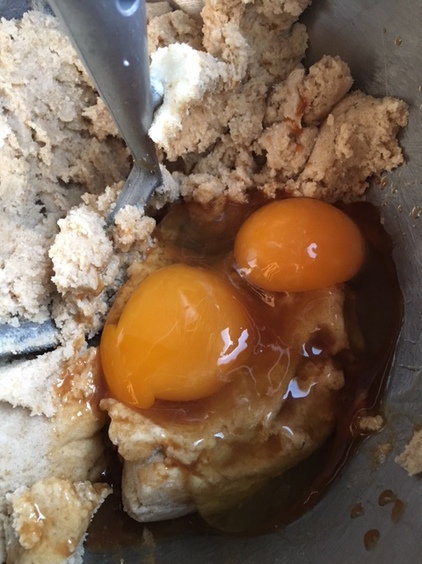 4. Stir in dry ingredients until almost completely incorporated. Scrape down sides of bowl and stir in both mini chips and jimmies.
 5. Scoop dough onto parchament lined baking sheets. Bake for 10-12 minutes until done.
6. Let cool completely before wrapping or storing. can keep frozen, wrapped air-tight for about 1 month. 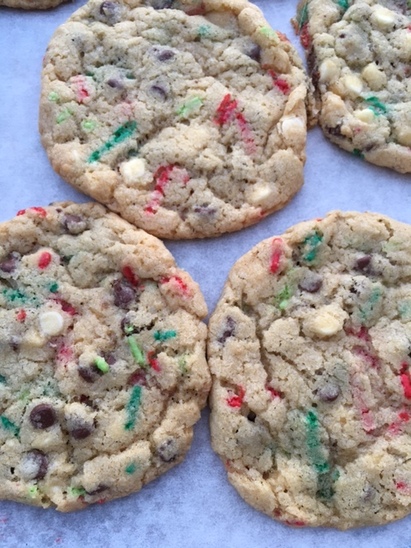 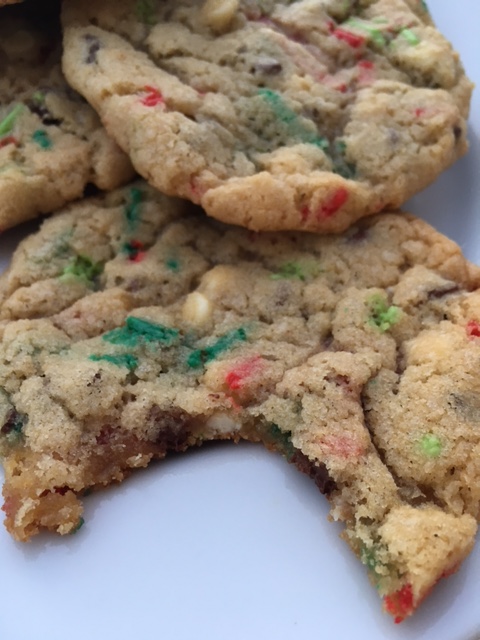 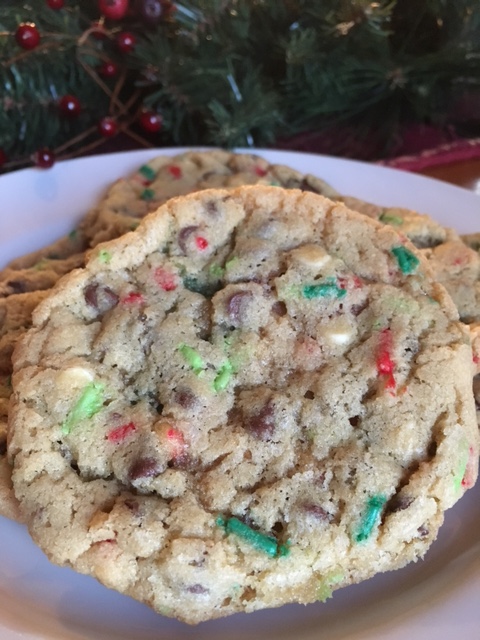 * Keep leftover cake mix wrapped air-tight in the freezer for future cookie making sessions.
** for best results and flavor, please use the ones that contain cocoa butter and not alternative fats. Happy Baking and sharing! ♥ #cookiesandkindness
0 Comments
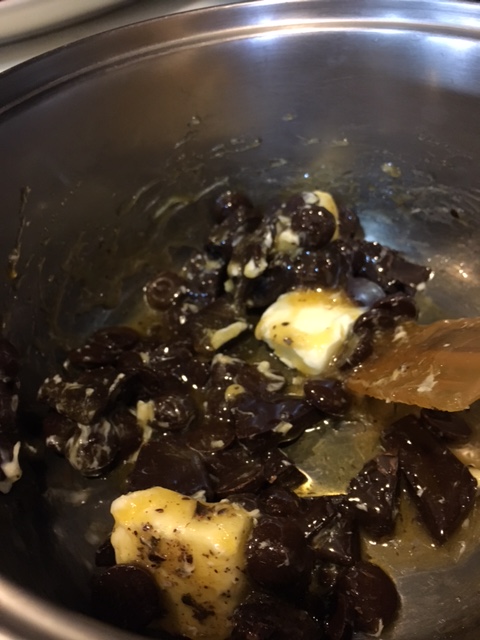
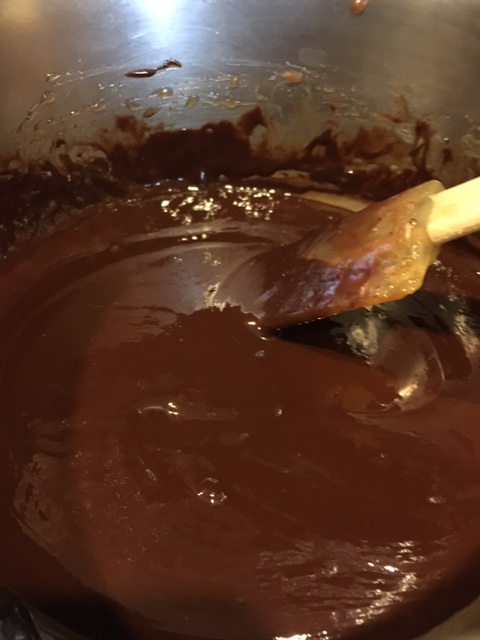
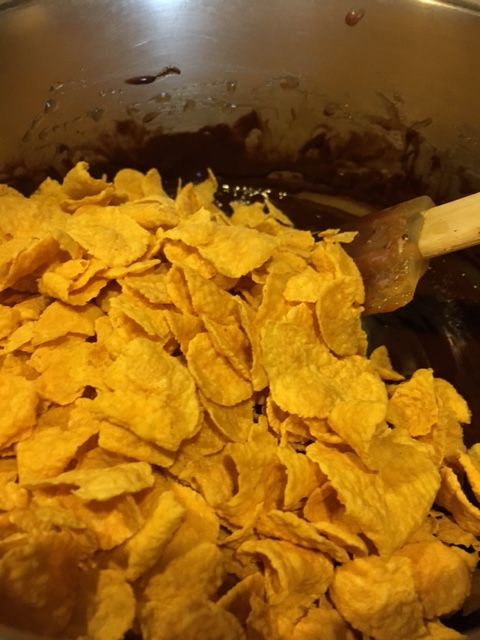
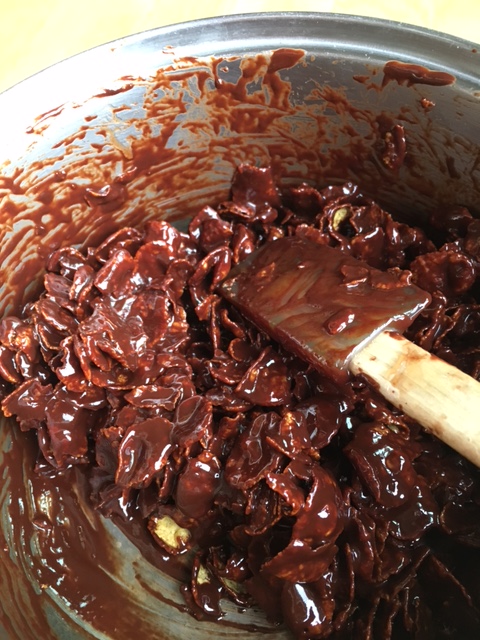
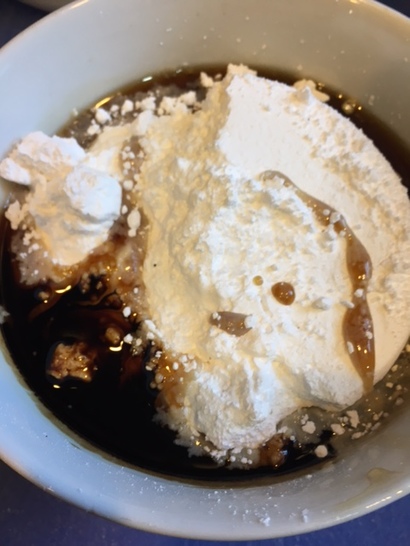
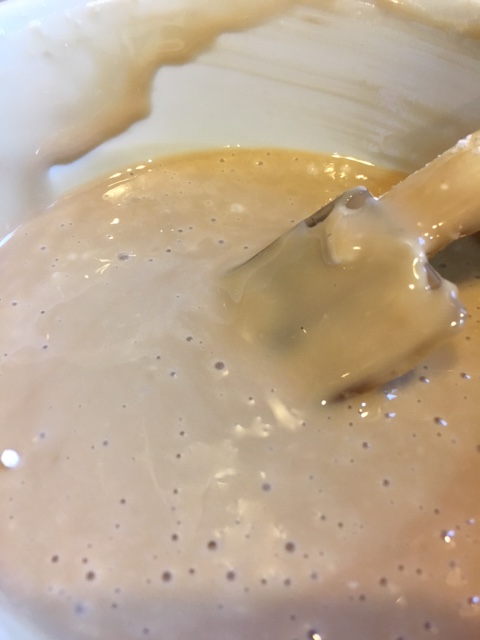
"A balanced diet is a cookie in each hand." - unknown October is just about over, so this is my last post commemorating National Cookie Month. I thought I'd end it with a no-bake cookie, so simple yet so unbelievably good. I tell you they are addicting! This is an adaptation of a recipe by the acclaimed British food writer/cookbook author/television personality Nigel Slater. I love how honest his food is. I am in love with his book Real Food, although he has 7 other titles to his name. I call these no bake cookies, Nigel's Fudge Crunchies. They have been a hit in my house for many years now. My kids love them! You may argue they are more confection than cookie, but that would just be superfluous (one of the only big words I know -lol!), Any way you call them they are delicious. I will admit they don't photograph as well as some, but you'll get a good idea nonetheless. Another (any) holiday favorite perhaps? If you want more cookie recipes, you can scroll through here. Nigel's Fudge Crunchies- Makes about 21 3 Tablespoon unsalted butter teensy weensy pinch of sea salt 3 Tablespoons Lyle's Golden Syrup* 1/2 ounce Unsweetened chocolate, fienly chopped 3 ounces bittersweet chocolate (60-72%) ** 2 1/2 cups corn flakes colored non-pareils of your choice- optional, but recommended 1. In a medium saucepan over low heat stir together the butter, golden syrup, salt and chocolates until melted and smooth, stirring continuously.
2. Remove chocolate mixture from heat and gently stir in corn flakes with a rubber spatula until completely coated with chocolate.
3. Place 21 mini muffin cups on a sheet pan if you want to have a more polished presentation. Alternatively, line a baking sheet with parchment or waxed paper. Scoop 1 tablespoon of cookie mixture into each mini muffin cup or straight onto lined baking sheet. 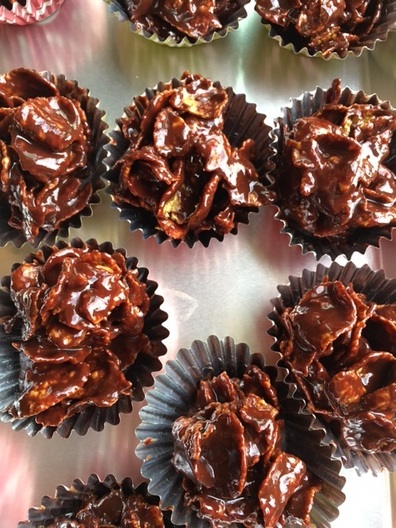 4. Sprinkle the tops with a small pinch of non-pareils or to taste. 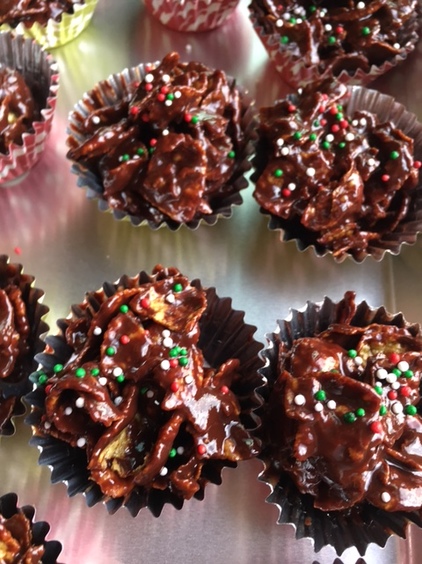 5. Place tray in refrigerator to set up cookies. Best stored in refrigerator... if they last that long. ; ) 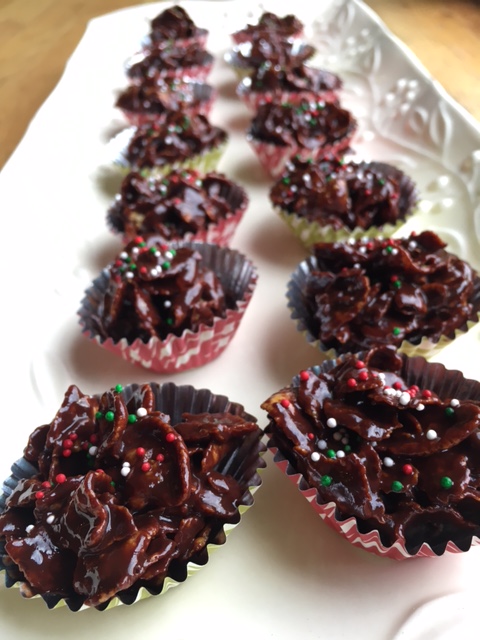 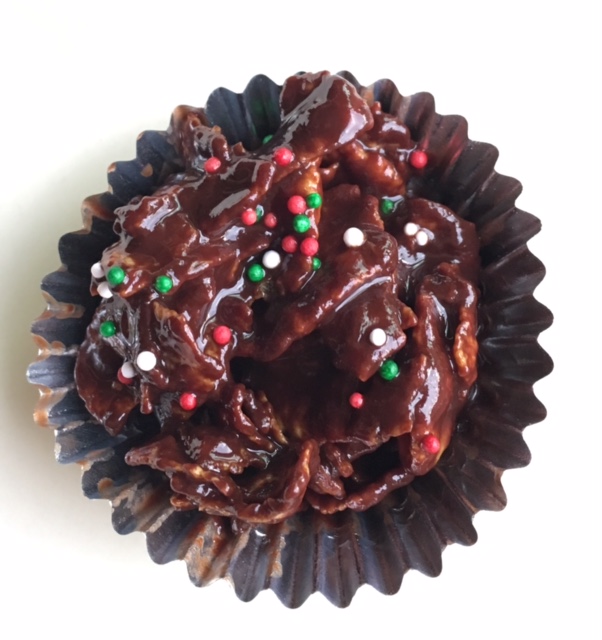 Notes:
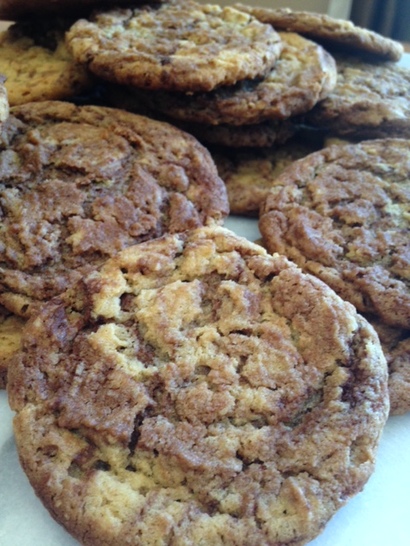
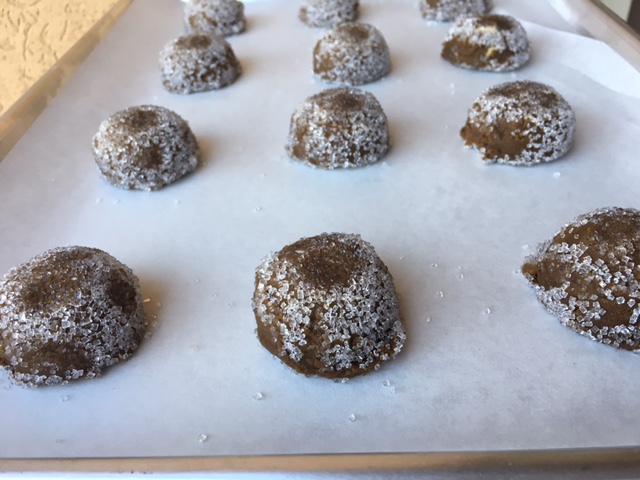
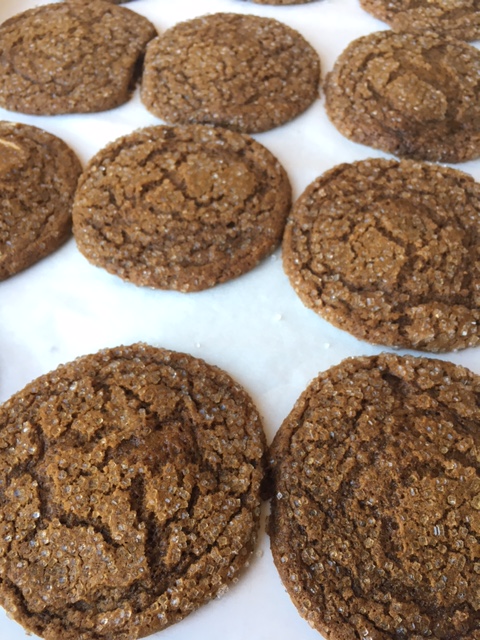
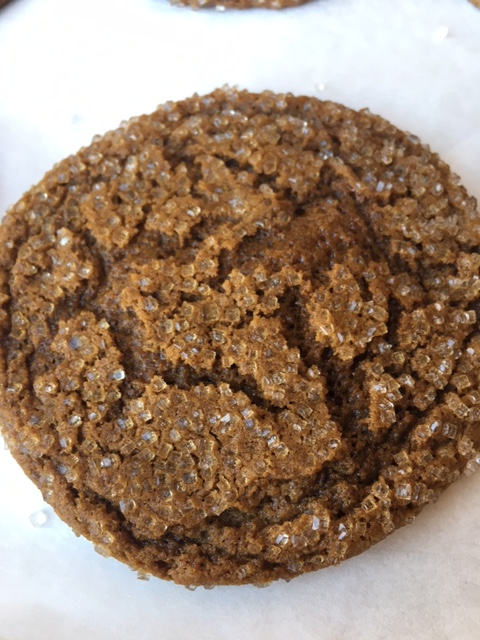
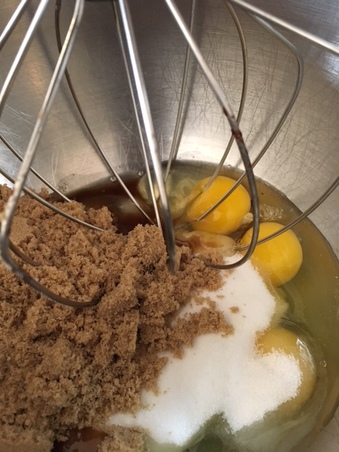
* Lyle's Golden Syrup is a very unique tasting cane sugar product. It has the flavor of almost a caramelized, slightly burnt sugar. It is superb tasting. You will not get the same flavor substituting another liquid sugar syrup such as corn or rice syrup or honey, but you can feel free to experiment. Besides on-line you may find Lyle's Golden Syrup at specialty Food stores, international grocer's or if you live in the US, at Cost Plus World Market. ** Since this recipe relies on so few ingredients they all have to be top notch. Use the best chocolate you can afford here. This is not the place to use chocolate chips or candy bar chocolate. Some reliable quality brands are Valrhona, Callebaut, E Guittard, El Rey or Lindt. "Cookies are made with butter and love."- Norwegian Proverb By now you all know October is National Cookie Month, right? So in the spirit of sharing and without further ado, here is my favorite Ginger Cookie. It's got some yummy, fragrant spice to it, perfect for fall.It's crisp around the edges then soft everywhere else with some nice added crunch from the coarse sanding sugar. It also makes a mean vehicle for ice cream sandwiches, if you are feeling like taking it in that direction (lemon or blackberry sorbet would be nice inside, but vanilla ice cream would also be delicious or vanilla ice cream with some lemon curd folded in....just sayin'). I do offer one quick variation at the end, too, if you are looking to dress them up a bit. Chewy Ginger Cookies 2 1/2 cups (11 1/2 ounces) all-purpose flour 1 3/4 teaspoons, scant, baking soda* 1/2 teaspoon fine sea salt 1 Tablespoon ground ginger 1/2 teaspoon ground cinnamon 1/2 teaspoon ground allspice 1/4 teaspoon ground black pepper 2 sticks plus 2 Tablespoons (9 ounces) unsalted butter, room temperature 1/2 cup (3.5 ounces) packed light brown sugar 1/2 cup (3.5 ounces) granulated sugar 6 Tablespoons unsulfured molasses 1 large egg 1/2 teaspoon pure vanilla extract sanding or pearl sugar 1. With a whisk, mix together the first seven ingredients; set aside. 2. In the bowl of a stand mixer with the paddle attachment, cream together the butter, granulated sugar and brown sugar on low speed until well combined. 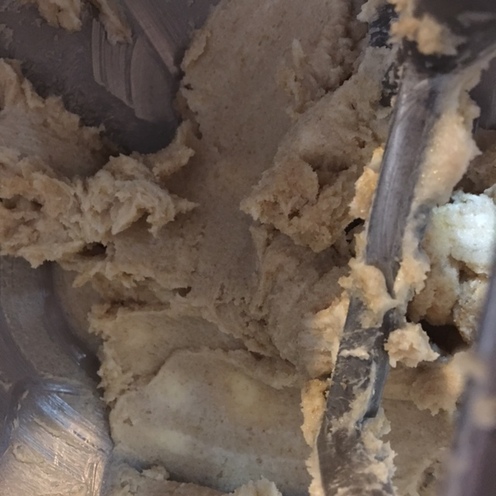 3. On low speed mix in the egg, molasses and vanilla. Increase speed to medium to help combine the mixture well for about 20 seconds. Reduce speed to low. 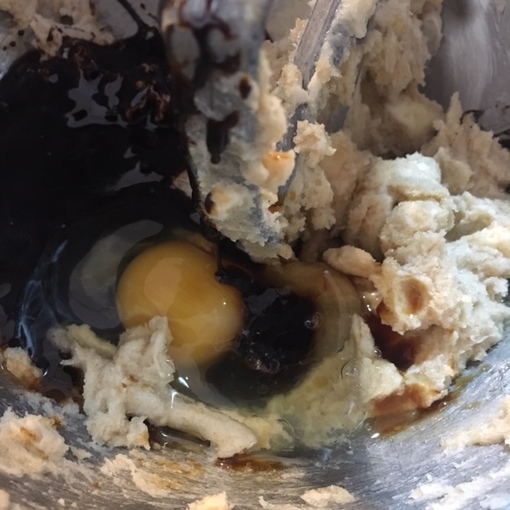 4. Mix in flour mixture until just combined.
5. Remove bowl from mixer and cover tightly with plastic wrap. Refrigerate dough for 24 hours. This gives all the spices time to really meld into the dough for the best flavor. 6. When you are ready to bake, preheat oven to 350 degrees Line baking sheets with parchment paper. 7. Remove dough from fridge and scoop out using an ice cream scoop to get uniform cookies. Dip cookies into sanding or pearl sugar. Place dough 2" apart on prepared baking sheets. Lightly pat down the tops of the dough.
8. Bake cookies in preheated oven for 10- 12 minutes until edges are golden brown and center seems set and crackles. Cookie will have puffed up, then sank back down.
 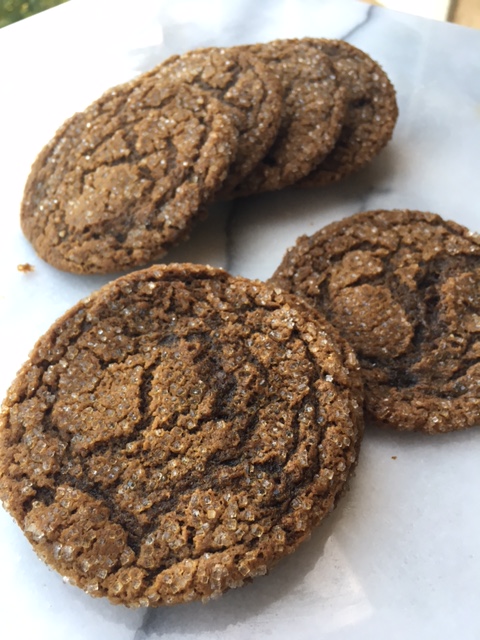 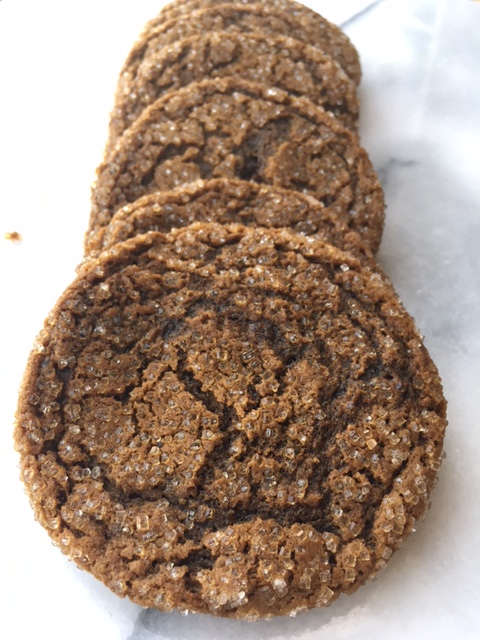 Variation: White Chocolate-Ginger Chews: Stir in 1 cup of fine quality, coarsely chopped white chocolate such as Lindt, Callebaut or Valrhona into batter after the flour. Proceed as directed in the recipe. The sweetness and creaminess of the white chocolate is a really nice complement to the spiced dough and looks really pretty , too. 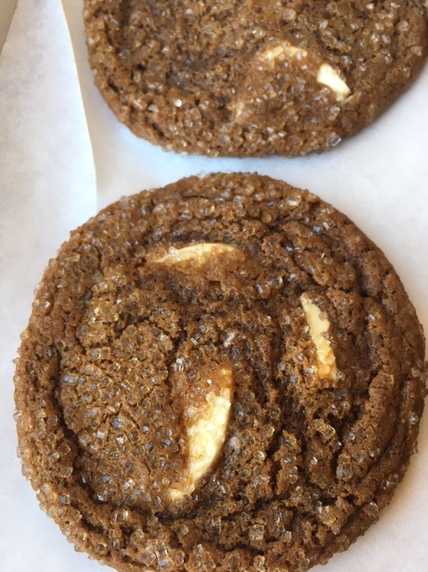 * Note: this recipe is for cooking at high altitude (about 5,000 ft, where I live). If baking closer to or at sea level, increase baking soda to 2 1/4 teaspoons.
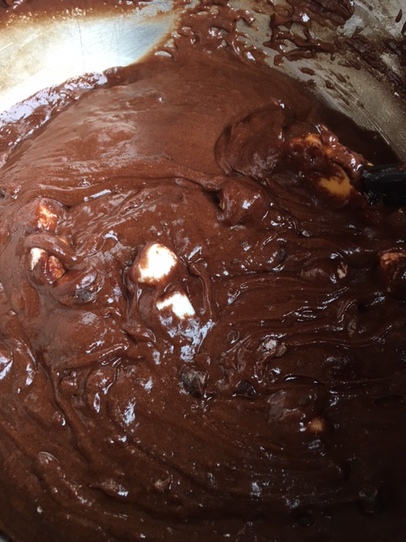
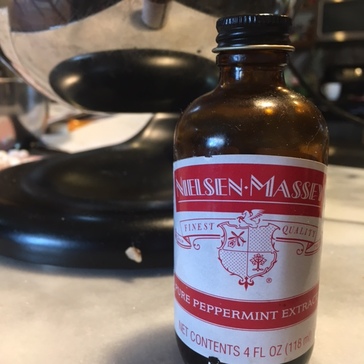
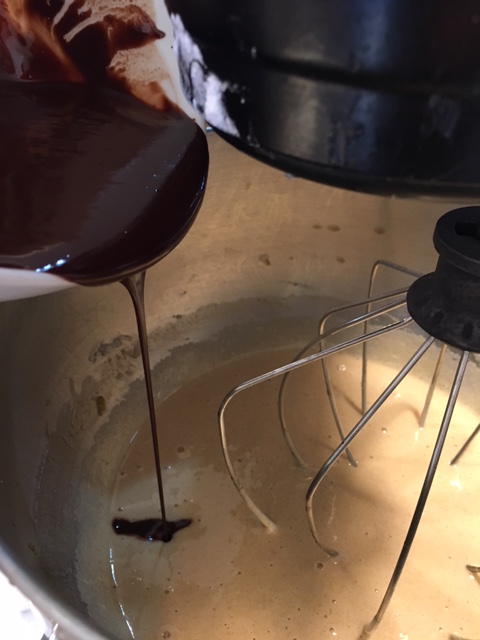
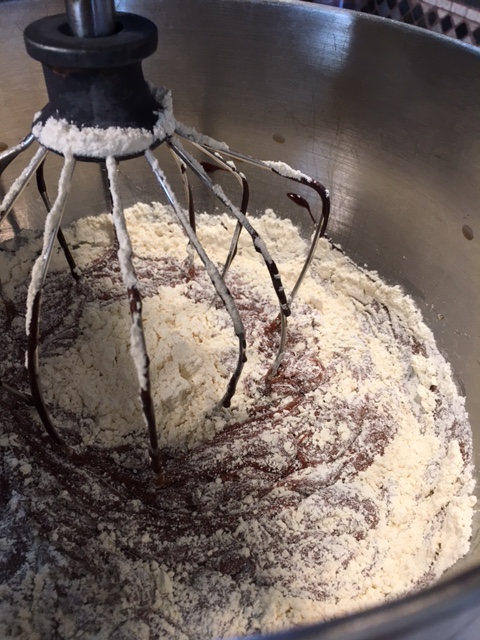
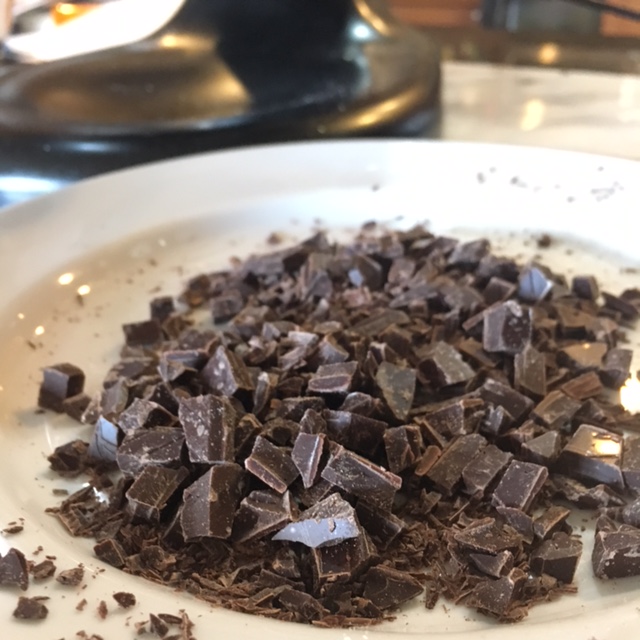
"C is for Cookie. That's good enough for me." -Cookie Monster National Cookie month continues! I posted a picture of this cookie a while back on my Facebook and Instagram feed and it was quickly voted the recipe most of my followers there wanted to see. It is worth their adoration, too. It is fudgy and minty and beautiful. I know it's only a little early to talk about this, but what a great addition to your holiday cookie trays this would be, am I right? They are super easy to make. Just make sure you use good quality chocolate like the mint infused Lindt chocolate bar here. Be sure to check out the interesting variations below. Also if mint and chocolate are your thing, check out these recipes here and here. Mint Crinkle Cookies 2 cups (9 ounces)all purpose flour 1 1/2 teaspoons baking powder * 1/8 teaspoons sea salt 5 ounces unsweetened chocolate, finely chopped 8 tablespoons (4 ounces ) unsalted butter, cubed 4 large eggs 1 cup (7 ounces) granulated sugar 1 cup (7 ounces) packed light brown sugar 1 1/2 teaspoons pure vanilla extract 1/4 teaspoon pure peppermint extract 2 ounces mint infused chocolate such as Lindt 1/3 cup mini marshmallows (stale is even better) Powdered Sugar 1. Melt the chocolate and butter together in a medium bowl; set aside. 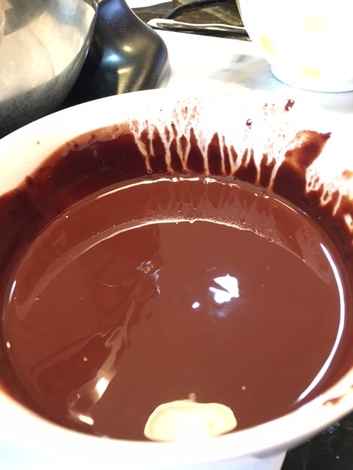 2. Whisk together flour, baking powder and salt; set aside. 3. In the bowl of a mixer whisk together the eggs, granulated and brown sugars and extracts on medium speed until well combined and just slightly increased in volume
4. Stir in melted chocolate on low speed a. Scrape down bowl and then add in flour until almost fully combined.
5. By hand, using a rubber spatula, stir in chopped mint infused chocolate and mini marshmallows until well combined.
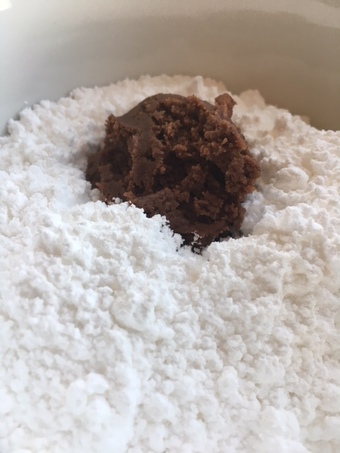
 6. Cover dough tightly with plastic wrap and chill for at least 2 hours or over-night. 7. When you are ready to bake cookies, preheat oven to 350 Degrees F and line baking sheets with parchment paper. 8. Remove dough from fridge and using an ice cream scoop, portion out dough into approximately 2 1/2 Tablespoon balls. Coat dough thoroughly in powdered sugar. Space 2" apart on prepared baking sheets.
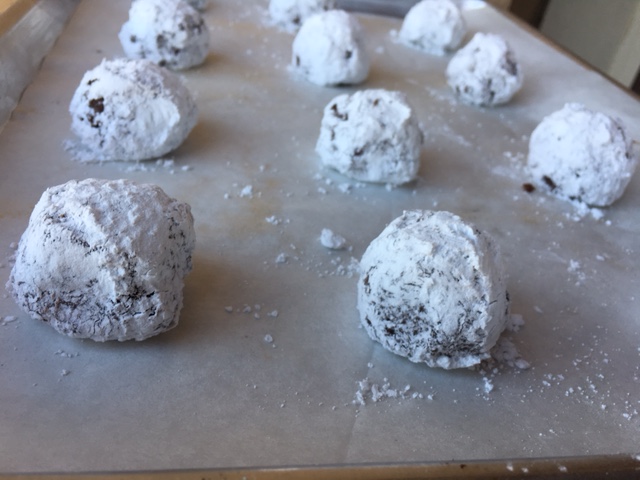
9. Bake cookies in preheated oven for 10-12 minutes until tops are crackled and middle appears set and is no longer glossy. Remove from oven and allow to cool for several minute before transferring to a cooling rack. 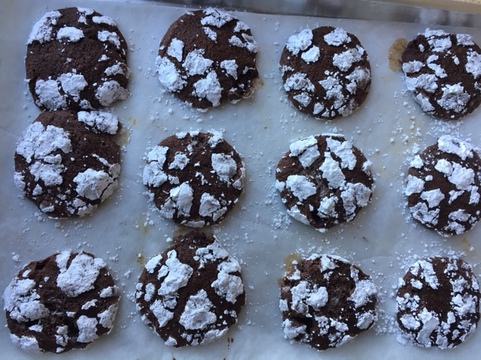  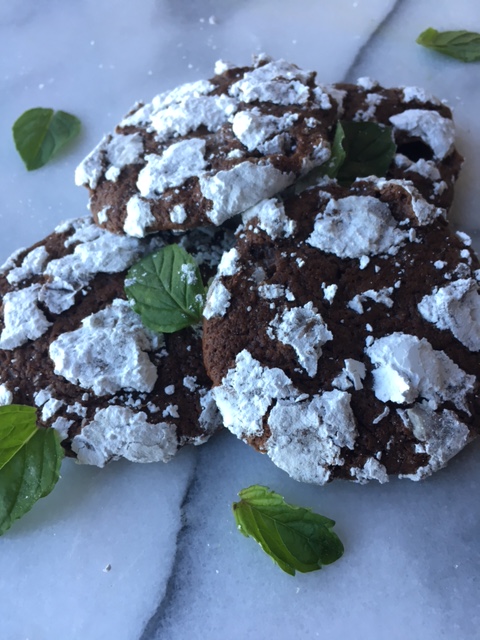 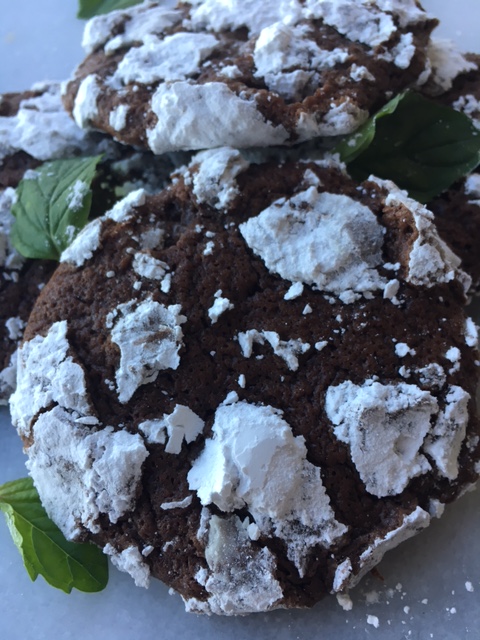 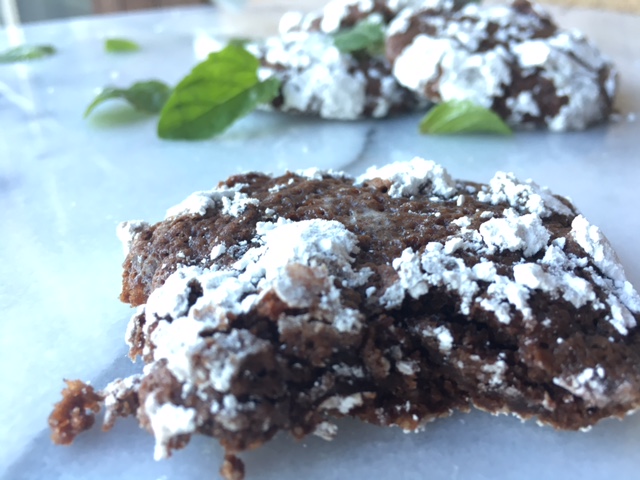 Note:
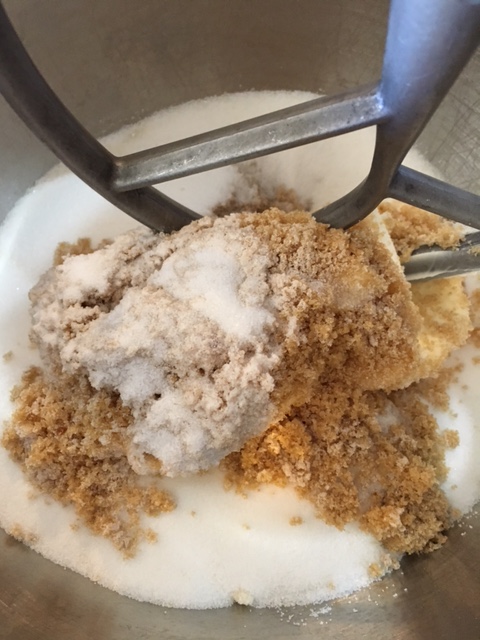
* if baking at sea level (I am at high altitude) increase baking powder to 2 teaspoons. These cookies freeze beautifully, wrapped air-tight for up to 2 months if you want to get a head start on your holiday baking. Variations: Chocolate Orange Crinkles- Omit pepermint extract. Increase vanilla extract to 2 teaspoons, Stir in 1/2 teaspoon fresh orange zest with eggs and sugar. Omit mint chocolate and use 2 ounces Lindt Intense Orange instead. Mocha Crinkles: Omit peppermint extract.Increase vanilla to 2 teaspoons Stir in 1/2 teaspoon espresso powder with vanilla. Omit mint chocolate and use finely chopped good quality milk chocolate instead. Chocolate Chili Crinkles-Omit peppermint extract. Kee vanilla at 1 1/2 teaspoons. Add 1/4 teaspoon PURE chile powder (not a spice blend chili powder) to the dry ingredients. Omit Mint chocolate and use 2 ounces of Lindt Chili Chocolate instead. Dark Fudge Crinkles: Omit peppermint extract. Increase vanilla to 2 teaspoons. Add a little pinch of instant espresso powder to dry ingredients. Omit mint chocolate and substitute mini chocolate chips or chopped up bittersweet chocolate instead. “I want to take all our best moments, put them in a jar, and take them out like cookies and savor each one of them forever.” - Crystal Woods, Write Like No One is Reading If you read my last post you know that here in the US, October is National Cookie Month. Unfortunately, with our Presidential election only weeks away, and all the attention directed toward that, the cookie has been over-looked. I know, it's truly a sad state affairs. For one, if both (which should read all) parties would just sit down with some cookies and commit to the greater good, I am certain things would go a lot smoother. Who writes the policy for that? In any case, here is my second entry for the month....the quintessential Chocolate Chip Cookie. It is buttery, brown sugary and so full of chocolate! I worked on this recipe for a long time and I may still tweak it here and there, but for now, it's better than good. I know everyone says their recipe is the best, but I really mean it! Just kidding....but hey why not try it and see what you think? The worst thing that will happen is that you will make somebody really happy when you pull them out of the oven! Or spread the love by bringing a plate to someone special just because! #cookiesandkindness Chocolate Chip Cookies:-makes a lot* 16 1/2 ounces (2 cups plus 1 tablespoon) unsalted butter, softened 12 ounces (approx. 1 3/4 cup lightly packed) light brown sugar 8 ounces (approx. 1 cup 2 Tablespoon) granulated sugar 1 tablespoon Pure Vanilla Extract 2 large eggs 1 1/2 teaspoon kosher salt 21 ounces ( approcimately 4 1/2 cups) all-purpose flour 1 1/8 teaspoon baking soda** 1/4 teaspoon baking powder 1 pound 12 ounces chocolate chips, chopped bittersweet chocolate or a combination of the two 1. With a whisk, mix together, flour, salt, baking soda and baking powder in a medium bowl. Set aside 2. Cream butter and sugar on low speed of stand mixer until combined.
3. On low speed, add in eggs and vanilla. Raise speed to medium for about 20 seconds, to combine well. Reduce speed to low. Stir in flour mixture and mix until almost combined.
4. Stir in chocolate chips/chopped chocolate (I like to use different kinds mixed together just for fun and variation).
5. Wrap dough tightly with plastic wrap and chill for 24 -48 hours*** 6. When ready to bake, remove dough from fridge about 2o-30 minutes before baking, line baking sheets with parchment paper and preheat oven to 350 degrees. 7. Scoop out dough using an ice cream scoop that holds about 2 1/2 tablespoons. Place them 2" apart on lined baking sheets. Pat down the tops slightly. 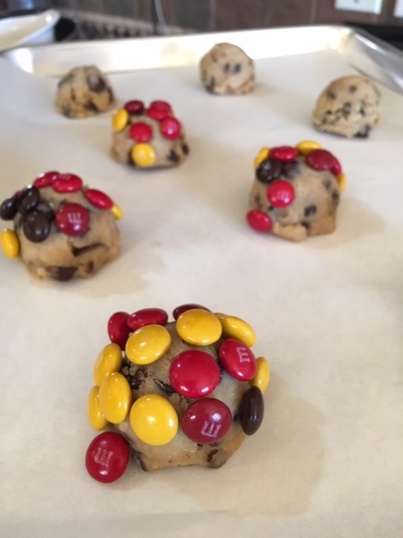 8. Bake cookies for 10-12 minutes until edges are golden brown and middles are set. Let cool a few minutes before transferring to a wire cooling rack and/or devouring them. Hint: try eating them frozen- my personal favorite!! 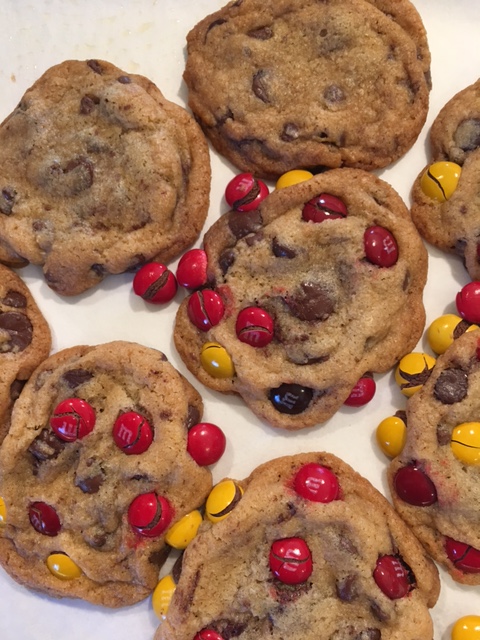 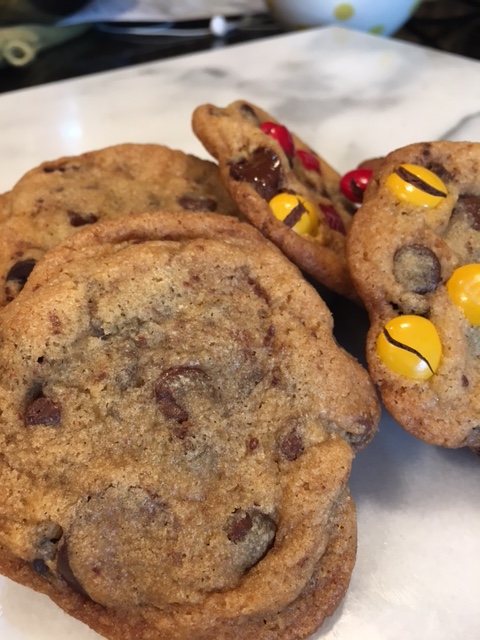 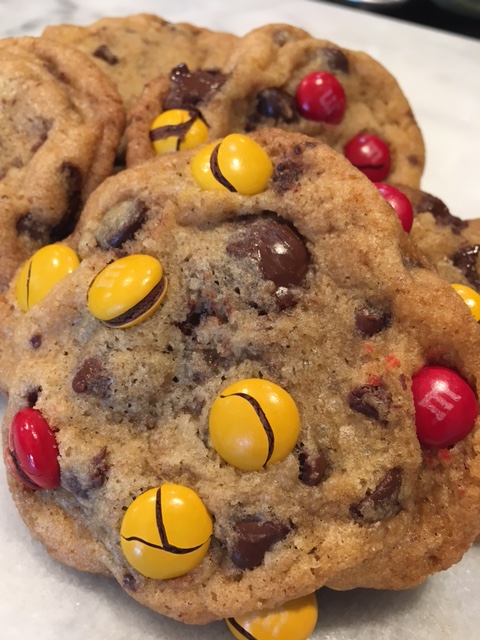 Notes:
* I like to make this really large batch, scoop out what I want for cookies then scoop out the rest of the dough balls onto a cookie sheet and freeze until firm. Transfer the dough balls to a freezer bag and store in the freezer, as air-tight as possible, for up to 2 months. Then when you want cookies, simply remove some dough balls from freezer, let sit out 2o-30 minutes before baking and you get cookies with little to no effort! ** this recipe was developed at high altitude. If you live closer to sea level you may have to increase your baking soda to 1 1/2 teaspoons, maybe even 1 3/4. Baking powder is just to give it a little lift. Do not change. *** if you chill the dough before baking, this gives all the ingredients time to really meld together and that in turn will give you more golden brown cookies with a more pronounced caramelization of the edges, which tastes so good. IF you can't stand to wait, baking them immediately after mixing will still be fine. Variations: M&M chocolate chip cookies (my favorite): Reduce chocolate chips from 28 ounces to 24 ounces. Dip tops of dough balls into a bowl of your favorite plain M&M's (I love making them using all the seasonal M&M varieties-autumn colors shown here), Mini M&M's are also fun. Bake as directed. Chocolate Chip with Walnuts: Reduce Chocolate chips from 28 ounces to 22 ounces. Stir in 1 1/2 cups lightly toasted, coarsely chopped walnuts along with chocolate chips. Bake as directed. (These remind me of my paternal grandma, Julia Byrnes). ♥ “Empty?! You took all the cookies!. They were crying to get out of the jar... Cookies get claustrophobia too, you know!” -Charles M. Schultz You know what makes me mad? Here it is National Cookie Month and nobody, I mean nobody, is talking about it! There's all this talk about this candidate and that candidate and which celebrity is doing what where, but no one is talking about cookies (well, except for Dorie Greenspan, noted cookbook author, who has a new book coming out at the end of the month on the subject). Cookies deserve a little more respect than that, I think. So I'm here to give it to them. Cookies are magical. They are little discs of flour, butter and sugar in some variation that you can hold in your hand, no matter how young or how old you are. Who doesn't love a cookie? One little cookie can transport you back to your childhood in an instant (think Proust's madeleines), help you make a friend, make a bad day better, are essential to any Christmas celebration worth celebrating and can create world peace (who could be angry over cookies and milk, right?). Name one other food with that much power and influence. Just as I thought.... So here is my first cookie worth celebrating this month. I created this cookie, Glazed Maple Oatmeal Cookie with Walnuts after trying the recipe for Maple Oatmeal scones in The Barefoot Contessa Cookbook by Ina Garten (p 222). Though I love Ina's scones, generally speaking I am not a scone gal. I am, however, a completely devoted cookie gal. I love this cookie with it's chunky texture full of toasted walnuts (I say the walnuts are essential to this recipe- they temper the sweetness and add crunch) and drizzled with that sweet maple glaze. I hope you will love it, too! Glazed Maple Oatmeal Cookies with Walnuts- makes about 2 1/2 dozen 8 ounces ( approx 1 1/2 cup plus 1 Tablespoon) all-purpose flour 3/4 teaspoon kosher or sea salt 3/4 teaspoon baking soda* 1/4 teaspoon ground cinnamon 8 1/2 ounces (2 sticks plus 1 Tablespoon) unsalted butter, room temperature 4 ounces (approx 1/2 cup plus 1 Tablespoon) granulated sugar 7 ounces (1 cup firmly packed) light brown sugar 1 large egg 2 teaspoons pure vanilla extract 1 fluid ounce (2 Tablespoons ) PURE maple syrup (grade B if available) 1/2 teaspoon maple extract 4 1/2 ounces lightly toasted walnuts, coarsely chopped 7 ounces ( 2 cups) old -fashioned oats Glaze: 1 1/2 cups powdered sugar 3 Tablespoons PURE maple syrup (grade B if available) 1/4 teaspoon maple extract teensy pinch (just a few granules) sea salt 1. Preheat oven to 350 Degrees F. Line a couple baking sheets with parchment paper; set aside. 2. in a medium bowl whisk together the flour, salt, baking soda and cinnamon. Set aside. 3. In the bowl of a stand mixer, on low speed, cream together the butter and sugars until combined well . Mix in the egg, syrup and extracts and combine well, increasing speed to medium for about 30 seconds. 4. Return speed to low and stir in the flour mixture until almost completely absorbed. Add in oats and walnuts. Mix well. The results will look like this: 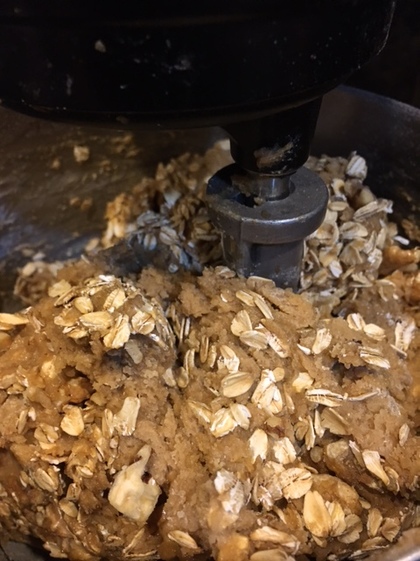 5. Scoop out dough using an ice cream scoop about 3 " apart on prepared baking sheets.**  6. Bake in preheated oven for about 10-12 minutes until edges are nicely golden and middle seems set. Cookies will have puffed up a bit in center and then flattened out. Let cool about 4 minutes then glaze. 7. To make glaze, combine powdered sugar, 3 Tablespoons maple syrup, 1/4 teaspoon maple extract, teensy pinch of salt and enough hot water to make a smooth icing with a drizzling consistency.
8. Using a spoon or spatula, drizzle the tops of the cookies Jackson Pollack style with icing ( as much or as little as you'd like), but you want to see cookie beneath the glaze, not have it completely covered). 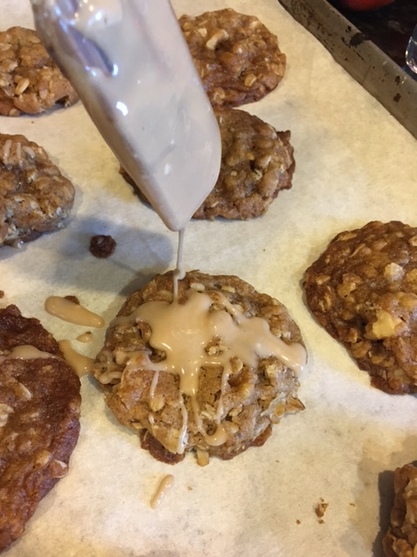 9. Let icing set before eating or storing, about 15-20 minutes (it's ok if you have to try one sooner, I won't tell). 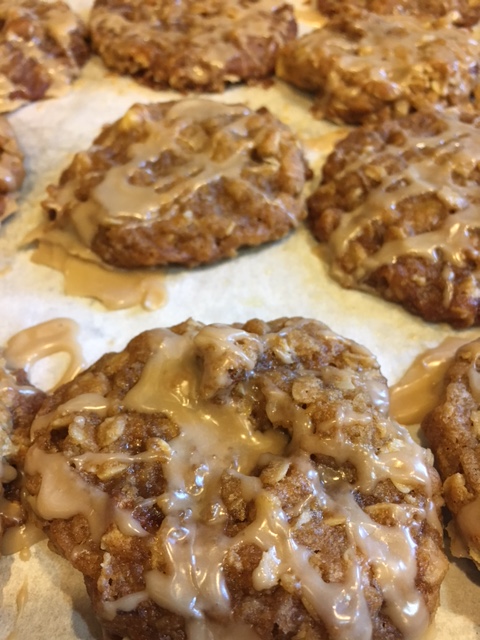 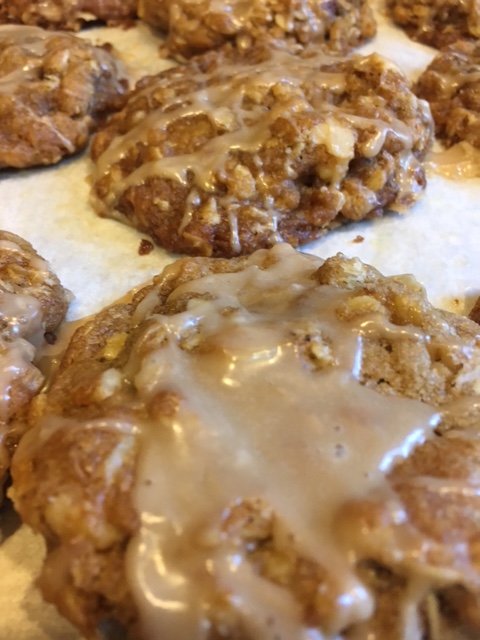 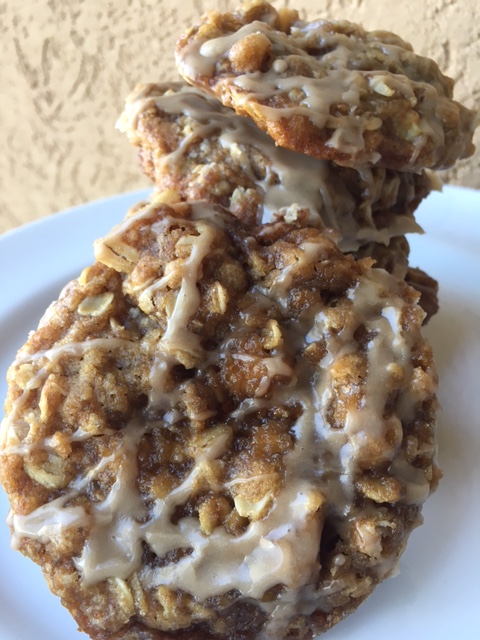 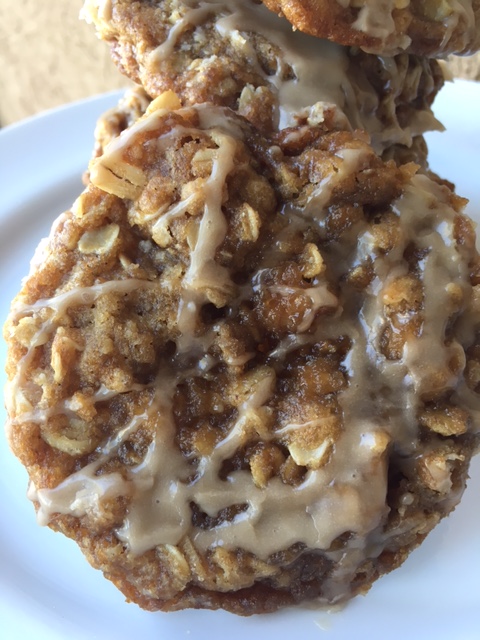 Promise me you'll share some, right? #cookiesandkindness ♥
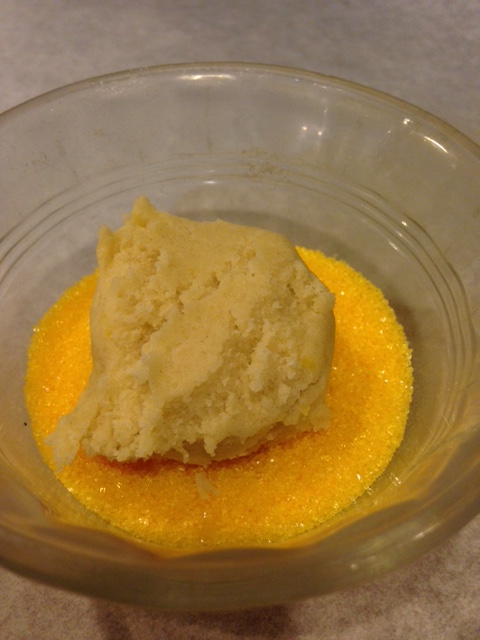
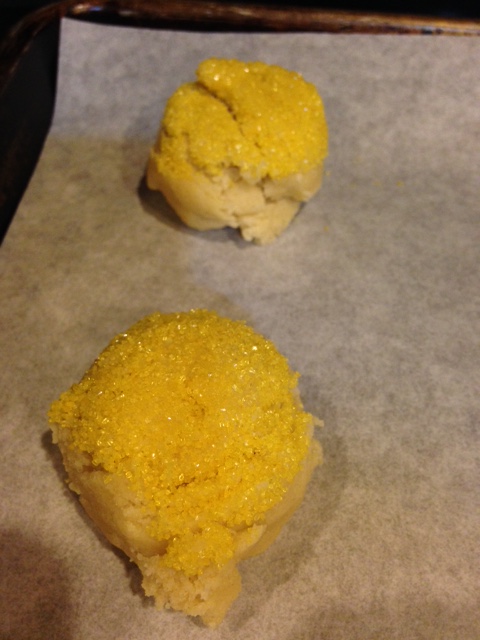
*NOTE: I developed this recipe at higher altitude ,at around 5000 feet above sea level. If you live closer to sea level and the cookies are not spreading to your satisfaction, you may need to increase your baking soda to 1 teaspoon. Try it and see.They will taste great either way. **If refrigerating the dough before baking, you may need to pat the dough balls down a bit before baking. Try one or two first and see what you think. It's generally what I do. "When life hands you lemons, make lemon sugar cookies." -me : ) I missed posting a recipe last week. Suddenly life has gotten very busy for me. We decided to put our house on the market again. It was on the market briefly last fall, but didn't sell. So we decided to let the holidays pass and try again this spring. And here it is, spring (though today Colorado is in the midst of a crazy spring snowstorm)! So this past week we had to get it ready for pictures for the MLS listing and edit out our personal stuff. Worst of all I had to really clear out my art studio space which makes me so sad to have so much of it inaccessible until the house sells. It's also my daughter's high school soccer season and with two-3 games a week, the hours/days just go by. I know, my story is nothing new. We are all trying to juggle life and responsibilities with the fun stuff (personally I am lobbying for a responsibility to fun ratio that's a little more evenly split-lol). A couple weeks ago we met up with some old friends who had moved out of state and I made them a few goodies, including these Lemon Sugar Cookies. They are really simple but cheerful and bright with that nice fresh lemon taste. My two most favorite flavors in desserts are chocolate (duh) and lemon. Although hands down, anything chocolaty is my favorite, sometimes it's nice to have something less heavy and with the bright flavor only a lemon can bring to the party. Anyhow, this recipe is a great spring sweet to add to your repertoire. Do you have any go to recipes that just shout spring to you? Please share! And if you like this cookie recipe, please post a comment. Introduce yourself and say hi. I'd love to meet you! Lemon Sugar Cookies 3 3/4 cups ( 1 lb 2 ounces) all -purpose flour (stir and spoon into measuring cup method) 1 Tablespoon baking powder* 1 3/4 teaspoons baking soda 1/4 teaspoon kosher salt 1 cup (8 ounces) unsalted butter, room temperature 2 cups (14 ounces) granulated pure cane sugar zest of 3 lemons (use this tool-so easy!) juice of 1 lemon, set aside 2 large eggs 1 Tablespoon light corn syrup 1/2 teaspoon pure vanilla extract yellow or plain sanding sugar 1. Preheat oven to 350 degrees F. Combine flour , baking powder, baking soda and salt. Set aside. 2. In the bowl of your stand mixer, combine butter, lemon zest and sugar. Cream together on low speed until well combined. 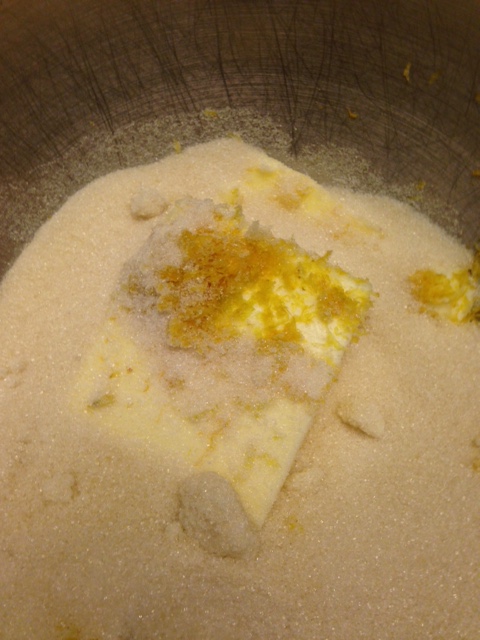 3. Add in eggs, corn syrup and vanilla. Increase speed to medium and mix well. Reduce speed to low. 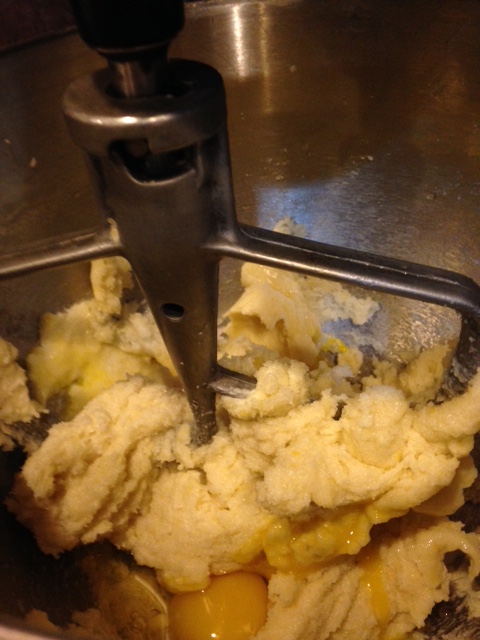 4. Stir in flour mixture and mix until just combined. Remove bowl from mixer. 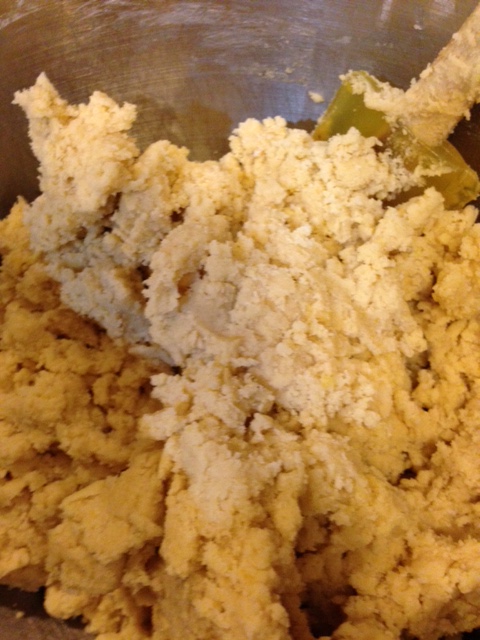 5. Scoop out dough and dip the top only in sanding sugar of your choice. Place 2 inches apart on parchment-lined baking sheets. Dip your (clean, of course) pointer and middle finger into lemon juice and pat down the sugar on top of each dough ball. You can use a pastry brush, if you prefer not to get your fingers sticky.
6. Bake for 10- 12 minutes until lightly golden around edges and set. Do not over-bake.  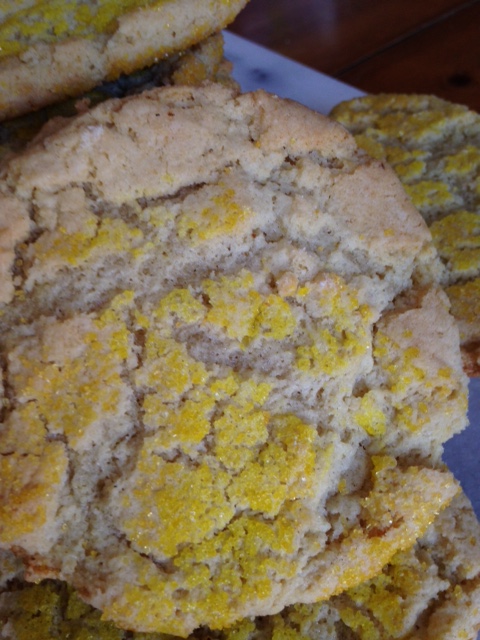 I know they aren't much to look at , but they sure are tasty! And just in case a plain cookie isn't enticing enough on its own, consider making ice cream sandwiches by encasing a scoop of raspberry, blackberry or blueberry sorbet between two of these babies. Not a bad idea, I know! ;)
*Note: I live at about 5,00o feet above sea level, so I decrease the baking powder to 2 1/2 teaspoons, in case that is of use to anyone else. "It's like peanut butter and chocolate. Each is great, but they're better together." -Richard Whitehead I'm dating myself, but anyone else remember the Reese's Peanut Butter Cup commercial that had that line in it? In the end it was a good thing though! Chocolate and peanut butter together is a match made in heaven. A while back there was a really nice magazine published (or at least I thought so) called Chocolatier. Are you familiar with it? Sadly it is no longer. As a pastry fan and pastry professional hopeful and then a working pastry professional, it was a magic door into pastry worlds I only dreamed of. I remember one recipe for a cookie I think was called Tiger Striped Cookies. It was a drop peanut butter cookie with chocolate streaks through it. Once it was baked it had a pretty striking appearance and a great flavor. I had the recipe for a long time and then through subsequent moves and whittling down my recipe collection it somehow disappeared. I was thinking about that recipe the other day and thought I'd just try to recreate it to the best of my memory. Here is the result for that cookie- super easy, super tasty. If you are in the chocolate-peanut butter lover's camp I bet you will love it. Let me know, won't you? I used Einkorn flour for my gluten sensitive daughter but the recipe shows the ingredients for both all-purpose or Einkorn flour. For that matter you can also use a 1:1 ratio gluten free baking flour just as easily. Peanut Butter "Tiger Stripe" Cookies- Yield: approx. 3 dozen cookies 2 cups light brown sugar, lightly packed (14 ounces) 1 cup creamy peanut butter (I used Jif) 1 cup ( 8 ounces)unsalted butter, room temperature 2 large eggs, room temperature 1 teaspoon pure vanilla extract 2 1/4 cups all-purpose flour (OR 10 3/4 ounces Einkorn Flour) 1 1/2 teaspoons baking soda* 1 teaspoon baking Powder* 1/2 teaspoon fine sea salt 3 ounces good-quality semi-sweet or bittersweet chocolate, chopped, melted and cooled 1. Preheat oven to 350 degrees F. 2. Whisk together flour, baking soda, baking powder and salt; set aside. * I am 5,o00 ft above sea level. I reduce baking soda to 1 1/8 teaspoon and baking powder to 3/4 teaspoon, in case you are baking at high altitude, too. 3. Cream together sugar, peanut butter, and butter on low speed of stand mixer until well -combined. 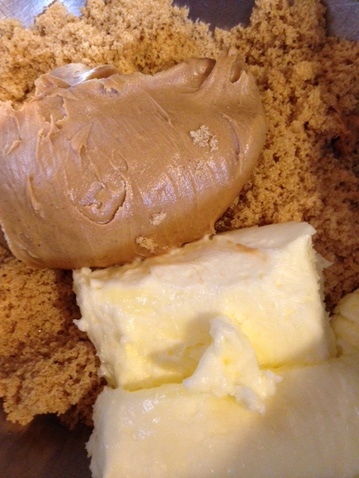 4. Add in eggs and vanilla. Mix on medium speed until well incorporated. 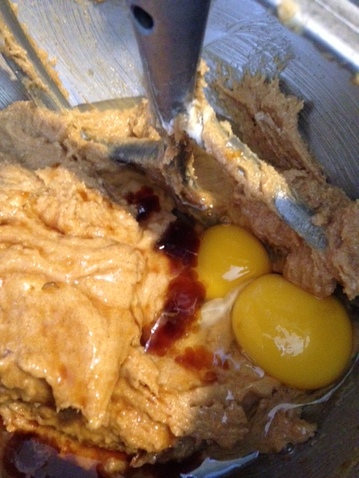 6. Reduce mixer to low speed and stir in flour mixture just until combined. Remove bowl from mixer. 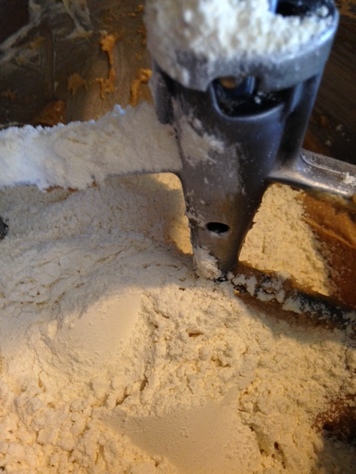 7. Drizzle melted chocolate on top of dough in a random fashion 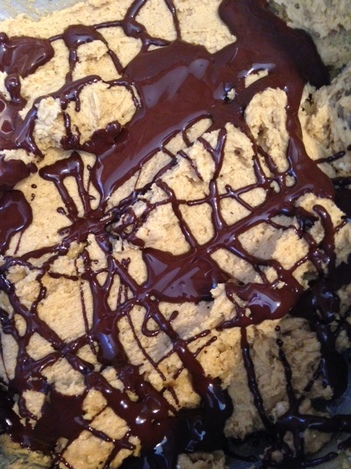 8. By hand, using a rubber spatula, carefully fold the melted chocolate into the dough, leaving distinct areas of peanut butter and chocolate dough. The idea isn't to make this a chocolate dough. It should look marbled, more or less like this: 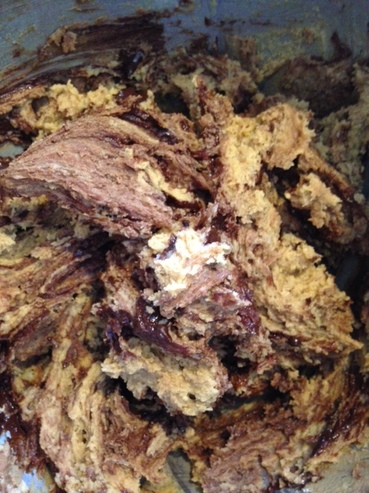 9. Line a baking sheet with parchment paper. Using a spring-loaded cookie (ice cream) scoop, dish out balls of dough onto baking sheet, spacing 2 " apart. 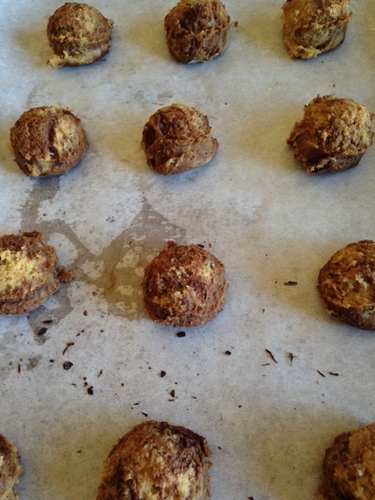 10. Bake cookies in preheated oven for 12-13minutes until done. Remove from oven and cool completely. Repeat with remaining dough until all the dough is baked off. 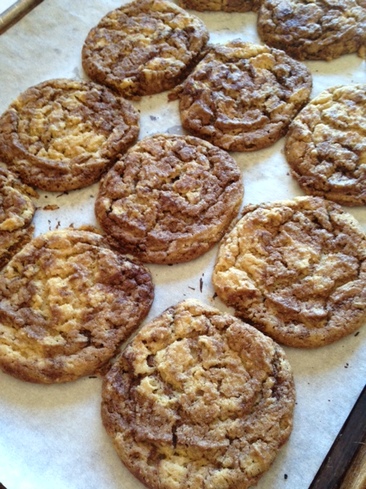 11. Well now you have left to do is eat them (though sharing them would be a nice idea, too). ♥
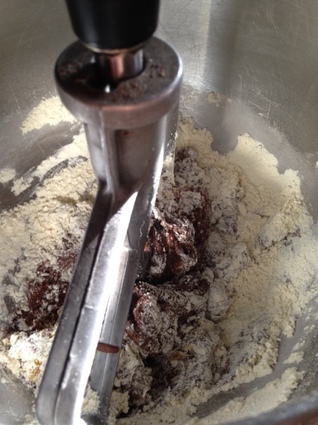
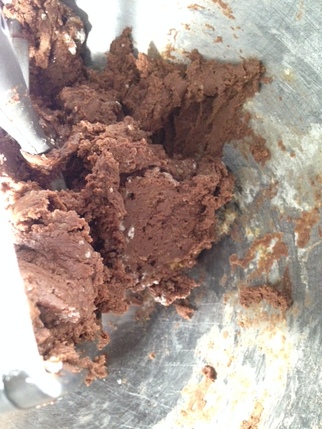
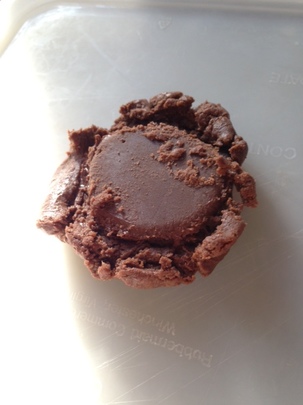
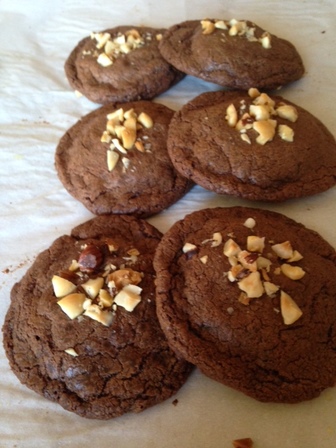
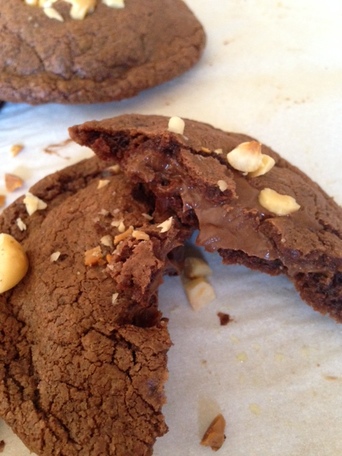
 "You can't make everyone happy. You aren't a jar of Nutella." - unknown It's hard to find anyone who doesn't seem to like Nutella, that European chocolate-hazelnut spread. It was popular in Europe long before it came here and it has really taken the US by storm. Now grocer shelves are lined with the real deal and plenty of knock-offs, too. Have you noticed? Recently, I was going through my Facebook feed and came across a post from King Arthur Flour company for a cookie that turned out to be a prize-winner in their office (imagine the competition there). It looked so good I thought I should try it. They call them Nutella Sea Salt Stuffies, and you can find the recipe here. I adapted it just a tiny bit and made a second variation which was even more well-received by my family. They reported back that the ratio of crispy to fudgy/chewy was better with the caramel filled version.Try both and see what you think. The recipe is super simple and requires just a few ingredients. So grab everything you need and let's get baking! Stuffed Nutella Cookies For the filling: 1/2 cup (5 1/2 ounces) Nutella For the Dough: 1 cup (10 1/2 ounces ) Nutella 1 cup (4 1/2 ounces) all-purpose flour* 1 large egg 1/4 teaspoon instant espresso powder 1/4 teaspoon sea salt 1/4 cup Hazelnuts, toasted and skinned, chopped fine 1. For the filling: Scoop out 2 teaspoons of Nutella into 12 mounds on a tray lined with plastic or parchment and freeze until firm, a few hours or over-night 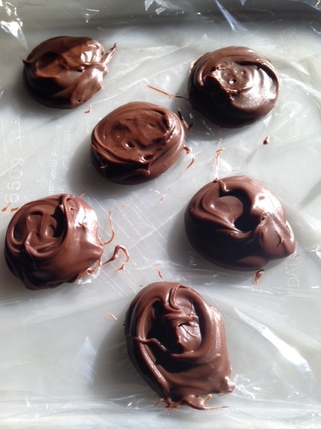 2. For the dough: Preheat your oven to 350 Degrees F. In a stand mixer or by hand, mix together the remaining 1 cup of Nutella, flour, sea salt, egg and espresso powder. Mix until a cohesive dough is formed.
3. Scoop out heaping tablespoons of dough and wrap the dough around a mound of Nutella. Enclosing it completely. Place the dough bundles on parchment-Lined cookie sheet, about 2" apart, and sprinkle each with the chopped hazelnuts. Pat down lightly on the nuts to adhere.
4. Bake cookies in preheated oven for 8- 10 minutes. Allow to cool completely. Take a bite!
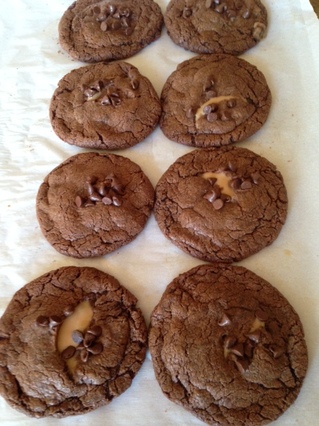
Variation: Chocolate-Caramel Filled Nutella Cookies 1. Use the same dough as above. Substitute Caramel filled chocolate , such as Rolos, or Cadbury caramel filled chocolate squares for the Nutella filling 2. Form the cookies the same way, patting down on the dough so they aren't completely ball shaped before baking. 3. Sprinkle the tops of the cookies with mini chocolate chips. 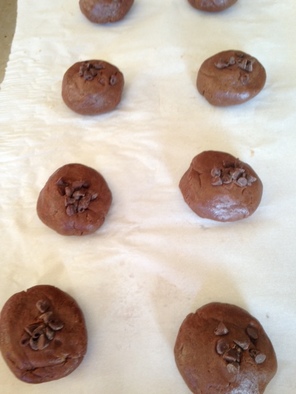 4. Bake as directed above. 5. Swoon with delight when you bite into one. ♥
* I used Einkorn flour for my gluten sensitive daughter. You can find out more about Einkorn here.
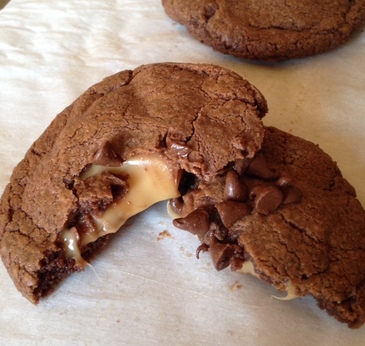
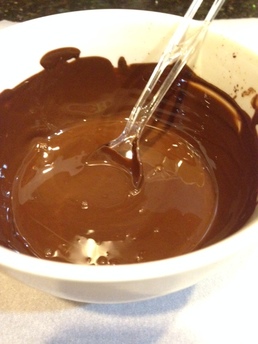
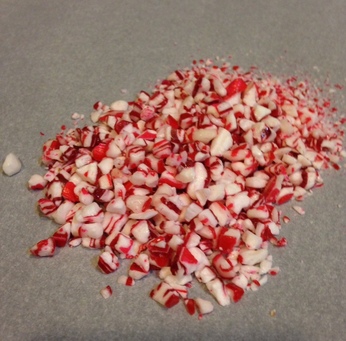
"Think what a better world it would be if we all, the whole world, had cookies and milk about three o'clock every afternoon and then lay down on our blankets for a nap." -Barbara Jordan Christmas eve is tomorrow. Chances are, like me, you are already done baking. Time to get the house cleaned up and ready for family and friends for however your Christmas celebration goes. I promised you one cookie, 3 ways, and then the days got away from me. I was scrambling to get my own baking done, last minute stocking stuffers acquired, grocery shopping completed (4 stores later) and making time for exercise to keep my sanity in check. Perhaps some of you know exactly what I mean. Then woosh, the days are gone! So my best laid plans didn't exactly go as planned. I am still fairly new to blogging and discovering rather quickly that it really takes time to get a blog post prepared and posted. So hats off to all the veteran bloggers out there who put out tons and tons of quality content like clock work. You are my role models! Anyways, onto part 3 of one cookie 3 ways. Maybe you won't get to try it this year, but put it on your "to try next year" list for sure. They are the best part of a fudgy chocolate cookie crossed with a peppermint patty in my book. If you love peppermint and chocolate together, you will really love these! Mint Patty Cookies 1 recipe Chewy Coca Crinkles (here) Mint buttercream (see below) 4 ounces fine quality semi-sweet or bitter-sweet chocolate, finely chopped 1 1/2 teaspoons coconut oil crushed peppermint candy canes 1. Make recipe for Chewy Cocoa Crinkles as directed in original post. After forming dough into mounds with cookie scoop, coat both the bottom and top in granulated sugar. Bake as directed and allow cookies to cool completely. 2. In the meantime , make the mint buttercream. Since you may be splitting one batch into different variations, here is the ratio you will need. Make as little or as much as you think you will need. For every 1 cup of powdered sugar you will need 2 Tablespoons unsalted butter, 1 teaspoon of pure peppermint extract (or to taste) and approximately 1-2 Tablespoons of milk. Combine all ingredients in the bowl of a mixer, and starting on low speed, mix all ingredients to combine. Once powdered sugar is absorbed, increase speed to high and mix until light and fluffy. You want the buttercream to be spreadable, but not too stiff nor too soft that it may run.Taste the buttercream for the peppermint flavor and add little by little, if more is needed, until it suits your taste. 3. On the top side of each cookie, spread about 1 tablespoon or so of mint buttercream into a flat disc as shown below. Repeat with as many cookies as desired. 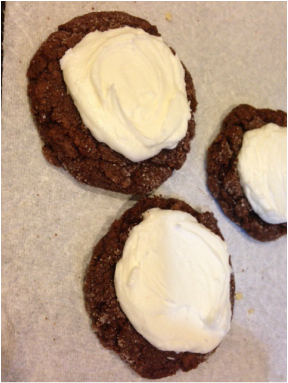 4. Place cookies in freezer to firm up. 5. Meanwhile gently melt chocolate with coconut oil in a double boiler or in microwave. Stir until completely smooth. Have crushed peppermint candy canes nearby.
6. Holding cookie carefully by the edges, dip buttercream side down into melted chocolate. Gently shake off excess and place on parchment-lined cookie sheet. Sprinkle top of cookie minimally with crushed peppermint candies. Repeat with remaining cookies. Allow chocolate to set up completely. 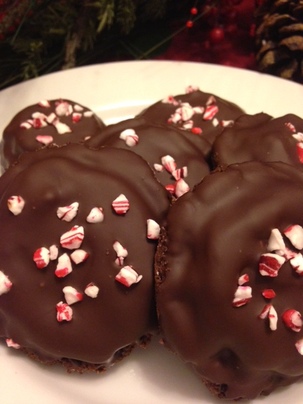 7. Store cookies in an air-tight container in the refrigerator. Allow to come to room temperature for serving. 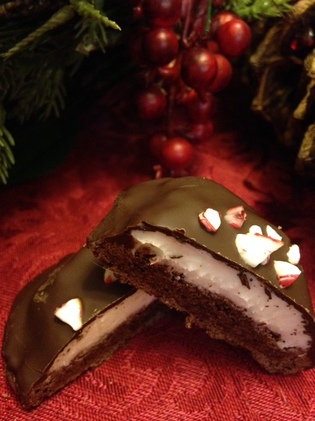 Wishing you a very Merry Christmas with joy and sweetness all around.♥
|

Archives
December 2019
Categories
All
|


 RSS Feed
