|
"You don't need a silver fork to eat good food."- the late great Paul Prudhomme I just found this quote, and it perfectly sums up how I feel about food- fresh, simple and delicious. I don't want the caviar and fancy techno cooking (not that I wouldn't enjoy eating that- well, not the caviar-have had it-not impressed, but it's not central to how I feel about food and cooking). I think Mother Nature got pretty much everything right. Think of a ripe peach. Really, can you improve on that? I don't think so. It's also fitting for this recipe I have to share with you today. The humble pork rib. It's tough and not much to look at, but transforms beautifully with a little time and inexpensive seasoning. I know it is probably blasphemous to suggest oven BBQ to anyone from certain regions of this country, but I am a working mother of two with other interests and no smoker in my backyard. Granted these ribs will lack the sweet touch of smoky goodness only real hardwood will give you, but they are satisfying and delicious if you are a rib lover. And they couldn't be easier. You do need to plan to start them at least 24-48 hours ahead of when you want to cook them as they need time to let the seasoning work its magic. You can scale this recipe up or down as long as you have the oven capacity, in case you want to make them for a crowd. The spice seasoning should be adequate for several racks of baby backs and will store fine for up to 4 months in an airtight container in your spice cabinet (would be great on BBQ or Beer can Chicken, too). The smoked paprika and smoked salt help bring a touch of that wood-smoked flavor to the ribs, but you can substitute sweet paprika and more kosher salt if you prefer. Ready to get started? Oven-Baked BBQ Ribs -serves 4-6 2 Racks of baby back ribs Yellow Mustard (such as French's) Seasoning Rub (recipe below) Barbecue Sauce (your favorite or my recipe below) 1. Lay out a sheet of heavy duty aluminum foil (long enough to enclose the ribs completely) for each rack of ribs preparing. 2. Spread a thin layer of yellow mustard on top and bottom of ribs. 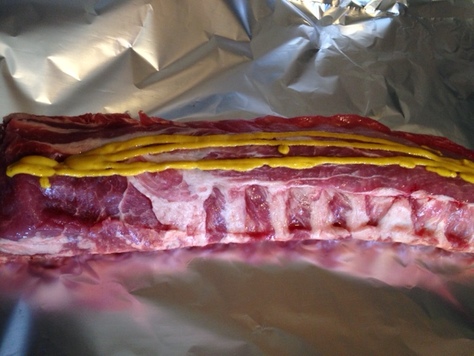 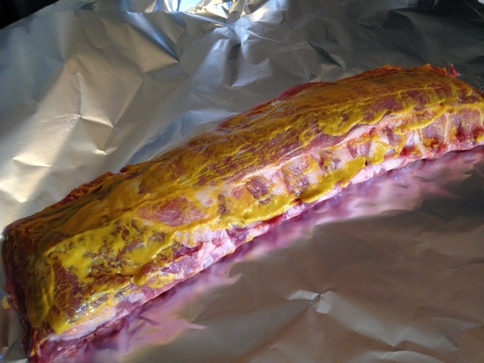 3. Sprinkle seasoning rub all over both sides of the ribs. Gently pat it down into mustard to adhere. 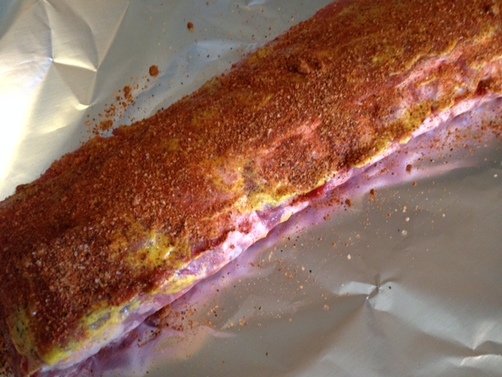 4. Wrap securely in foil, place on a baking tray and refrigerate for at least 24 hours and up to 48 hours. 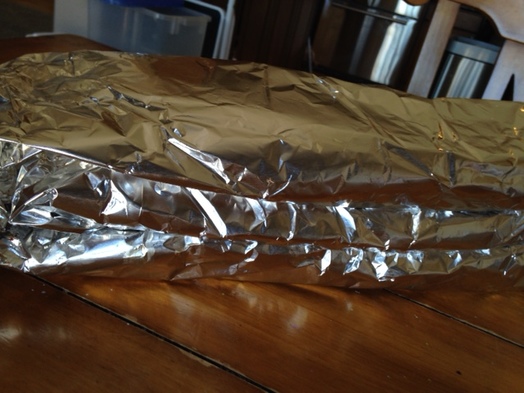 5. Remove ribs from fridge 30 minutes before cooking. When ready to cook, preheat oven to 300 degrees. Place ribs, on tray, into oven and bake for 2 1/2 to 3 hours until ribs are very tender. Remove ribs from oven. Preheat broiler. 6. Unwrap ribs and slather tops generously with barbecue sauce. Return ribs to oven and broil until caramelized. Watch carefully so the sauce doesn't burn! 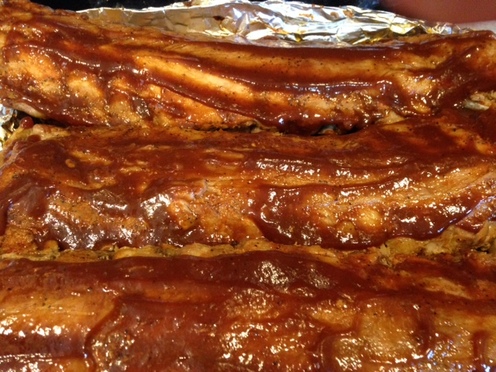 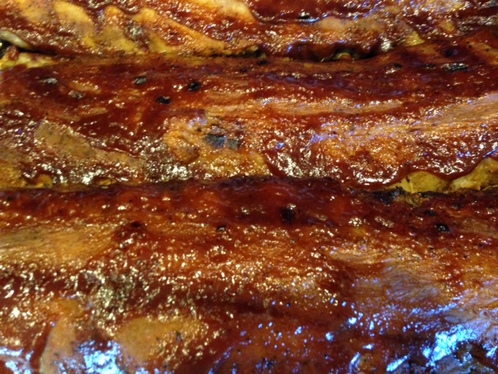 7. Remove from oven, cut into portions (I do every 2-3 ribs), serve with your favorite BBQ sides such as coleslaw, corn and watermelon! Be sure to have extra napkins on hand-this is messy good stuff! ♥ 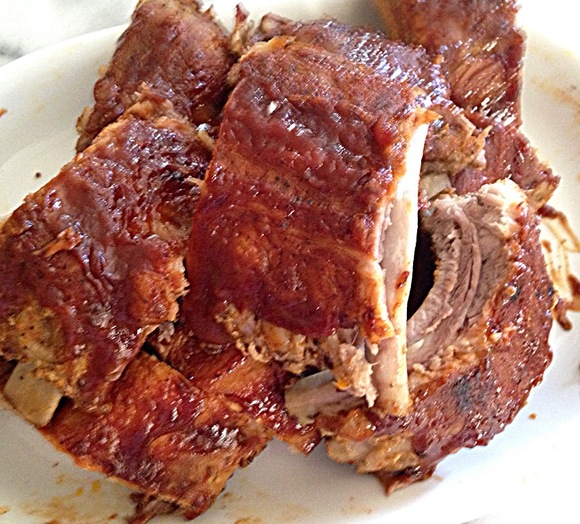 Barbecue Seasoning Spice Rub (Adapted from How to Grill by Steven Raichlen) 1/2 cup light brown sugar 1/2 cup smoked paprika 1/4 cup plus 2 Tablespoons coarse ground black pepper 1/4 cup plus 2 Tablespoons Kosher salt 2 Tablespoon hickory or apple-wood smoked salt 4 teaspoons garlic powder 4 teaspoons onion powder 1 teaspoon cayenne pepper 1. Combine all ingredients together in a bowl. Mix well. Store in an air-tight container until ready to use. Sweet and Zesty Barbecue Sauce -makes approx 1 1/2 cups (Don't be put off by the long ingredient list. It's mostly just measure and dump) 1 teaspoon minced fresh garlic 1/4 cup minced onion 1 cup Ketchup (I like Heinz the best) 1/4 cup Worcestershire sauce 1 1/2 teaspoons molasses 1 1/2 teaspoons apple cider vinegar 1 teaspoon kosher salt (or smoked salt) 1/4 cup fresh squeezed lemon juice (about 2 lemons) 1 teaspoon yellow mustard pinch crushed red pepper 1/4 teaspoon Tabasco sauce 1/4 teaspoon dried thyme dash or two of liquid smoke (optional) 1. Over medium heat saute onions and garlic in a little vegetable oil until softened and translucent. 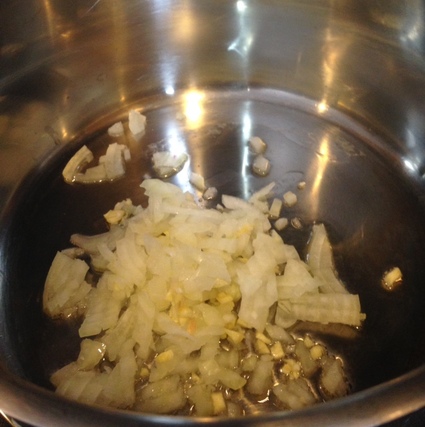 2. Stir in all remaining ingredients. Bring to a boil over medium heat, stirring often. 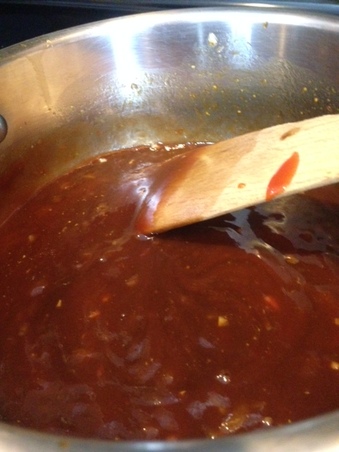 3. Cook, stirring often, until sauce is reduced and thickened. Cool slightly before transferring to glass container. Store in refrigerator for up to a month. 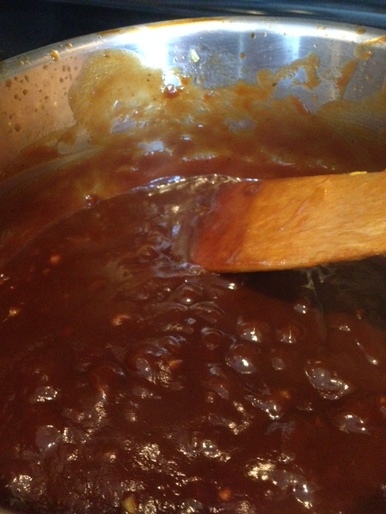 thick and rich and zesty- just the way I like it! : )
0 Comments
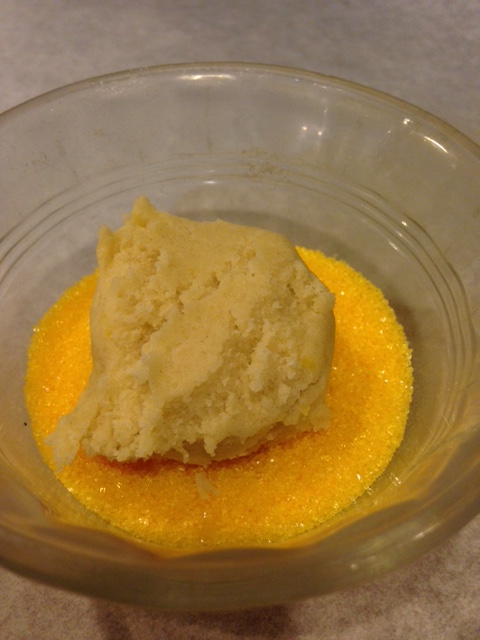
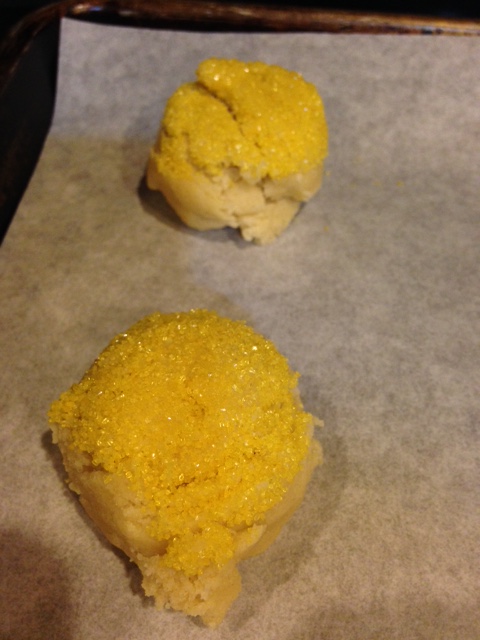
"When life hands you lemons, make lemon sugar cookies." -me : ) I missed posting a recipe last week. Suddenly life has gotten very busy for me. We decided to put our house on the market again. It was on the market briefly last fall, but didn't sell. So we decided to let the holidays pass and try again this spring. And here it is, spring (though today Colorado is in the midst of a crazy spring snowstorm)! So this past week we had to get it ready for pictures for the MLS listing and edit out our personal stuff. Worst of all I had to really clear out my art studio space which makes me so sad to have so much of it inaccessible until the house sells. It's also my daughter's high school soccer season and with two-3 games a week, the hours/days just go by. I know, my story is nothing new. We are all trying to juggle life and responsibilities with the fun stuff (personally I am lobbying for a responsibility to fun ratio that's a little more evenly split-lol). A couple weeks ago we met up with some old friends who had moved out of state and I made them a few goodies, including these Lemon Sugar Cookies. They are really simple but cheerful and bright with that nice fresh lemon taste. My two most favorite flavors in desserts are chocolate (duh) and lemon. Although hands down, anything chocolaty is my favorite, sometimes it's nice to have something less heavy and with the bright flavor only a lemon can bring to the party. Anyhow, this recipe is a great spring sweet to add to your repertoire. Do you have any go to recipes that just shout spring to you? Please share! And if you like this cookie recipe, please post a comment. Introduce yourself and say hi. I'd love to meet you! Lemon Sugar Cookies 3 3/4 cups ( 1 lb 2 ounces) all -purpose flour (stir and spoon into measuring cup method) 1 Tablespoon baking powder* 1 3/4 teaspoons baking soda 1/4 teaspoon kosher salt 1 cup (8 ounces) unsalted butter, room temperature 2 cups (14 ounces) granulated pure cane sugar zest of 3 lemons (use this tool-so easy!) juice of 1 lemon, set aside 2 large eggs 1 Tablespoon light corn syrup 1/2 teaspoon pure vanilla extract yellow or plain sanding sugar 1. Preheat oven to 350 degrees F. Combine flour , baking powder, baking soda and salt. Set aside. 2. In the bowl of your stand mixer, combine butter, lemon zest and sugar. Cream together on low speed until well combined. 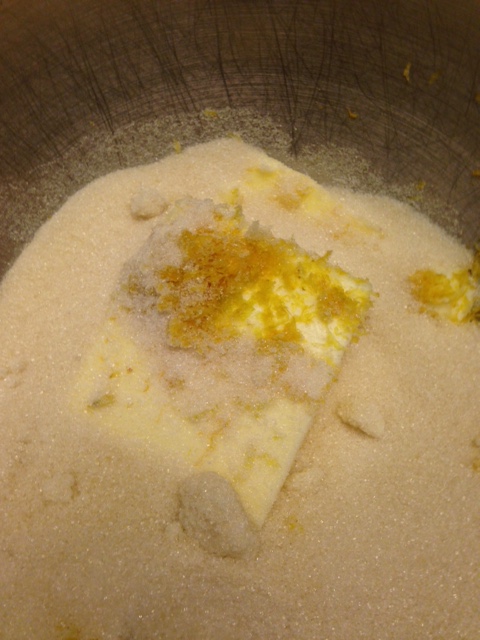 3. Add in eggs, corn syrup and vanilla. Increase speed to medium and mix well. Reduce speed to low. 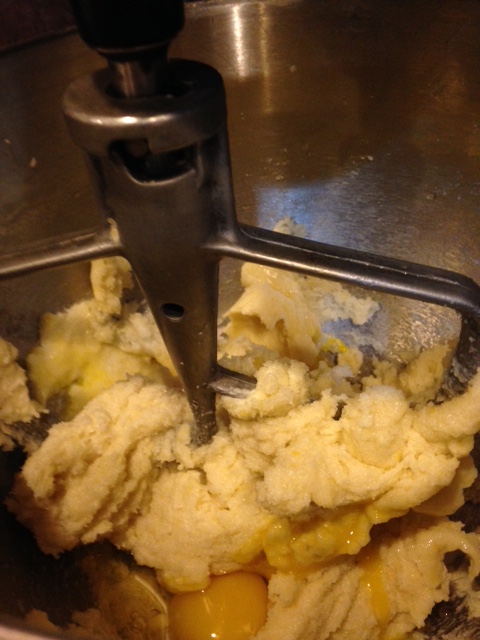 4. Stir in flour mixture and mix until just combined. Remove bowl from mixer. 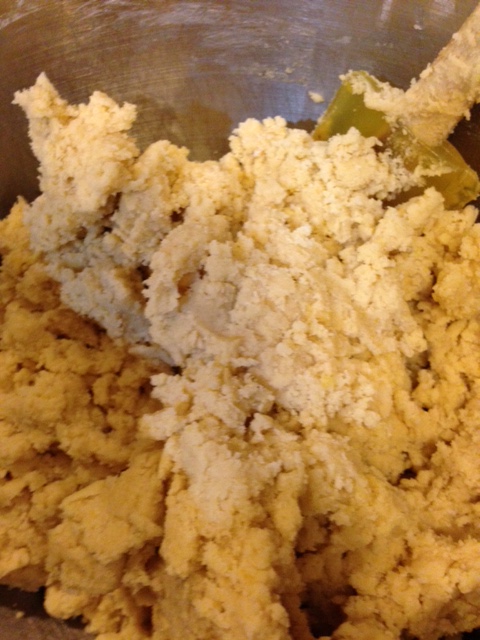 5. Scoop out dough and dip the top only in sanding sugar of your choice. Place 2 inches apart on parchment-lined baking sheets. Dip your (clean, of course) pointer and middle finger into lemon juice and pat down the sugar on top of each dough ball. You can use a pastry brush, if you prefer not to get your fingers sticky.
6. Bake for 10- 12 minutes until lightly golden around edges and set. Do not over-bake.  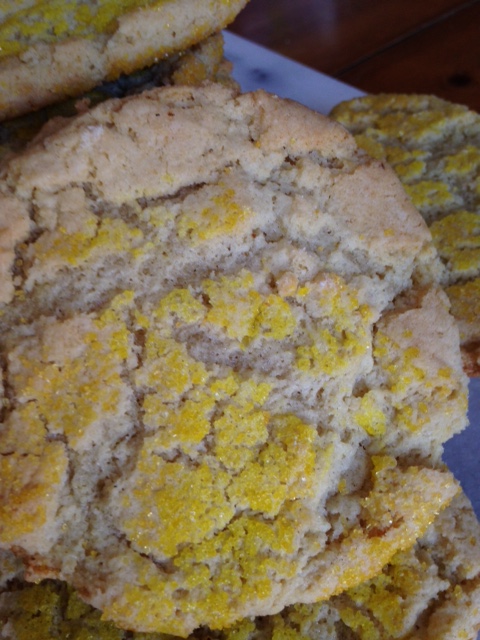 I know they aren't much to look at , but they sure are tasty! And just in case a plain cookie isn't enticing enough on its own, consider making ice cream sandwiches by encasing a scoop of raspberry, blackberry or blueberry sorbet between two of these babies. Not a bad idea, I know! ;)
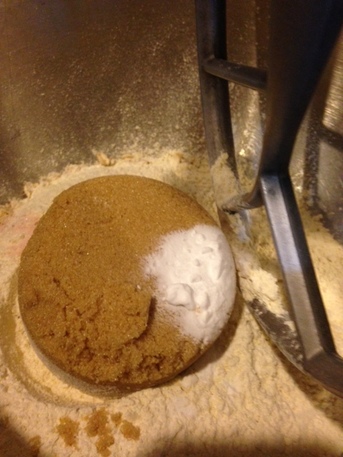
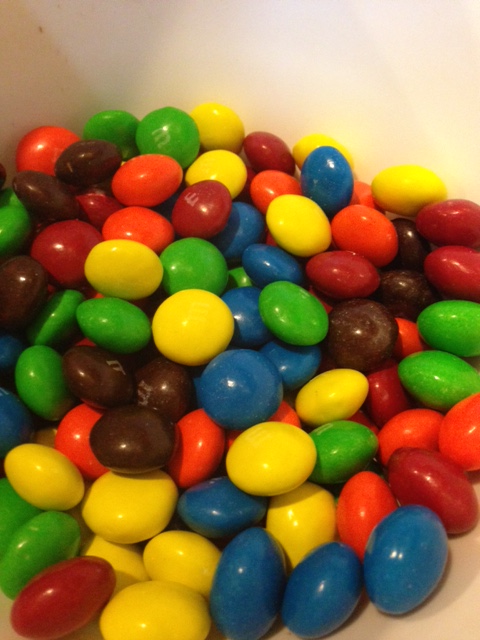
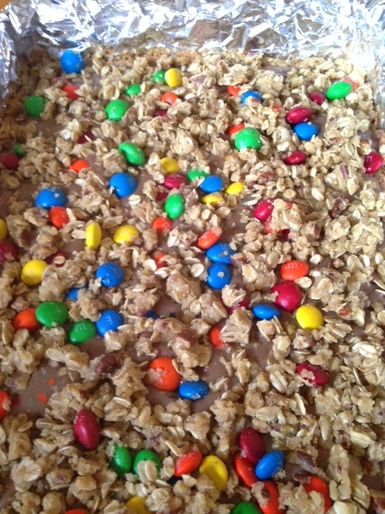
*Note: I live at about 5,00o feet above sea level, so I decrease the baking powder to 2 1/2 teaspoons, in case that is of use to anyone else. “Baking and love go hand in hand, for as one bakes a tasty treat and fills the room with its sweet aroma, the true joy is to take what has been made and share it with another.” - Heather Wolf, Kipnuk has a Birthday It's true, baking is no fun if the final result isn't going to be shared with anyone. Over the weekend we took a long road trip from our home in Colorado to visit our son who is at the University of Nebraska. He is playing club rugby for UNL and we hadn't had a chance to see him play yet. This past weekend was our opportunity, and we'd been looking forward to it for weeks. I'm firmly in the "food is love" camp, and so I wanted to bring him a treat that would survive the car ride, have a good shelf life and be conducive to sharing. Gooey Peanut Butter M&M Oat Bars fit the bill perfectly. This recipe is an adaptation of one I have been making for a long time. It originally appeared in a little cookbook I bought at a Southern Living at Home party years ago but called for regular Milk Chocolate M&M's. So feel free to make that substitution if you prefer. Each variation is pretty outrageously good! Gooey Peanut Butter M&M Oat Bars- makes 1- 9x13" pan 1 cup chopped pecans, lightly toasted (you could use dry roasted unsalted peanuts, too) but I prefer pecans) 1 cup light brown sugar, lightly packed 1 1/2 cups all-purpose flour (einkorn flour or gluten free flour may be substituted) 2 cups Old-Fashioned (Rolled) oats (use gluten free , if desired) 1/4 teaspoon fine sea salt 1 teaspoon baking soda 1 cup (8 ounces) unsalted butter, melted and cooled* 12 ounces (approx a full 1 1/2 cups) Peanut Butter M&M's , divided (or a mixture of Peanut Butter and Milk Chocolate, per your taste) 1- 14 ounce can sweetened condensed milk 1 Tablespoon creamy peanut butter (I like Jif) 1/8 teaspoon pure vanilla extract 1. Preheat oven to 375 degrees F. Line a 9x13" baking pan with aluminum foil; lightly grease or spray with non-stick baking spray. Set aside. 2. In the bowl of a stand mixer, combine pecans, flour, brown sugar, salt, baking powder and oats. Mix on low to combine.
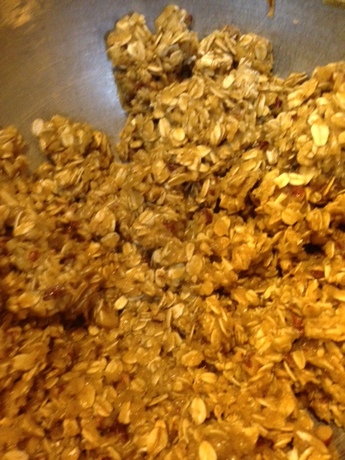
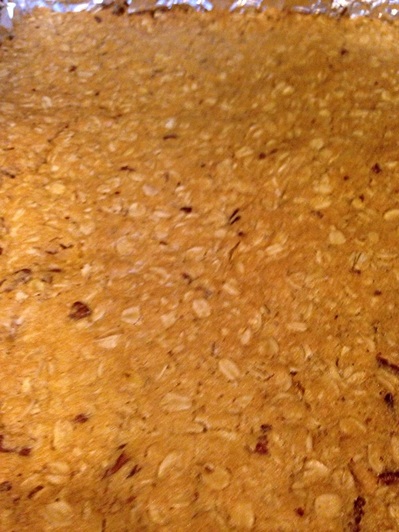
3. On low speed stir in butter until mixture is crumbly. Set aside 1 1/2 cups of crumbs. Press the remainder evenly into the prepared 9x13 pan. Bake at 375 degrees F for about 10 minutes until lightly golden. Remove from oven and let cool. Reduce oven temperature to 350 degrees F.
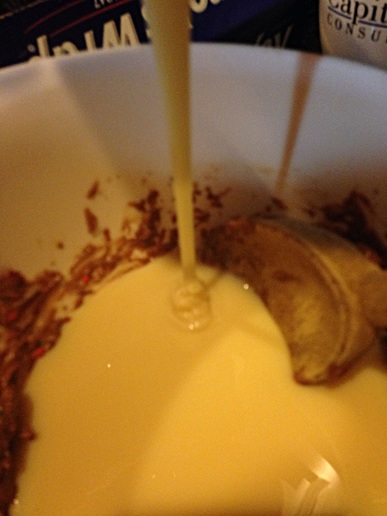
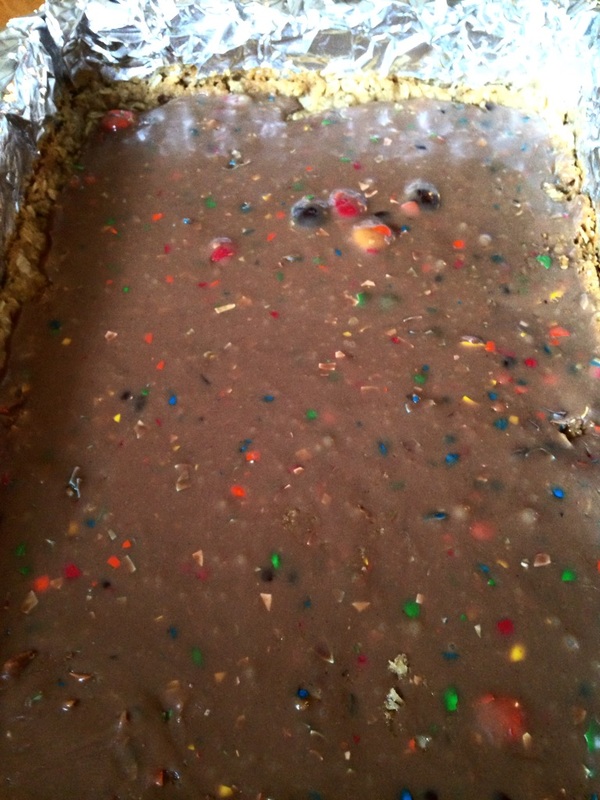
4. Meanwhile, place 8 ounces (approx 1 full cup) of Peanut Butter M&M's in a microwave safe bowl. Microwave on 50% power for 30 second intervals, pressing on candies with back of wooden spoon to mash between intervals, until candies are pretty much all melted with pieces of the candy shell speckling the mix). Stir in sweetened condensed milk, vanilla and peanut butter. Stir until well combined. Pour mixture over cooled base, leaving a small border around all sides.
5. Combine reserved crumb mixture with remaining 4 ounces (approximately a full 1/2 cup) M&M candies. 6. Sprinkle crumbs evenly over chocolate-peanut butter mixture. Press lightly to adhere. Bake at 350 degrees for 18-20 minutes or until bars are set and nicely golden.
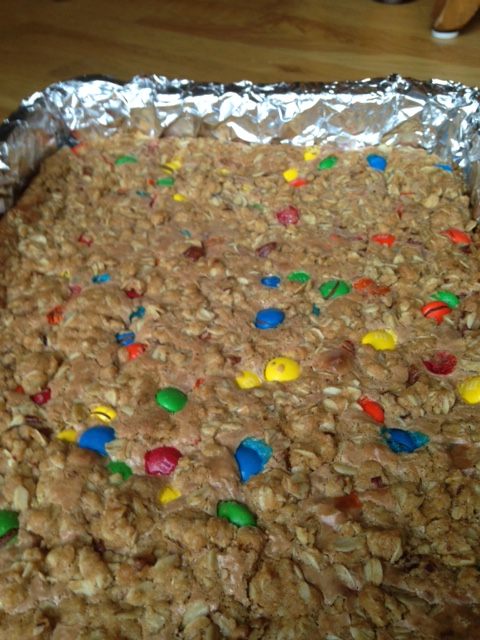
7. Let bars cool completely before cutting (to cut, remove bars from pan using foil ends. Peel off foil and cut bars into desired size). Bars keep well for 3-4 days, wrapped tightly in foil, at room temperature. They freeze beautifully, too, wrapped air-tight in foil and placed inside zip top freezer bags for up to 2 months. 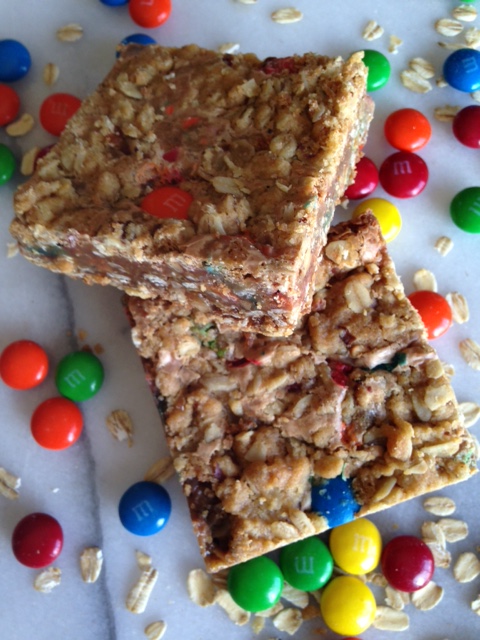 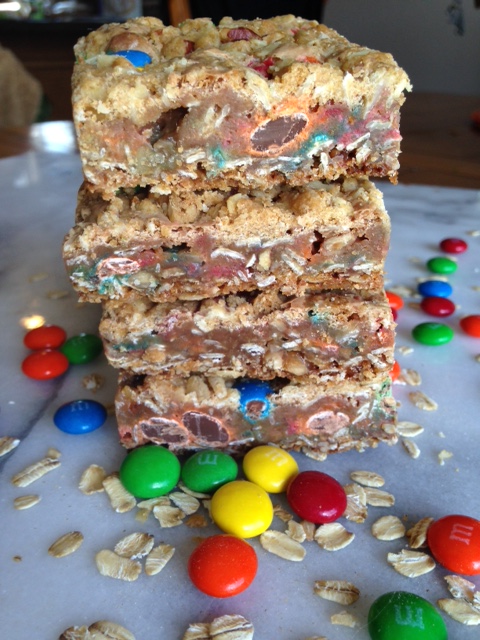 * Note: if using Einkorn flour reduce butter to 7 ounces. Proceed as for bars above.
|

Archives
December 2019
Categories
All
|

 RSS Feed
