|
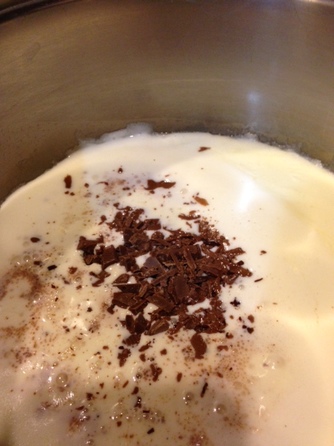
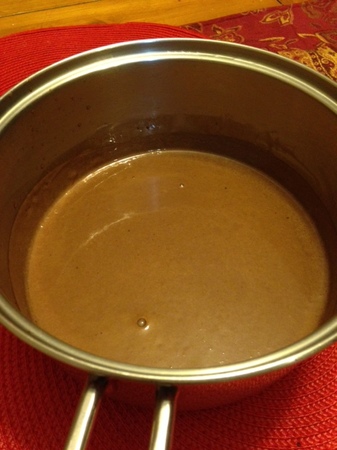
“Love is like a hollowed out piece of chocolate, filled with melted music.” -Jarod Kintz Tomorrow is my daughter's 17th birthday and Valentine's Day is not far behind. For me any celebration calls for chocolate. So I thought I'd share my technique for making an easy showstopper of a cupcake that you can whip up in time for Valentine's day or any time you need a little chocolate indulgence. You'll need to begin the recipe 24 hours ahead of time, but that's just to allow for refrigeration and time for the delightful cream (sooo delicious) to set up. Start with a baker's dozen of chocolate cupcakes, homemade (best) or store-bought. If you have more, simply increase the ingredients accordingly.Use the best quality chocolate you can afford as the flavor will be front and center. You will need a scale for this recipe as well that measures in both grams and ounces. Showstopper Cupcakes 13 prepared chocolate cupcakes, cooled 500 grams Heavy Cream pinch instant espresso powder (optional) 180 grams good quality Milk Chocolate(Lindt, Valrhona, El Rey or Callebaut are some brands to consider), finely chopped 4 ounces good quality Semi-sweet or Bittersweet Chocolate, finely chopped 1. In a medium saucepan, bring the cream to a boil.. Remove from heat and immediately add chopped milk chocolate and espresso powder to cream. Let sit 5 minutes, covered. Gently whisk until combined and smooth.
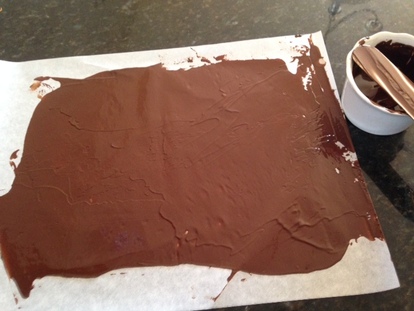
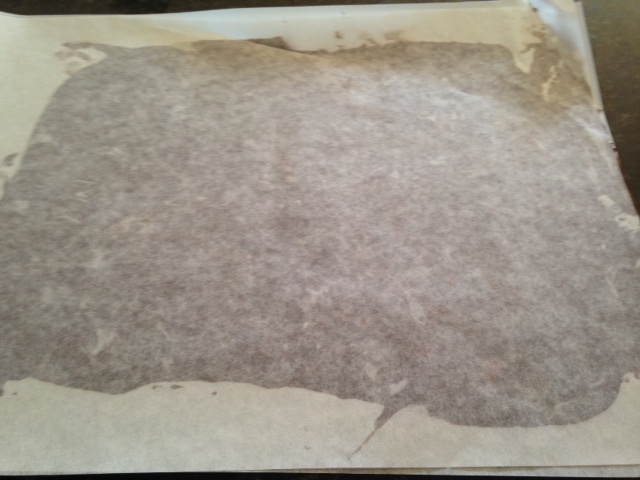
2. Immediately transfer mixture to a mixing bowl, place a piece of plastic wrap directly on the surface. Poke a slit in plastic wrap to allow steam to escape. Place in refrigerator for 24 hours. 3. Meanwhile, gently melt the 4 ounces of semi-sweet or bittersweet chocolate. Have 4 sheets of parchment paper nearby. 4. Lay out two sheets of parchment paper on a smooth, level surface. Pour half of chocolate onto one sheet. With an off-set spatula, spread the chocolate into a thin, even layer. Place another layer of parchment on top of chocolate, smoothing it out.
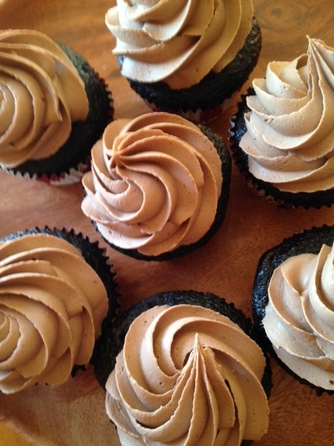
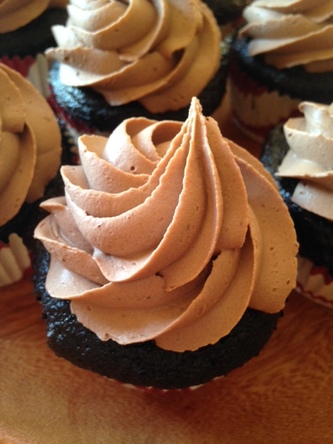
5. Roll chocolate sheet up and insert into an empty paper towel or toilet tissue tube. 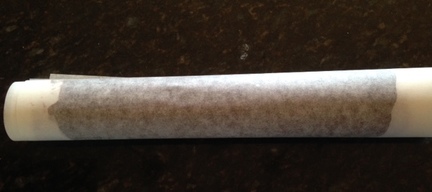 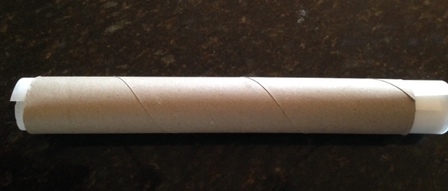 6. Repeat with the other half of the chocolate. Place both rolls in the freezer to set, for at least 30 minutes or over-night. 7. After 24 hours, remove the cream mixture from the fridge. With a hand-held or stand mixer, whip the chocolate cream on medium speed until thickened and the consistency is somewhere between whipped cream and soft mousse. It will be fairly thick. 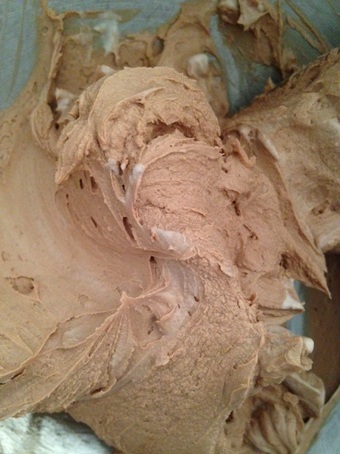 8. Remove chocolate rolls from freezer. On a clean sheet pan, unwrap the rolls, leaving shards of chocolate to use. Place sheet pan in freezer until ready to use. 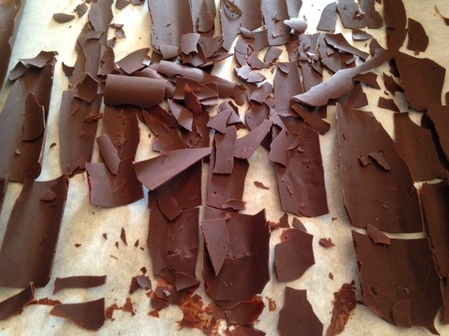 9. Meanwhile, place whipped milk chocolate cream in a pastry bag fitted with a large star tip. Pipe the cream mixture on top of each cupcakes in a generous rosette.
10. Remove chocolate shards from freezer. Top each cupcake with the chocolate shards as desired. Sprinkle tops of cupcakes lightly with powdered sugar. Eh voila! "Oohs" and "aahs" will abound! Share the love! ♥ 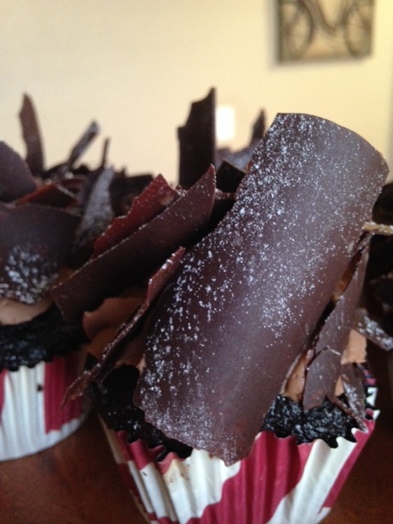 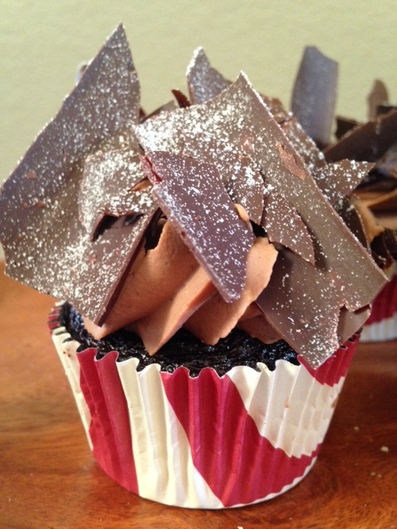 Note:
Cupcakes are best eaten within 24 hours. The cream will start to wilt in a day or two. Keep cupcakes stored in the refrigerator. Remove from refrigerator and let sit at room temp 20-30 minutes before serving.
0 Comments
"I suppose there are people who can pass up free guacamole, but they are either allergic to avocados or too joyless to live. " -Frank Bruni Oh, guacamole, how do I love thee? I grew up in upstate New York, not far from the Vermont border. Mexican and southwestern-inspired cuisine was not part of the landscape in the 70's. Fast forward 22 years, I found myself living in Southern California after college. California, it seemed, was the epicenter of Mexican food to this Northeastern gal. There at El Torito Grill near South Coast Plaza in Costa Mesa, California, I discovered guacamole. At El Torito Grill at the time, they served fresh, warm tortillas with guacamole, made fresh at the table. I could have made a meal just out of that. It was soooo good! The restaurant is no longer there, and I now live in Colorado. Thankfully, watching them prepare the guac table-side all those times gave me a good idea how to make a great guacamole. I have been making it this way ever since. Healthy fat and chock full of freshness, I can't think of a better snack to have on hand for this weekend's Super Bowl 50. Of course, these measurements are just suggestions. Once you make it yourself, you may want to adjust them to your liking. Heck, you may even want to add diced mango to yours (no kidding, it's amazing) ! Guacamole 4 ripe Haas avocados, halved, pit removed 2 Tablespoons minced red onion 2 Tablespoons finely chopped cilantro 1 clove garlic, minced Half a Roma Tomato, seeds removed half of a jalapeno pepper, stemmed, seeded and minced juice of 1 lime 1/8-1/4 teaspoon fine sea salt Tortilla chips and/or veggie sticks for serving 1. Assemble all your ingredients- so fresh and good! 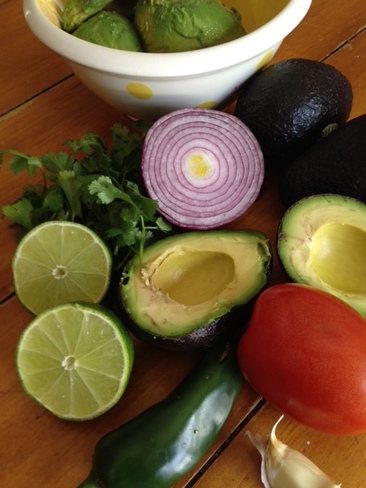 2. With a spoon, scoop out the flesh of 7 of the eight avocado halves into a bowl. Dice the flesh of the remaining avocado; set aside. 3. Coarsely mash the avocado in the bowl with a fork, leaving it somewhat chunky (texture is a good thing). 4. Gently fold in 1/8 teaspoon salt, red onion, reserved avocado pieces, tomato, jalapeno pepper, garlic, lime juice and cilantro. Taste for salt and lime juice ( I always use a tortilla chip to taste since the salt on the chip will play into the salt factor). Adjust to suit your taste. 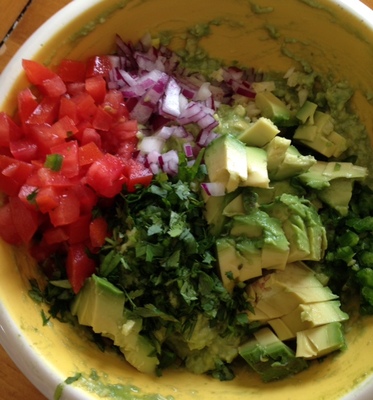 5. Transfer guacamole to a serving bowl and serve with chips or veggie sticks (or on turkey sandwiches or burgers....you get the idea). If made a few hours ahead, press plastic wrap directly on top of guacamole and refrigerate. The lime juice will prevent browning for a few hours. 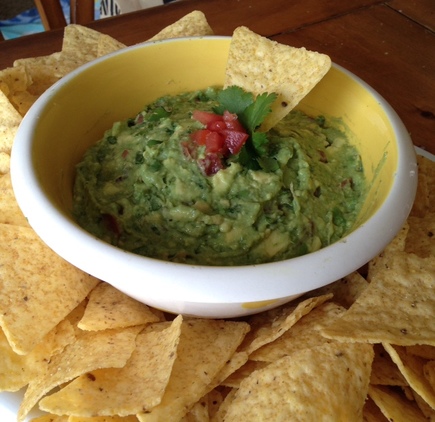 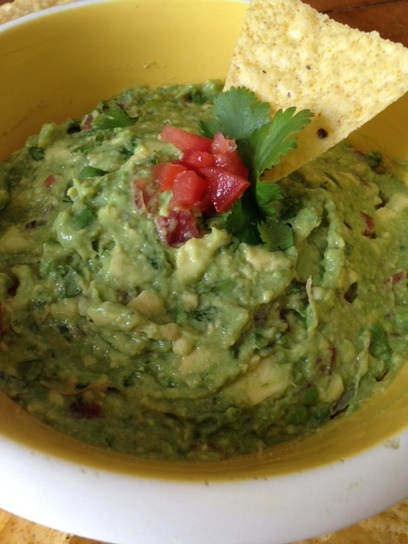 Doesn't this make your mouth water?! Hurry- go buy your avocados so they have time to ripen, before it's too late! ♥
P.S. If you are interested in a good chili for game day, check out my recipe for White Chicken Chile and My Favorite Turkey Chili. Either (or both) would sure to be a hit and can simmer in your crockpot! “The best meals are those prepared by loving hands.” - Ken Poirot It's mid-week, and things are busy in your house. Am I right? Or maybe you had a busy day at work or school and you don't really feel much like cooking, but still want to put a nourishing meal on the table with minimal effort. With a few pantry items and some leftover chicken, you can do just that! A week ago or so, we had leftover rotisserie chicken and in the back of my mind I thought that Chicken Burrito Bowls would be an easy and delicious way to use that up. It ended up being a big hit with my husband and daughter, and it was super easy.The beauty of it is you can totally customize it to your taste (be sure to check out some variations at the bottom of the post). Here is how I went about it. Chicken Burrito Bowls- serves 4 4 cups cooked and seasoned seasoned brown rice* 4 cups diced left-over roast chicken, reheated gently in the microwave 1/2 cup frozen corn kernels, thawed 3/4 cups black beans, rinsed and drained Your favorite prepared tomato-based salsa Low-Sodium Chicken broth 1 teaspoon taco seasoning** 1 cup shredded cheese (Cheddar, Colby-Jack, Jalapeno-Jack, ) diced avocado -optional chopped fresh cilantro-optional diced fresh tomato-optional sliced olives-optional sour cream-optional guacamole-optional sliced geen onions-optional hot sauce-optional 1. Cook rice according to package directions, substituting salsa for one fourth of the liquid called for and using chicken broth in place of remaining amount of water called for. 2. When rice is done, stir in corn, black beans and 1 tablespoon chopped cilantro (optional). Remove pot from burner and keep covered until ready to use.. 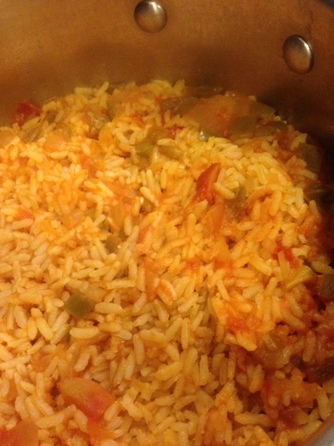 3. Sprinkle diced chicken with taco seasoning; stir to evenly distribute. 4. Into each of the 4 bowls, place 1 cup of the rice. Make a well in the middle of the rice. Into the well place the chicken. 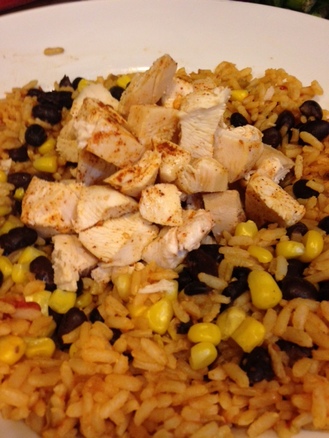 5. Drizzle about 1/4 cup of your prepared salsa on top of chicken then sprinkle each bowl with cheese
6. If desired microwave bowls to melt cheese (or if bowls are oven-proof, feel free to place them under broiler to melt). Top with your favorite garnishes as listed above. Serve with a nice green salad and some fresh fruit.  Variations: Shrimp burrito bowl- Saute 1 pound thawed, peeled and de-veined shrimp tossed with 2-3 teaspoons of taco seasoning in a skillet with 2 tablespoons of olive or coconut oil just until opaque. Squeeze the juice of 1/2 lime over the top. Toss to coat. Substitute for chicken.
Beef Burrito Bowl: cook 1 pound of ground beef in skillet until browned. Stir in 3 tablespoons taco seasoning (or to taste) and 1 cup of water (if using store bought seasoning, follow package directions). Simmer, stirring until water is evaporated and meat is thoroughly seasoned, about 10-15 minutes, adding more water as needed. Taste and adjust seasoning accordingly. Substitute for chicken. Re-fried Beans: Add 1/2 cup of re-fried beans that have been heated to the bottom of the bowl before adding in chicken.Season if desired with taco seasoning. Or for vegetarian option, use re-fried beans in place of meat; substitute vegetable broth for chicken broth in rice. * Different brands may call for different liquid to rice ratios, so be sure to follow the instructions for cooking rice on the package you are using. You want it to yield 4 cups cooked, approximately. ** Taco seasoning: I make my own, but you can use store bought, if you prefer. 1 Tablespoon chili powder 2 teaspoons onion powder 1 1/4 teaspoons ground cumin 1 teaspoon garlic powder 1 teaspoon paprika 1 teaspoon dried oregano 1/2 teaspoon sea salt Place all ingredients in a bowl. Whisk or stir together well to evenly combine. Recipe can be easily doubled or tripled. Store any leftovers in an airtight container for future use. Stir before using. "Nothing says home like the smell of baking."-unknown Can you believe it is only just over a week until Christmas? Here in Northern Colorado we were gifted with a snow day today! What a great excuse to stay inside and get going on my holiday baking. I'm a little behind! I didn't want to go out and drive anywhere, so after checking my pantry, decided my Brown Sugar Blondies would be the recipe du jour, dolled up for the big day with Holiday M&M's. It's funny because M&M's are really the only candy leftover from my childhood that I still enjoy. I love baking them into cookies and blondies when I am not eating them straight out of the bag.... for breakfast (ok I don't do that anymore, but when I was younger....). I digress. Back to the Blondies at hand. Blondies sometimes get a bad rap, as if they are the evil cousin of chocolate brownies, or when they are a lazy attempt at passing off chocolate chip cookies in bar format. That thinking stops here and now! These luscious moist bars of buttery brown sugar brownies can stand atop a lofty cake pedestal all on their own merits. When they bake and the top gets all golden brown and the crisp edges are calling out to you "eat me, eat me," you will know exactly what I mean. You will not be able to resist that aroma of baked sugary, buttery goodness that lingers in your kitchen even after you have pulled them from the oven and put them in the garage (wait, you don't do that?!!) to cool. Anyone with a working nose and a sweet tooth in your house will be called to discover what that smell is and beg you for a bite, I promise! So what are you waiting for? Oh, and the Christmas crack thing? It's really hard to eat just one. Don't say I didn't warn you! : ) Disclaimer: the pictures show a double batch because I made a big half sheet of them today for gift-giving ....and eating. Brown Sugar Holiday M&M Blondies 2 1/2 cups plus 1 1/2 teaspoons all -purpose flour 1 teaspoons baking soda, scant * 3/8 teaspoon kosher salt 9 1/2 ounces unsalted butter, room temperature (1 cup plus 1 Tablespoon) 1 1/2 cups brown sugar, lightly packed 1/2 cup plus 3 Tablespoons granulated sugar 3 large eggs, room temperature 1 teaspoon pure vanilla extract 1 cup semi-sweet chocolate chips 1 1/4 cups Holiday M&M Milk Choc0late Candies 1. Preheat oven to 350 degrees F. Line a 9x13x2" baking pan with heavy duty aluminum foil. Spray with non-stick baking spray or grease with butter. Set aside. 2. Whisk together flour, baking soda and salt. Set aside. 3. In the bowl of a stand mixer, cream butter and sugars on medium until light and fluffy (I think that looks good already)!. 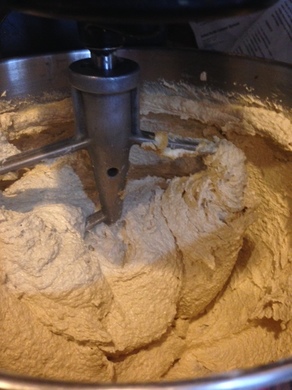 4. Scrape down sides of bowl. On low speed, add in eggs, one at a time, and vanilla. Return mixer to medium speed and mix until well combined. 5. Reduce speed to low and gradually add in flour. Mix until combined, stopping to scrape down sides of bowl as needed. 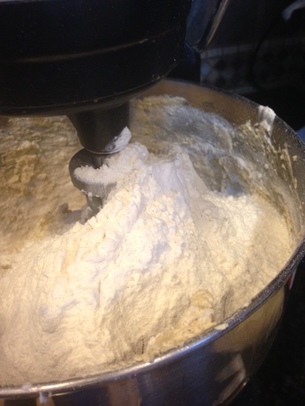 6. Reserve 1/4 cup of M&M candies. Combine remaining M&M's and chocolate chips and slowly add to mixer (on low speed) just until incorporated. 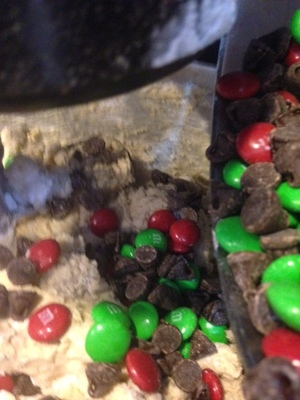 7. Remove bowl from mixer and scrape batter into prepared pan. With an off-set spatula, spread the dough out in the pan, BUT, and this is kind of important, bevel the edges down at a roughly 45 degree angle all around the pan. DO NOT spread the batter out evenly across the pan, as this will cause the edges to rise up and cook faster than the center and then leave a huge edge and a sunken middle. This technique helps mitigate that result. 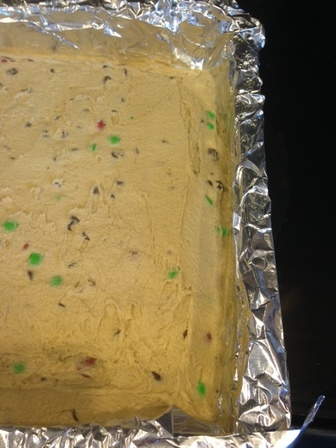 8. Now with the same spatula, smooth out the middle area so it is even, as shown above. 9. Sprinkle reserved M&M candies over the top of the Blondies 10. Bake the Blondies for 30-4o minutes until top is very golden brown, edges are caramelized and top of blondie, when pressed gently with the palm of your hand, feels firm and not wobbly. Do not over bake. 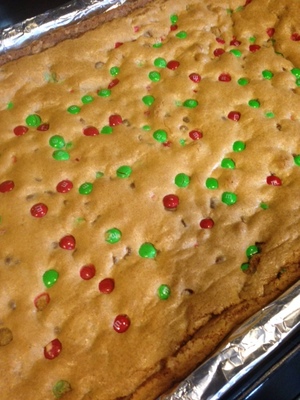 11. Remove from oven and let cool completely (ok, eat a piece of the edge first, if you must). I like to refrigerate them before cutting them. The foil will allow you to remove the chilled blondie easily from the pan, flip it over and carefully remove foil (may need to support it with a cutting board), flip it back over and cut into desired size. I prefer to store mine in the refrigerator, but it's not necessary. 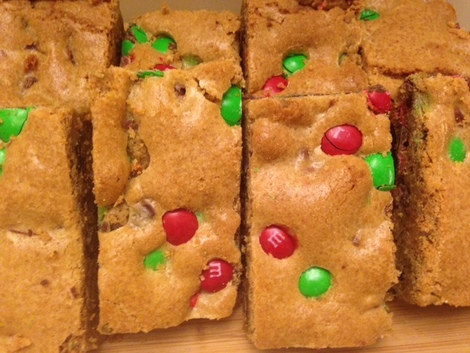 * If you live at 5,000 feet altitude like I do, reduce the baking soda to 3/4 (scant) teaspoon. Proceed with recipe as directed.
I'd love to hear what you think about this recipe if you try it! They freeze beautifully as well, so perfect for lunch box treats anytime of the year! : ) |

Archives
December 2019
Categories
All
|


 RSS Feed
