|
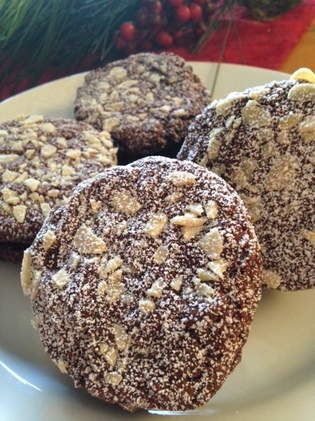
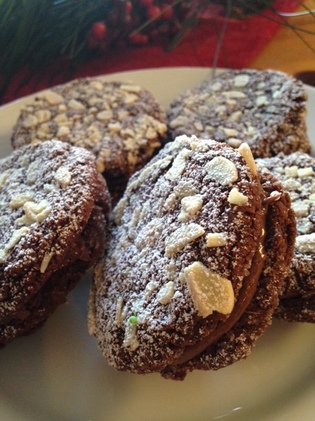
“My stomach rumbles. Plates of cookies, cake, and fudge. Christmastime is here.” -Richelle E. Goodrich Yesterday I introduced a wonderful cookie that have legions of fans in my prior customer base and in ,my family. Yesterday was part 1, straight up.. If you only ever make that version, you will not be disappointed. I am sure it will become part of your cookie rotation from now on. However, if you'd like to take it a step further and maybe gussy it up just a bit for a more indulgent treat, then consider this variation: Almond-Nutella Sandwich Cookies. For the base recipe go here, to yesterday's post: http://wonderandgratitude.weebly.com/blog/one-cookie-3-ways-part-1 Follow the recipe in the link all the way to the point where you dip the bottom of the cookie in granulated sugar. Here's where we start creating a different cookie. Almond-Nutella Sandwich Cookies Sliced, blanched almonds, lightly toasted and coarsely crumbled Nutella Almond Butter Powdered Sugar 1. After dipping the bottom of the scooped dough in granulated sugar, roll the rounded part (top) of the dough ball in the crumbled almonds. Place onto prepared baking sheet, 2" apart. Pat dough balls down slightly, as in the original recipe.. 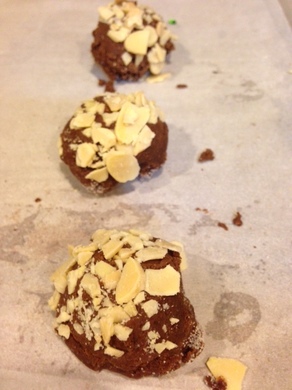 2. Bake cookies for 8-10 minutes in preheated 350 degree F oven, until done (see original recipe for tips on checking for doneness. Remove from oven and cool completely. 3. In a small bowl , combine equal amounts of almond butter and Nutella and mix well. 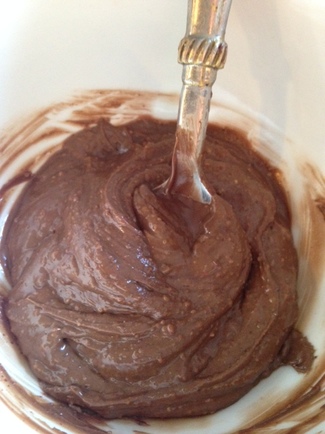 4.Flip half of the cookies over so flat side of cookie is facing up. 5. With a small off-set spatula, spread a small amount of the Nutella-almond butter mixture evenly over the flat side of one cookie. Place another cookie, almond side up on top of the filling. 6. Repeat with the remaining cookies.! Wait till you taste them... and they taste as good as they look!
Note: I don't give amounts for the ingredients above since you will have the option of making all three cookies from one dough. So know if you have extra almonds, you can use them in a salad later on or to top steamed green beans, and you can make up the nutella mixture as you go since it is just a 1:1 ratio. Have fun!
0 Comments
"I am still convinced that a good, simple, homemade cookie is preferable to all the store-bought cookies one can find." James Beard James Beard had this one right. There is nothing better than homemade cookies. And in this, the season of cookie over-load, is the best time to hit that sentiment home. I hope you will take some time this busy season and make a cookie (or two or three) from scratch. I have shared a couple easy holiday cookie ideas with you already here and here. I also provided links to find some of my favorite cookie recipes on the net here . Today, however, I will share another family favorite that I have played with over the years. It is a soft, chewy , delicious chocolate cookie that you can take and transform into three different cookies. One dough, 3 cookies..... "that's a good thing," to quote Martha (yes, that Martha). You may want to double the recipe so you have more than enough to try all three variations. Get out your mixer. preheat you oven, and let's tackle the basic dough and 1st variation. (I apologize in advance for not including more photos, just got so wrapped up in making them, I completely forgot to take photos along the way)! Chewy Cocoa Crinkles 10 ounces good-quality bittersweet chocolate, finely chopped 1 cup all-purpose flour* 2 Tablespoons fine quality cocoa powder 1 teaspoon baking powder ** 1/8 teaspoon instant esporesso powder 1/4 teaspoon kosher salt 1/2 cup unsalted butter, room temperature 2/3 cups granulated sugar, plus extra for dipping 1/2 cup light brown sugar, lightly packed 2 large eggs 1 teaspoon pure vanilla extract Colored sprinkles or non-pareils of your choice * as with other recipes I have had good success using Bob Reds Mill 1 to 1 baking flour in place of all-purpose if you want Gluten Free cookies ** if you live at 5,000 feet altitude like I do, reduce the baking powder to 3/4 teaspoon. 1. Preheat oven to 350 degrees F. Line a couple baking sheets with parchment paper. Set aside. 2. In microwave-safe bowl or in a bowl over a bain marie (double boiler) place chopped chocolate. Heat gently, stirring occasionally, until chocolate is melted and smooth. Remove from heat (or microwave) and set aside. 3. Sift together, flour baking powder, espresso powder and salt. Set aside. 4. In the bowl of a stand mixer place butter and sugars. Beat on medium-low speed to combine. for several minutes, scraping down the side of the bowl, as needed. 5. Reduce the mixer to low and add in the eggs and vanilla. Increase speed to medium-low and continue to mix until well combined. 6. Reduce mixer speed to low and slowly add in cooled chocolate. Combine well. 7. Stir in flour mixture in 2 or 3 additions until just combined. DO NOT over-mix. 8. Remove bowl from mixer and cover with plastic wrap. Chill dough for about 30 minutes to firm up slightly. If the dough is already more thick than runny, you can skip this step. You can tell if it's ready if you form a ball and it retains its shape. 9. Scoop out rounds of dough using an ice cream scoop. I favor the Piazza number 40, but a similar scoop about 1 3/4 inches in diameter will work fine. 10. Dip the flat bottom of the dough into granulated sugar. Dip the mound part in sprinkles of your choice. I used holiday colored non-pareils. I alter the colors based on the holiday, occasion or time of year. Place sprinkle side up on prepared baking sheet, about 2 " apart. Pat down on the dough ball slightly (if dough was refrigerated for a long time,. you may have to pat down by half. Experiment with one or two before baking a whole sheet. 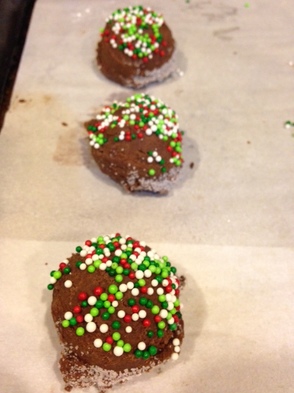 11. Bake cookies for 8-10 minutes or until done. DO NOT over-bake. Cookies will puff up slightly and then flatten out and crinkle if you rap baking tray on counter. Center should not look raw anywhere. This may takes some trial and error as chocolate cookies can be a little tricky. But I find by 10 minutes tops, if your oven is accurate, they should be done. Once they cool they will be firm but soft in the center. 12. Remove tray from oven and let cool completely. They store great in the freezer, if they last that long. 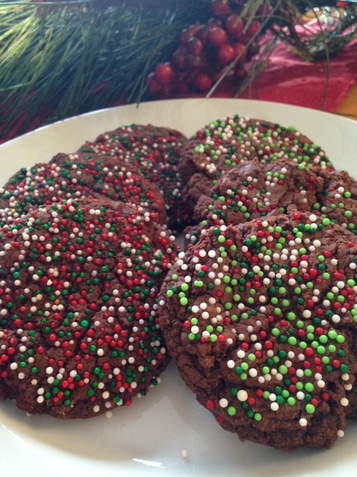 "Nothing says home like the smell of baking."-unknown Can you believe it is only just over a week until Christmas? Here in Northern Colorado we were gifted with a snow day today! What a great excuse to stay inside and get going on my holiday baking. I'm a little behind! I didn't want to go out and drive anywhere, so after checking my pantry, decided my Brown Sugar Blondies would be the recipe du jour, dolled up for the big day with Holiday M&M's. It's funny because M&M's are really the only candy leftover from my childhood that I still enjoy. I love baking them into cookies and blondies when I am not eating them straight out of the bag.... for breakfast (ok I don't do that anymore, but when I was younger....). I digress. Back to the Blondies at hand. Blondies sometimes get a bad rap, as if they are the evil cousin of chocolate brownies, or when they are a lazy attempt at passing off chocolate chip cookies in bar format. That thinking stops here and now! These luscious moist bars of buttery brown sugar brownies can stand atop a lofty cake pedestal all on their own merits. When they bake and the top gets all golden brown and the crisp edges are calling out to you "eat me, eat me," you will know exactly what I mean. You will not be able to resist that aroma of baked sugary, buttery goodness that lingers in your kitchen even after you have pulled them from the oven and put them in the garage (wait, you don't do that?!!) to cool. Anyone with a working nose and a sweet tooth in your house will be called to discover what that smell is and beg you for a bite, I promise! So what are you waiting for? Oh, and the Christmas crack thing? It's really hard to eat just one. Don't say I didn't warn you! : ) Disclaimer: the pictures show a double batch because I made a big half sheet of them today for gift-giving ....and eating. Brown Sugar Holiday M&M Blondies 2 1/2 cups plus 1 1/2 teaspoons all -purpose flour 1 teaspoons baking soda, scant * 3/8 teaspoon kosher salt 9 1/2 ounces unsalted butter, room temperature (1 cup plus 1 Tablespoon) 1 1/2 cups brown sugar, lightly packed 1/2 cup plus 3 Tablespoons granulated sugar 3 large eggs, room temperature 1 teaspoon pure vanilla extract 1 cup semi-sweet chocolate chips 1 1/4 cups Holiday M&M Milk Choc0late Candies 1. Preheat oven to 350 degrees F. Line a 9x13x2" baking pan with heavy duty aluminum foil. Spray with non-stick baking spray or grease with butter. Set aside. 2. Whisk together flour, baking soda and salt. Set aside. 3. In the bowl of a stand mixer, cream butter and sugars on medium until light and fluffy (I think that looks good already)!. 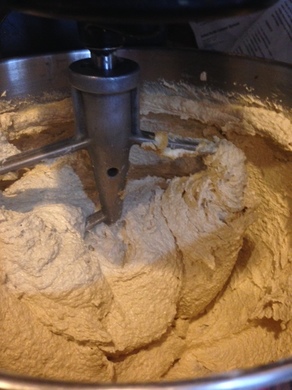 4. Scrape down sides of bowl. On low speed, add in eggs, one at a time, and vanilla. Return mixer to medium speed and mix until well combined. 5. Reduce speed to low and gradually add in flour. Mix until combined, stopping to scrape down sides of bowl as needed. 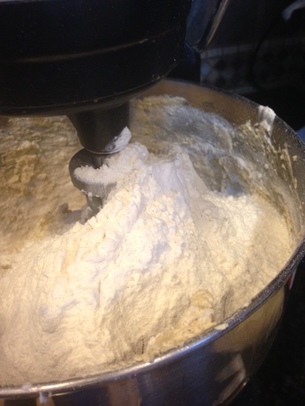 6. Reserve 1/4 cup of M&M candies. Combine remaining M&M's and chocolate chips and slowly add to mixer (on low speed) just until incorporated. 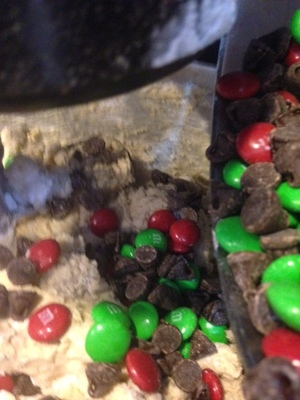 7. Remove bowl from mixer and scrape batter into prepared pan. With an off-set spatula, spread the dough out in the pan, BUT, and this is kind of important, bevel the edges down at a roughly 45 degree angle all around the pan. DO NOT spread the batter out evenly across the pan, as this will cause the edges to rise up and cook faster than the center and then leave a huge edge and a sunken middle. This technique helps mitigate that result. 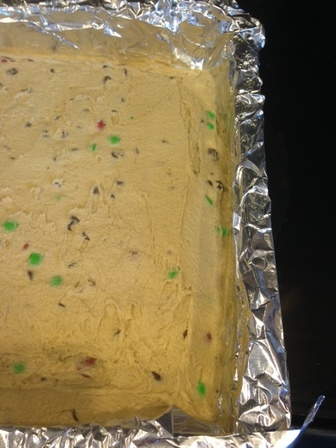 8. Now with the same spatula, smooth out the middle area so it is even, as shown above. 9. Sprinkle reserved M&M candies over the top of the Blondies 10. Bake the Blondies for 30-4o minutes until top is very golden brown, edges are caramelized and top of blondie, when pressed gently with the palm of your hand, feels firm and not wobbly. Do not over bake. 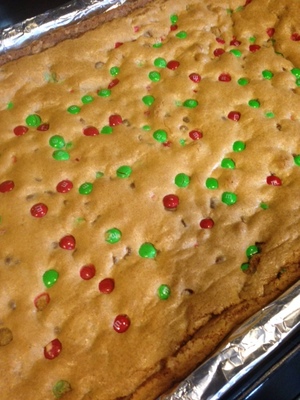 11. Remove from oven and let cool completely (ok, eat a piece of the edge first, if you must). I like to refrigerate them before cutting them. The foil will allow you to remove the chilled blondie easily from the pan, flip it over and carefully remove foil (may need to support it with a cutting board), flip it back over and cut into desired size. I prefer to store mine in the refrigerator, but it's not necessary. 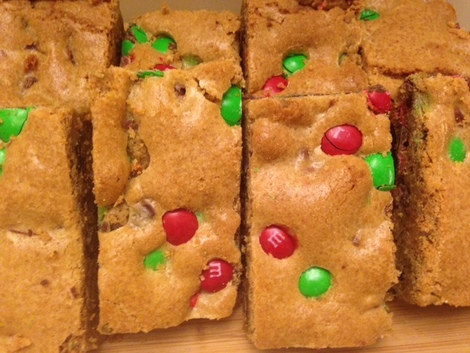 * If you live at 5,000 feet altitude like I do, reduce the baking soda to 3/4 (scant) teaspoon. Proceed with recipe as directed.
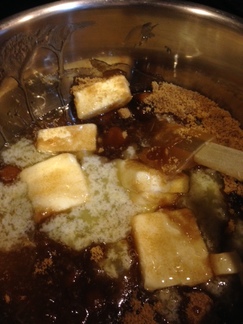
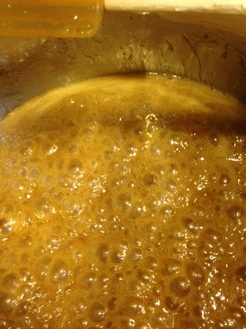
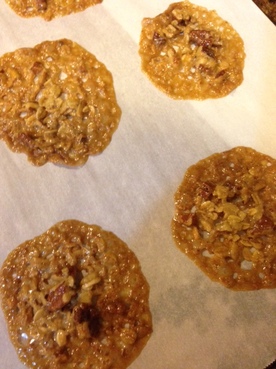
I'd love to hear what you think about this recipe if you try it! They freeze beautifully as well, so perfect for lunch box treats anytime of the year! : ) "Today I will live in the moment, unless it's unpleasant, in which case I will eat a cookie."- Cookie Monster It's National Cookie Day, and I have nothing to offer you. I am completely unprepared. My previous two posts are about cookies, so you can go here or here . I promise I will be posting more cookies in the very near future. A day just to celebrate cookies seems like a good idea to me. In spite of my fancy pastry chef training learning how to make mousses, creams, tortes, tarts and gateaux, the simple and humble cookie has always been the sweet that captures my heart the most. A small cookie is portable, no utensils are needed to consume it and the mere sight of a cookie makes even the most jaded among us smile in delight. I think most of us harbor a child-like love for cookies because it is the one treat that reminds us so much of home and childhood. Everyone I know has that one special favorite cookie, their version of Proust's madeleine. One bite and it's as if a time machine has swept us away to another place and time. So since I don't have a recipe ready to share with you today, I will offer you some links to places to find excellent cookie options and some of my favorites from other people as well. Martha Stewart Living magazine is celebrating 25 years in publication. Wow! She has shared some great cookies over the years. This month they are sharing 25 of their favorite recipes here. I can personally vouch for the rugelach, the chewy chocolate gingerbread and the peppermint meringues. Take a look and see which ones catch your eye. You can't go wrong with a recipe from Ina Garten, The Barefoot Contessa. Every recipe I have ever tried of hers has been wonderful. Her recipes are completely reliable and delicious every time. Of her cookies I can recommend the Pecan Shortbread, Chocolate White Chocolate chunk Cookies and her Ultimate Ginger Cookie. If you are a food Network fan, you can sign up for their 12 days of Cookie newsletter to get even more tasty options delivered right to your in-box here. This is my favorite sugar cookie recipe. I have been using this one for as long as I can remember. They come out great. The creator of this recipe, cookbook legend Nancy Baggett, also has a recipe for a wonderful melt-in your mouth glazed lemon cookie. This Pecan Caramel Surprise Cookie from Rachel Ray is crazy good. You must try it! Lastly this Chocolate Truffle Cookie originally published in the now defunct Gourmet Magazine is a chocoholics dream come true bite. Make extra! At Christmas time I love to decorate the tops of these cookies with Royal icing wreaths to add a festive touch and a pop of color to my cookie tray. Well I hope that gets you started. Share your favorite cookie recipes as well! One can never have too many great cookie recipes! 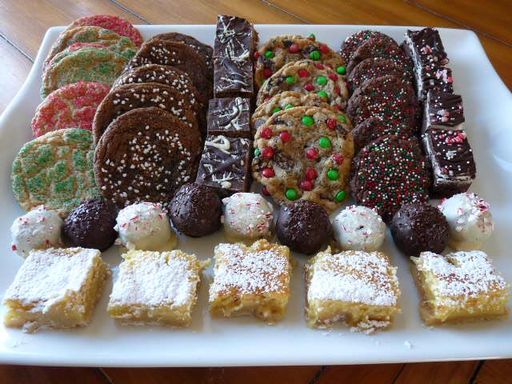 "Christmas cookies and happy hearts, this is how the holidays start." -Anonymous So I was thinking about the cookies we really love to make and give this time of year. I wanted to mostly offer you the ones for the biggest bang for the buck. This Oatmeal Lace cookies is one of those. You can make them now and they will still be amazing come Christmas time. As long as you keep them in in airtight container in a cool, dry place, they will last and last. Humidity will be the nemesis of this cookie for long-term storage. This is one of my daughter's favorite cookies. It has lovely caramel overtones from the brown sugar and a wonderful crisp yet light bite. The lightly toasted nuts add extra crunch and texture. I love them sandwiched with melted chocolate, my daughter prefers them without the chocolate (what does she know?!!). The chocolate serves two purposes, so I highly recommend that step. The first is well, chocolate-duh! The second is it strengthens the cookie structure. On their own these are very fragile cookies. Sandwich them with chocolate and it's a game changer. They hold together much better and the taste is divine! Oatmeal Lace Cookies 2/3 cup light brown sugar, lightly packed 1/2 cup light corn syrup 8 tablespoons ( 1 stick) unsalted butter 1 cup rolled oats 1/2 cup all-purpose flour 2 pinches (scant 1/8 teaspoon) kosher salt 1 cup coarsely chopped pecans, lightly toasted (Or your favorite nut-pistachio, walnuts, almonds...) 2/3 cup dried fruit (apricots, cranberries, cherries, chopped)- optional Approx 6 ounces good quality semi sweet or bittersweet chocolate, finely chopped and melted -optional 1. Line several baking sheets with a Silpat or parchment paper. Set aside. 2. Whisk together flour and oats in a bowl; set aside. 3. In a medium saucepan combine the butter, brown sugar, corn syrup and salt. Cook over medium heat, stirring until smooth and bubbling, about 4 minutes.
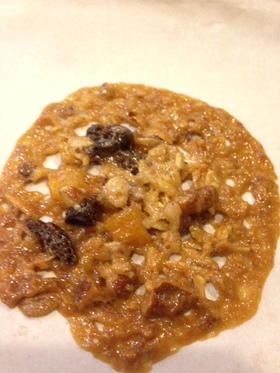
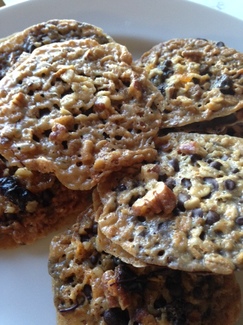
4. Remove mixture from heat. Stir in flour and oats and dried fruit, if desired. 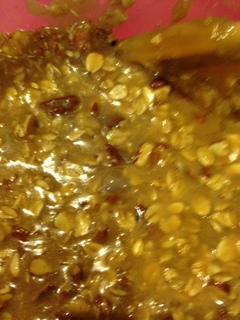 5. Transfer mixture to a bowl or covered container and refrigerate for 1 hour. 6. Preheat oven to 325 degrees F. 7. Roll teaspoons ( as in measuring spoon size) of dough into small balls. Place 3 inches apart on lined cookie sheets. Pat down slightly. Cookies will spread a lot when baking. 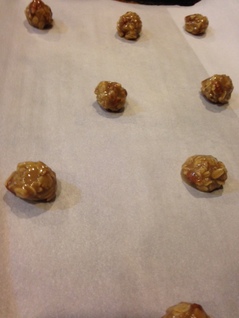 8. Bake on center rack for 8-10 minutes until bubbly and caramel colored. Remove from oven and with a small off-set spatula, gently and quickly shape the cookies into as round a shape as possible (optional but makes them pair up better and look more pleasing). Let cool completely. Continue until all dough is baked. Here are some without fruit and one with.
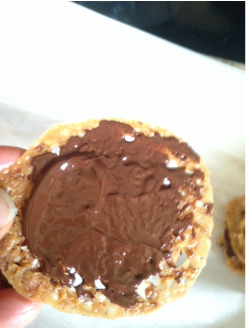
9. Once cookies are cooled, coat the underside of one cookie with a small amount of melted chocolate using a small off-set spatula. Sandwich together with another cookie, flat side towards chocolate, of approximately the same size and shape. Continue until you have used up all the cookies. Fortify yourself by eating any broken ones as you go. ; ) Set aside in a cool dry space to allow chocolate to set (again the cold garage is an excellent choice or just a couple minutes in the freezer).
10. Store cookies in an air-tight container, layering between pieces of parchment, in a cool dry place.
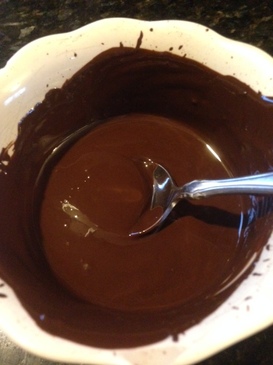
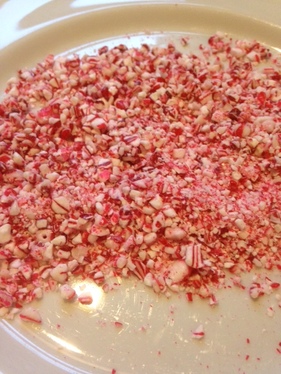
Gluten free Variation: Substitute Gluten Free rolled oats for regular oats and your favorite cup for cup gluten free flour for the all-purpose flour. I have had good results with Bob's Red Mill 1 to 1 flour (blue label) "I should really work off that Thanksgiving meal. Oh, look-Christmas cookies!"- Anonymous Oh, yes, it is that time of year, isn't it?! The sweet season of cookies and treats is upon us. As a former pastry professional, baking and giving cookies is in my DNA, I think. Each year I say I am going to cut back, and each year I don't. Why start now?! lol! I thought now that I have the blog, I will try to share and document a few of my favorites or maybe something even brand new, such as these Chocolate-Dipped Peppermint Meringues. I was rummaging through my cupboards and spotted these meringues and had an aha moment! Meringue cookies are available at almost any market. I know for sure Whole Foods and Trader Joe's sell them, but I have also seen them in the bakery section of my local super market. Meringues are gluten free and fat free, so not even the worse choice if you are going the sweet route. They are quick, require no special skill or equipment, start from store bought (afterall, sugar and egg whites are pretty much sugar and egg whites no matter what), turn out gorgeous and taste great to boot! If you have a cookie exchange to attend and aren't the baking type- look no further. This is your recipe. If you want a lovely hostess gift, this fits the bill. This is also a great "recipe" for a middle school aged child or older to do all by him or herself to gift to teachers and friends! Ready to get started? Chocolate-Dipped Peppermint Meringues 1 tub store bought Meringue "Cookies" 4 ounces ( approximately) good quality semi-sweet or bitter-sweet chocolate (not chips), finely chopped Candy Canes 1. Line a baking sheet with parchment and place in freezer for at least 15 minutes. This will just help the chocolate set up faster later. 2. Meanwhile, gently melt chocolate in a microwave or over a double boiler. Stir until smooth; set aside. 3. Place candy canes in a ziploc bag. Squeeze air out and seal. With a mallet or rolling pin, pound candy canes until finely chopped. You will need approx, 1/2-cup. Pour candy canes pieces onto a rimmed plate. Set aside.
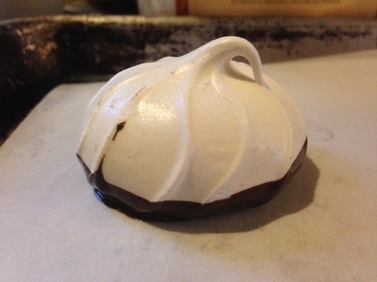
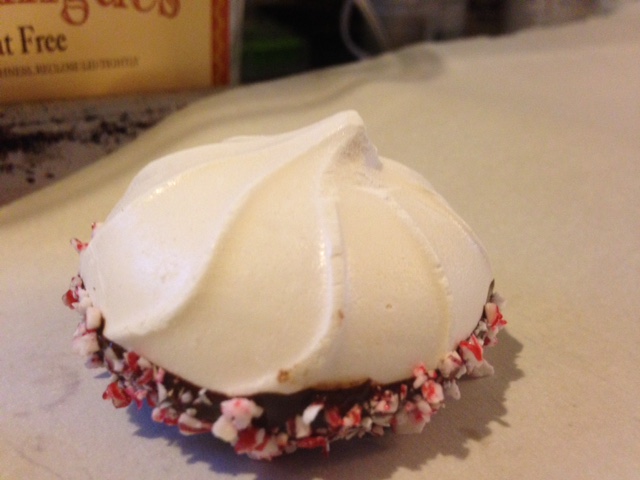
4. Open tub of meringue cookies -that's the hard part! ; ). 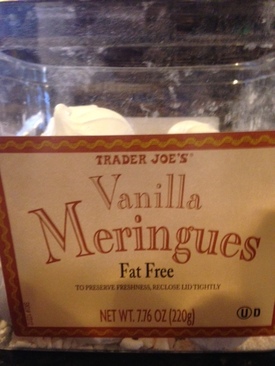 5. Remove parchment-lined sheet pan from freezer. 6. Working one at a time, dip a meringue about 1/8" into melted chocolate, shaking off excess and gently scraping bottom of meringue across bowl so chocolate won't puddle when set down. 7. Immediately roll sides of meringue into crushed candy cane bits. Place bottom side down on prepared baking sheet. Continue until all meringues are dipped and coated. 8. Place the meringues in a cool, dry place to set up chocolate. The cold garage would be good this time of year or the freezer briefly. Avoid storing them for any length of time near moisture as that will make them soften. You don't want that. Cool dry place is best.
Variation: Instead of crushed peppermint, roll the cookies in chopped nuts (pistachios would be festive) or sprinkles! Just as pretty, see? 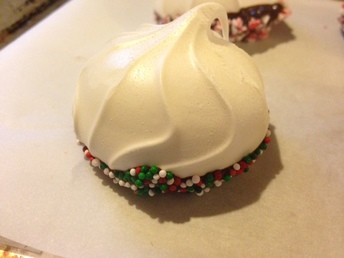 Now wrap them up and they are ready for gifting! Who wouldn't love that?! 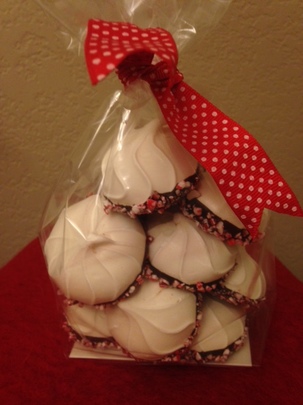 Let me know what you think!
|

Archives
December 2019
Categories
All
|

 RSS Feed
